
Thanksgiving is right around the corner so I decided to make a gratitude card for this week’s sketch challenge.

Here’s the sketch I used. It’s from the weekly Atlantic Hearts Sketch Challenge.

Tips & Instructions
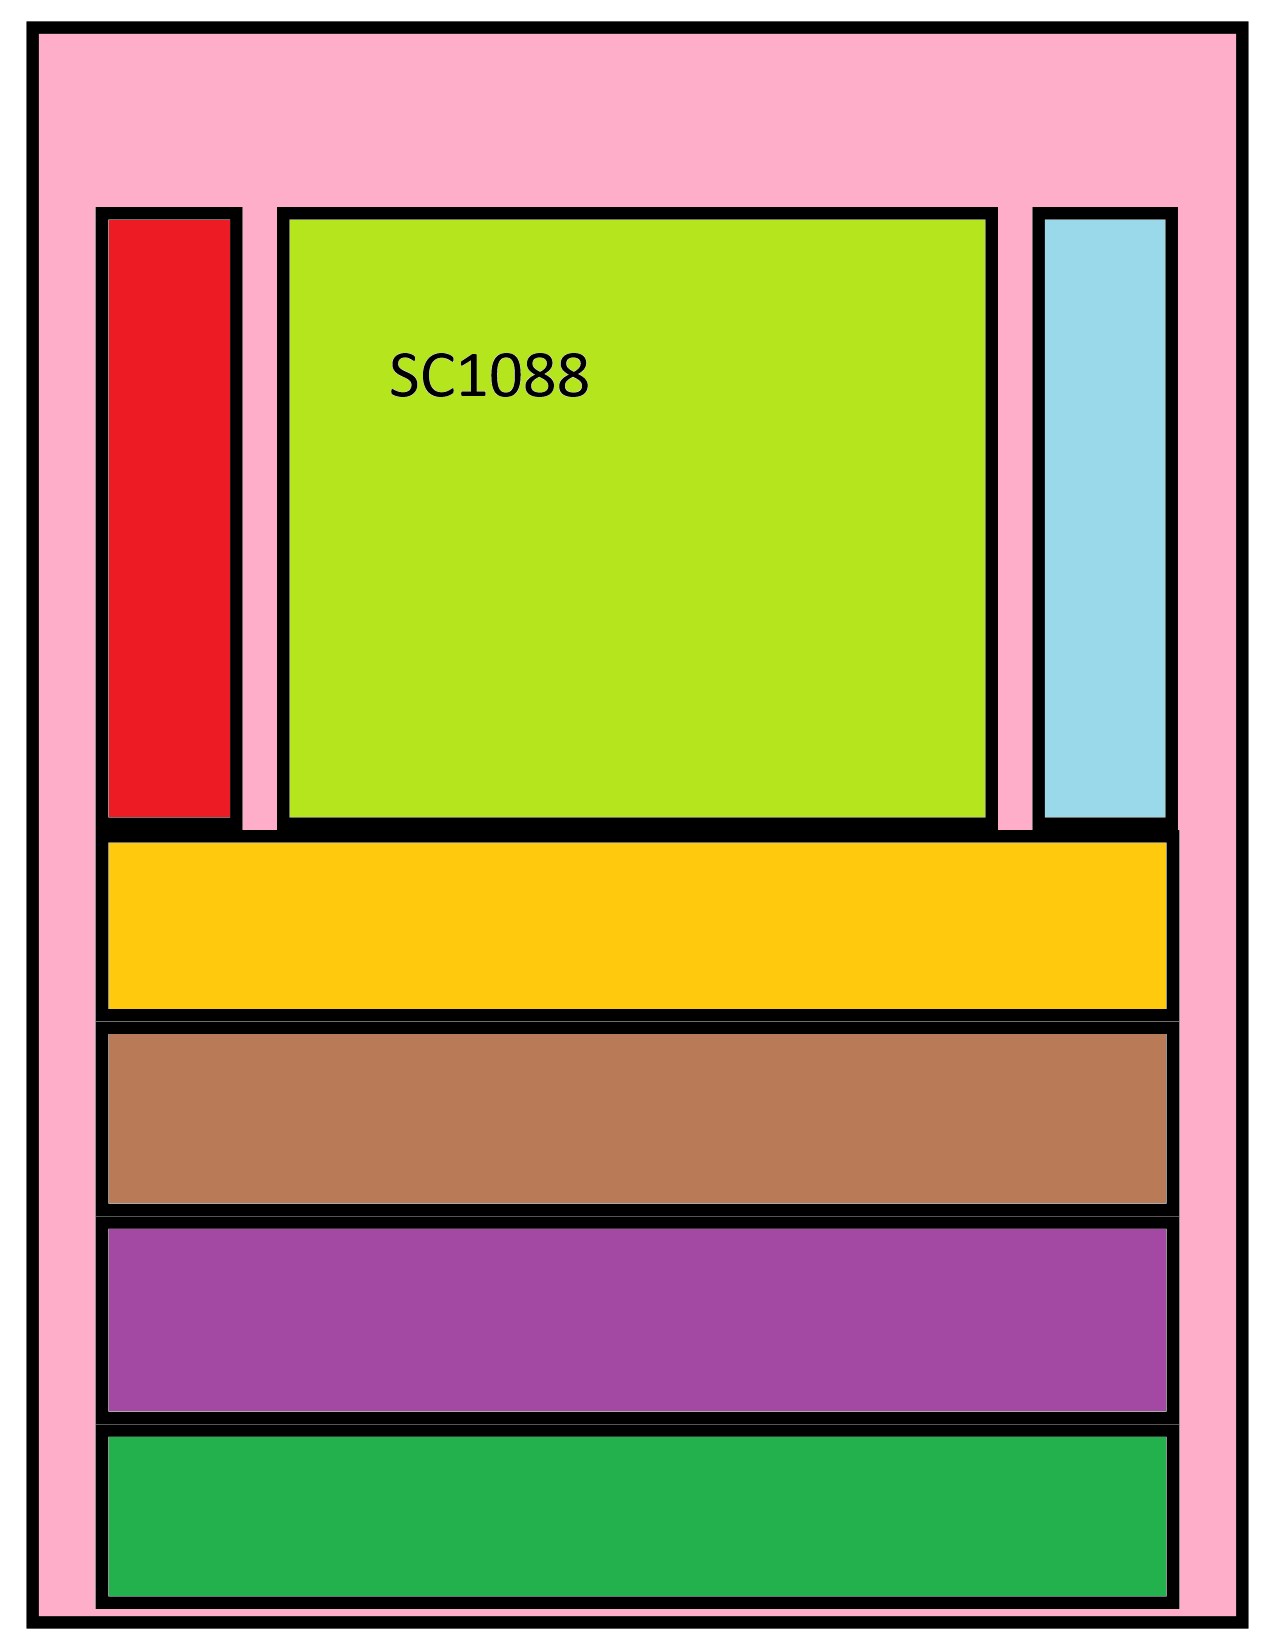
Thick Basic White Card Base - 5-1/2 x 8-1/2, score at 4-1/4
Basic White Layer - 4-1/4 x 5-1/2, emboss using the Gathering Leaves 3D Embossing Folder. Adhere to the card base.
Early Espresso Layer - 2-1/2 x 5-1/2
Gathering Together Designer Series Paper - 2-1/8 x 5-1/2, adhere to the Early Espresso layer and then to the card.
Die cut some branches and pine cones from the Designer Series Paper.
Basic White Label - 1-3/8 x 2-1/2, stamp sentiment in Early Espresso Ink.
Adhere the label with Dimensionals and the branches and pine cones with Liquid Glue.

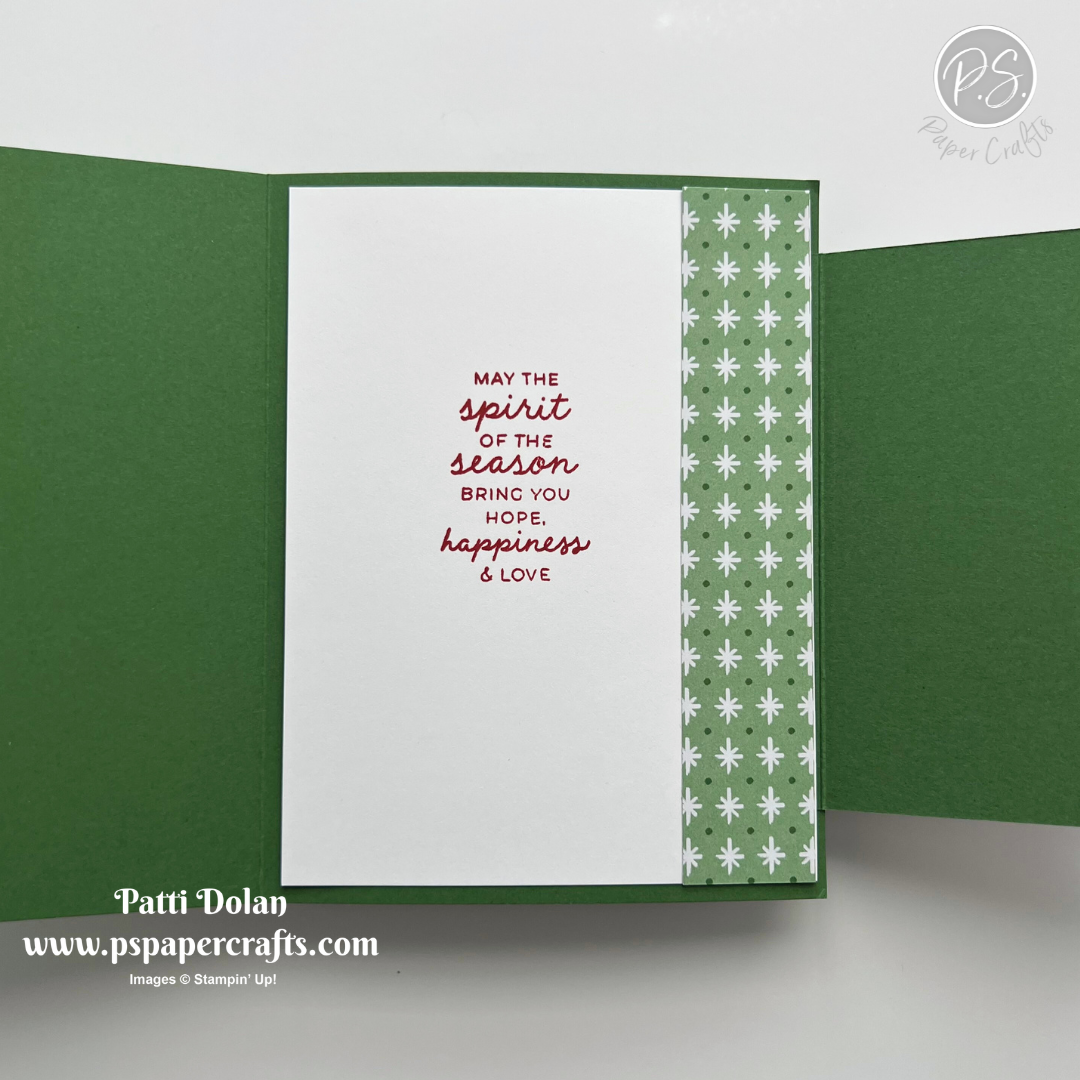
Inside layers:
Early Espresso Layer - 4 x 5-1/4
Basic White - 3-3/4 x 5, stamp sentiment in Early Espresso.
Adhere a 3/4 x 5 strip of Designer Series Paper to the white layer and adhere layer to the Early Espresso layer.
Adhere layers to the card.

I love die cutting from Designer Series Paper. You get beautiful patterns on the die cuts.

Supply List
You can click on the item to purchase it from my Online Store.