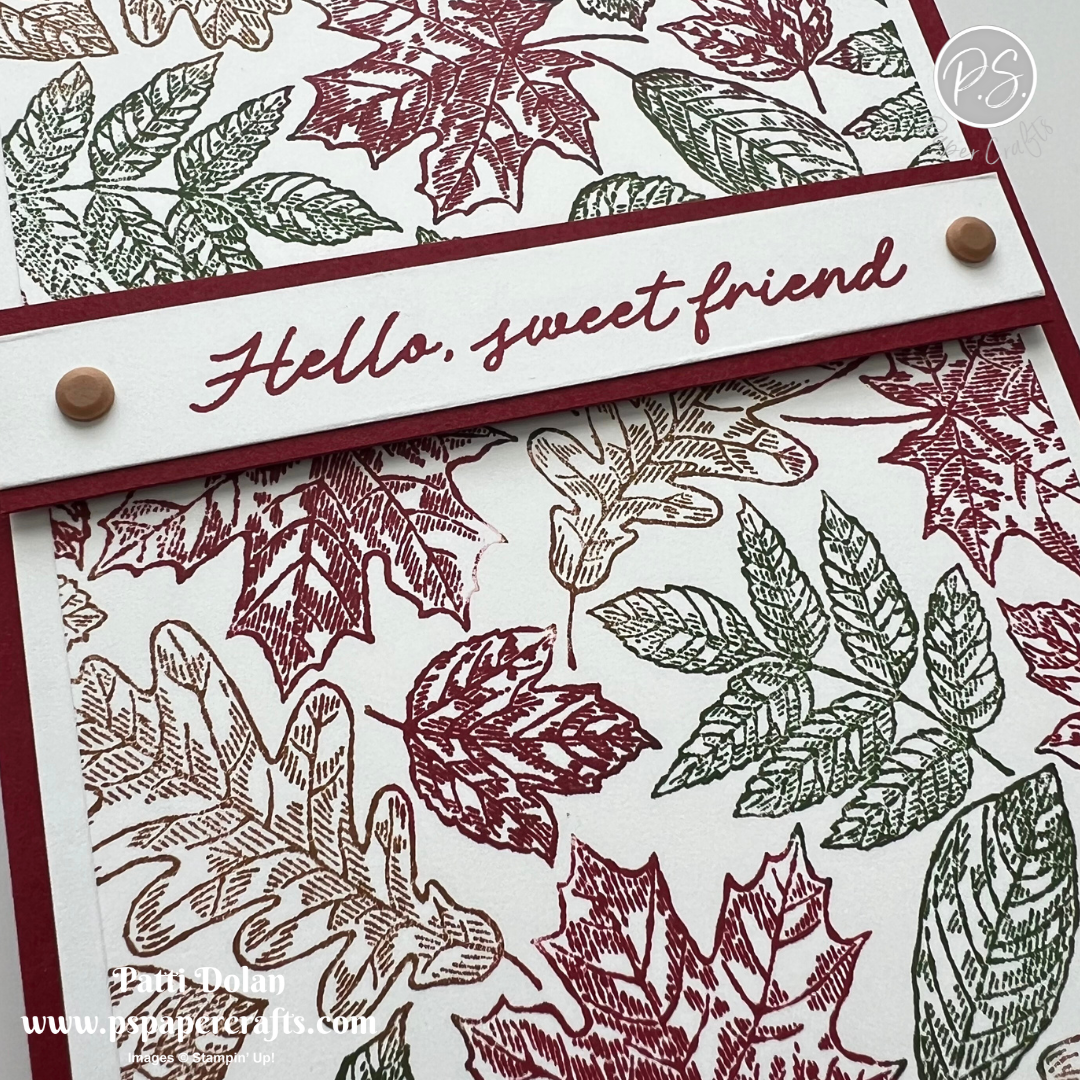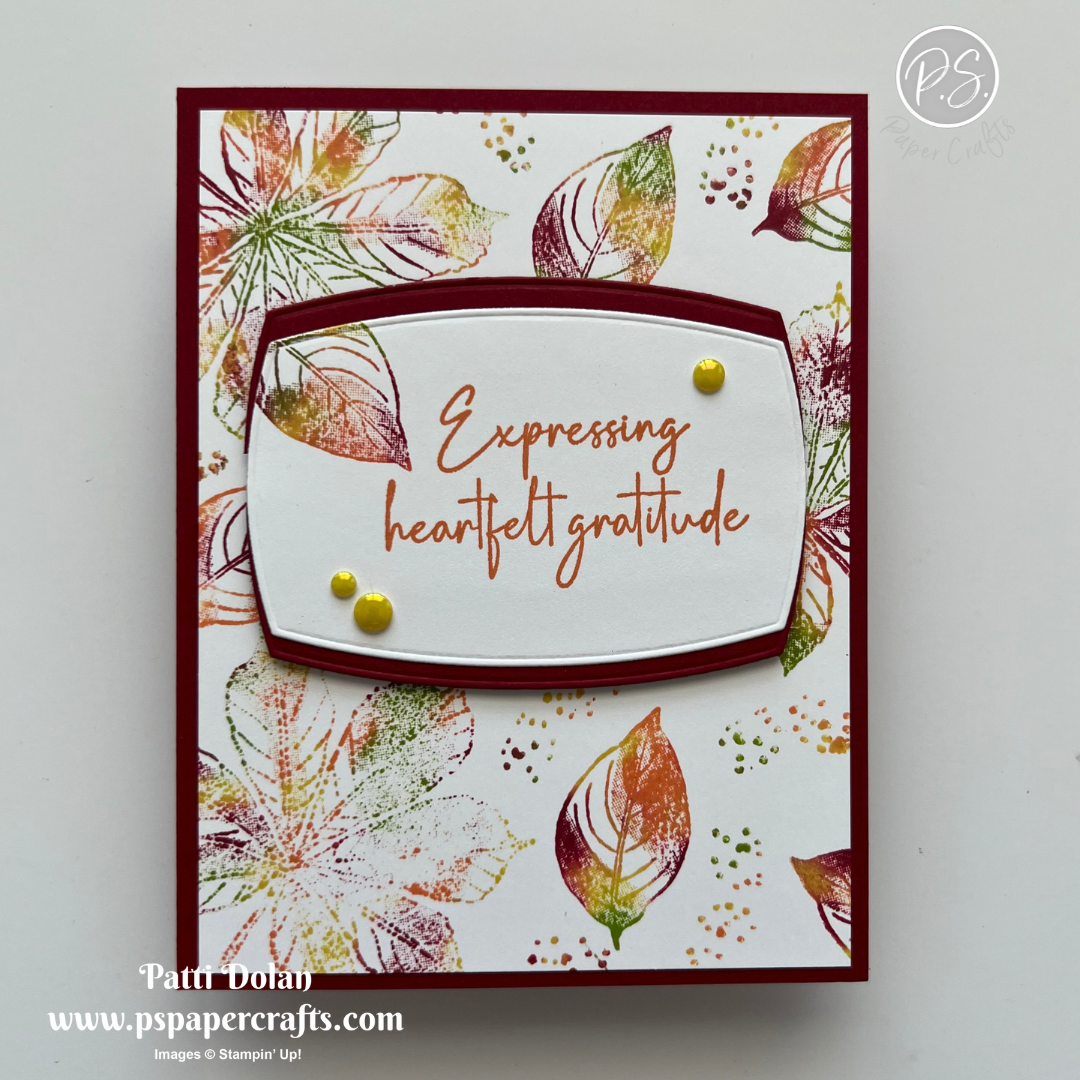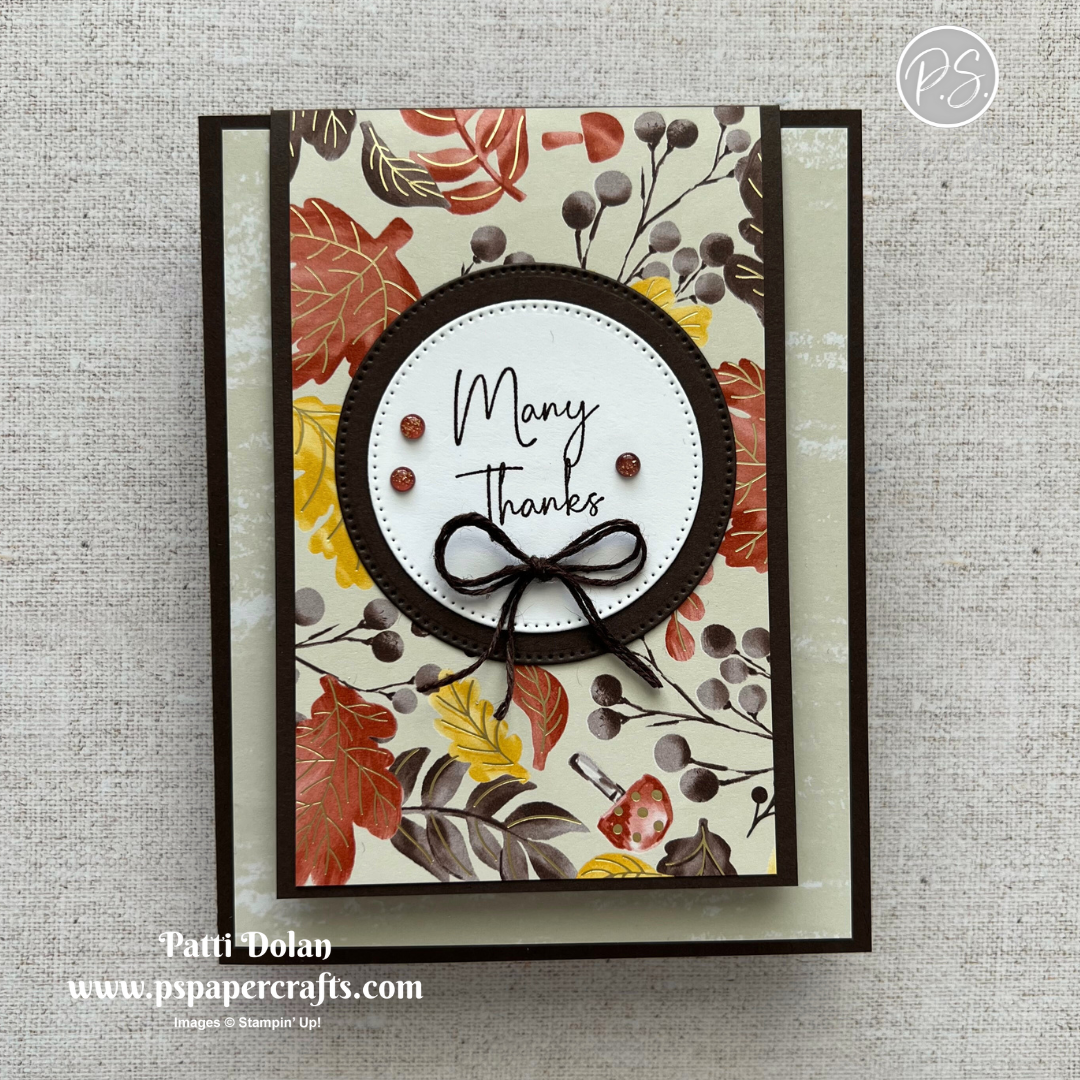

I love how this card turned out. I wasn’t sure what to do with this sketch but it all came together. I used the Gathering Together Designer Series Paper and Gathering Moments Bundle.

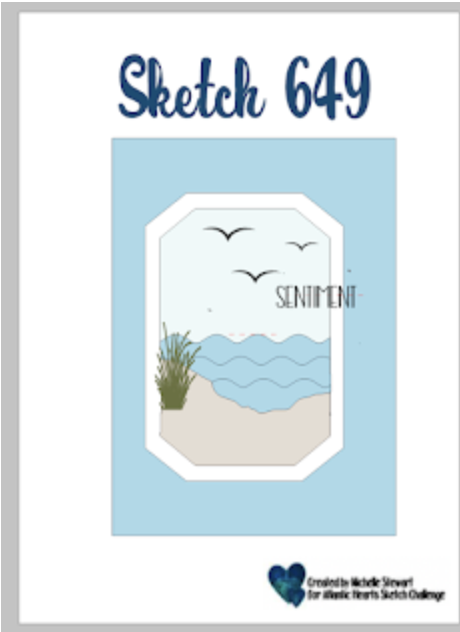
Here’s the sketch I used. You can see all the projects posted for this week’s challenge by clicking on the sketch below.

Tips & Instructions
Crushed Curry Card Base - 5-1/2 x 8-1/2, score at 4-1/4
Cajun Craze Layer - 4 x 5-1/4, emboss using the Gathering Leaves Embossing Folder. Adhere to the card base.
Crushed Curry Strip - 3/8 x 5-1/4, adhere to the card.
Crushed Curry Layer - 2-5/8 x 3-5/8
Gathering Together Designer Series Paper Layer - 2-1/2 x 3-1/2, adhere to the Crushed Curry layer and then adhere to the card.
Stamp the leaves in Crushed Curry and Cajun Craze Ink. Stamp the acorn in Early Espresso Ink. Die cut with coordinating dies and adhere to the card with Dimensionals.
Stamp sentiment on a 1/2” strip of Basic White. Banner both ends and adhere to the card with Dimensionals.
Add some Cajun Craze & Gold Dots.

On the inside layer (4 x 5-1/4), stamp sentiment in Cajun Craze Ink. Stamp 2 leaves in Crushed Curry Ink.

I love the fall colors in this card!

Supply List
You can click on the item to purchase it from my Online Store.