Sweet Just A Note Card
Here’s another card using the Wishing You Well Stamp Set. I am really loving this set, its so sweet and simple.

Here’s the dimensions:
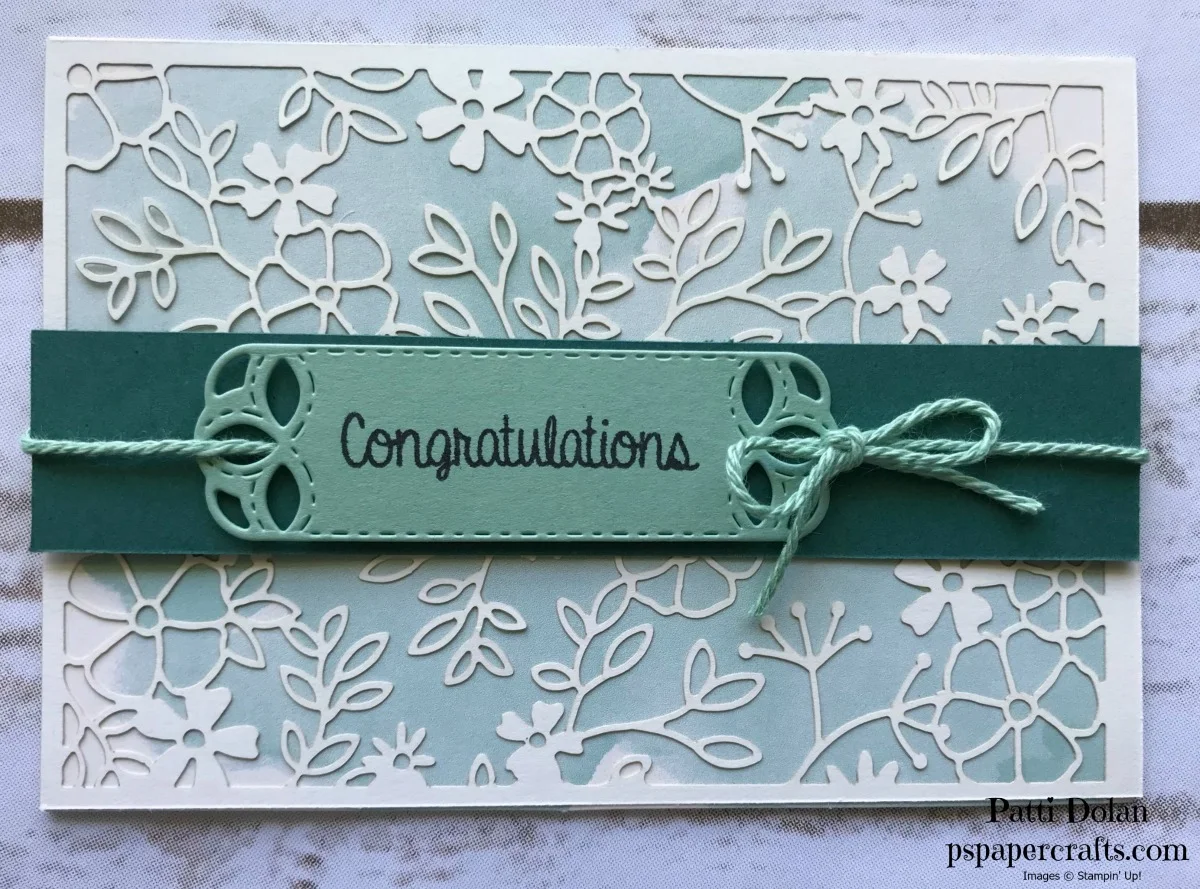
Night of Navy Card Base - 8 1/2 x 5, scored at 4 1/4
Soft Sea Foam Layer - 5 1/4 x 4
Fresh Fig Layer - 3 7/8 x 2 7/8
Whisper White Layer - 3 3/4 x 2 3/4

I used the Layered Leaves Dynamic Textured Impressions Embossing Folder to emboss the Soft Sea Foam Layer.

The floral bunch was stamped in Soft Sea Foam and the bow in Night of Navy. The flowers and sentiment are Fresh Fig.

I stamped the Floral Bunch in both Soft Sea Foam and Fresh Fig, offsetting it a little to give it some depth. I like how it came out.

If you want any of the products I used on this project, just click on the item below or the Shop Now button and it will bring you to my Online Store. Please use the current Host Code when you go to checkout your order. You can also click directly on an item to order.
Tip of the Week - Refilling Your Stampin' Write Markers
Today I have a quick video to show you how to refill your Stampin’ Write Markers. Take a look, its so easy to do.
Here’s the link to my Online Store where you an purchase the Ink Refills, Stampin’ Write Markers and any current Stampin’ Up Products.
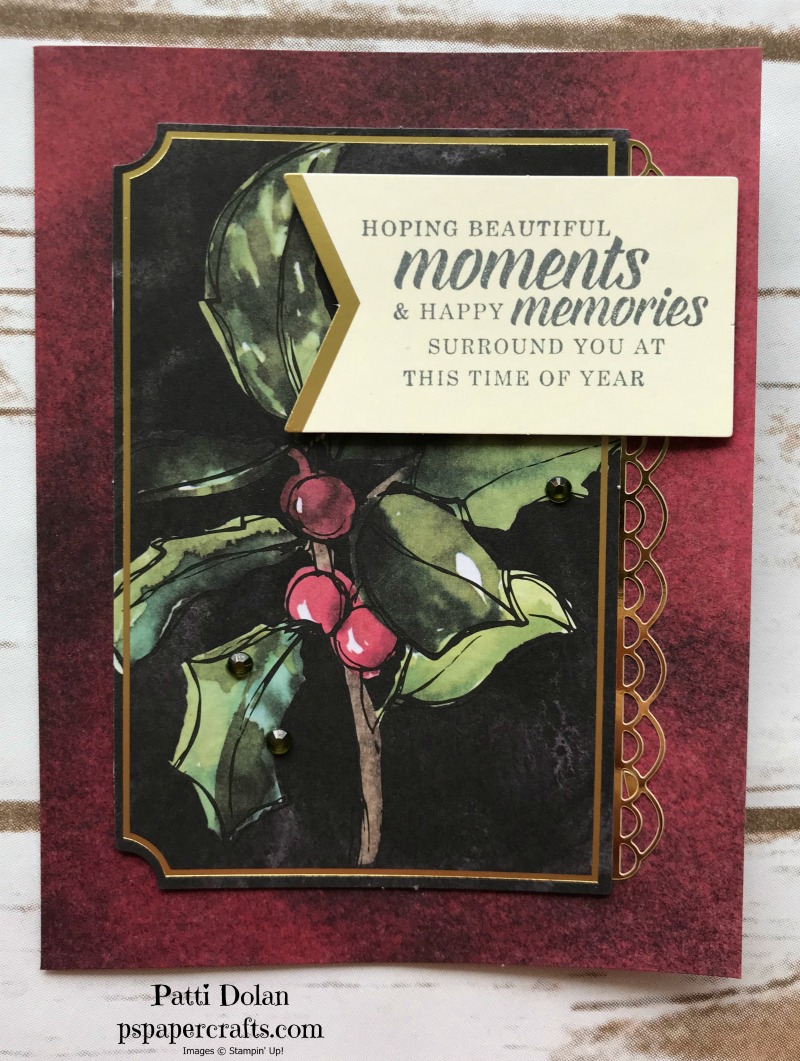
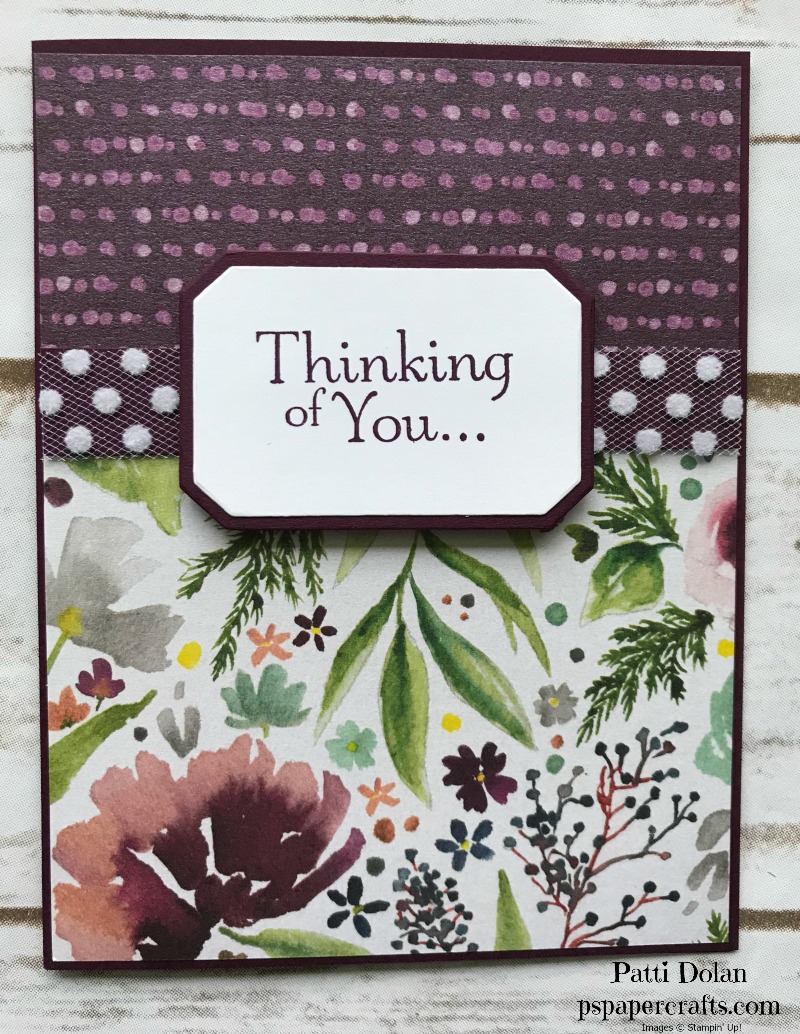
Wishing You Well Card Using the Thumping Technique
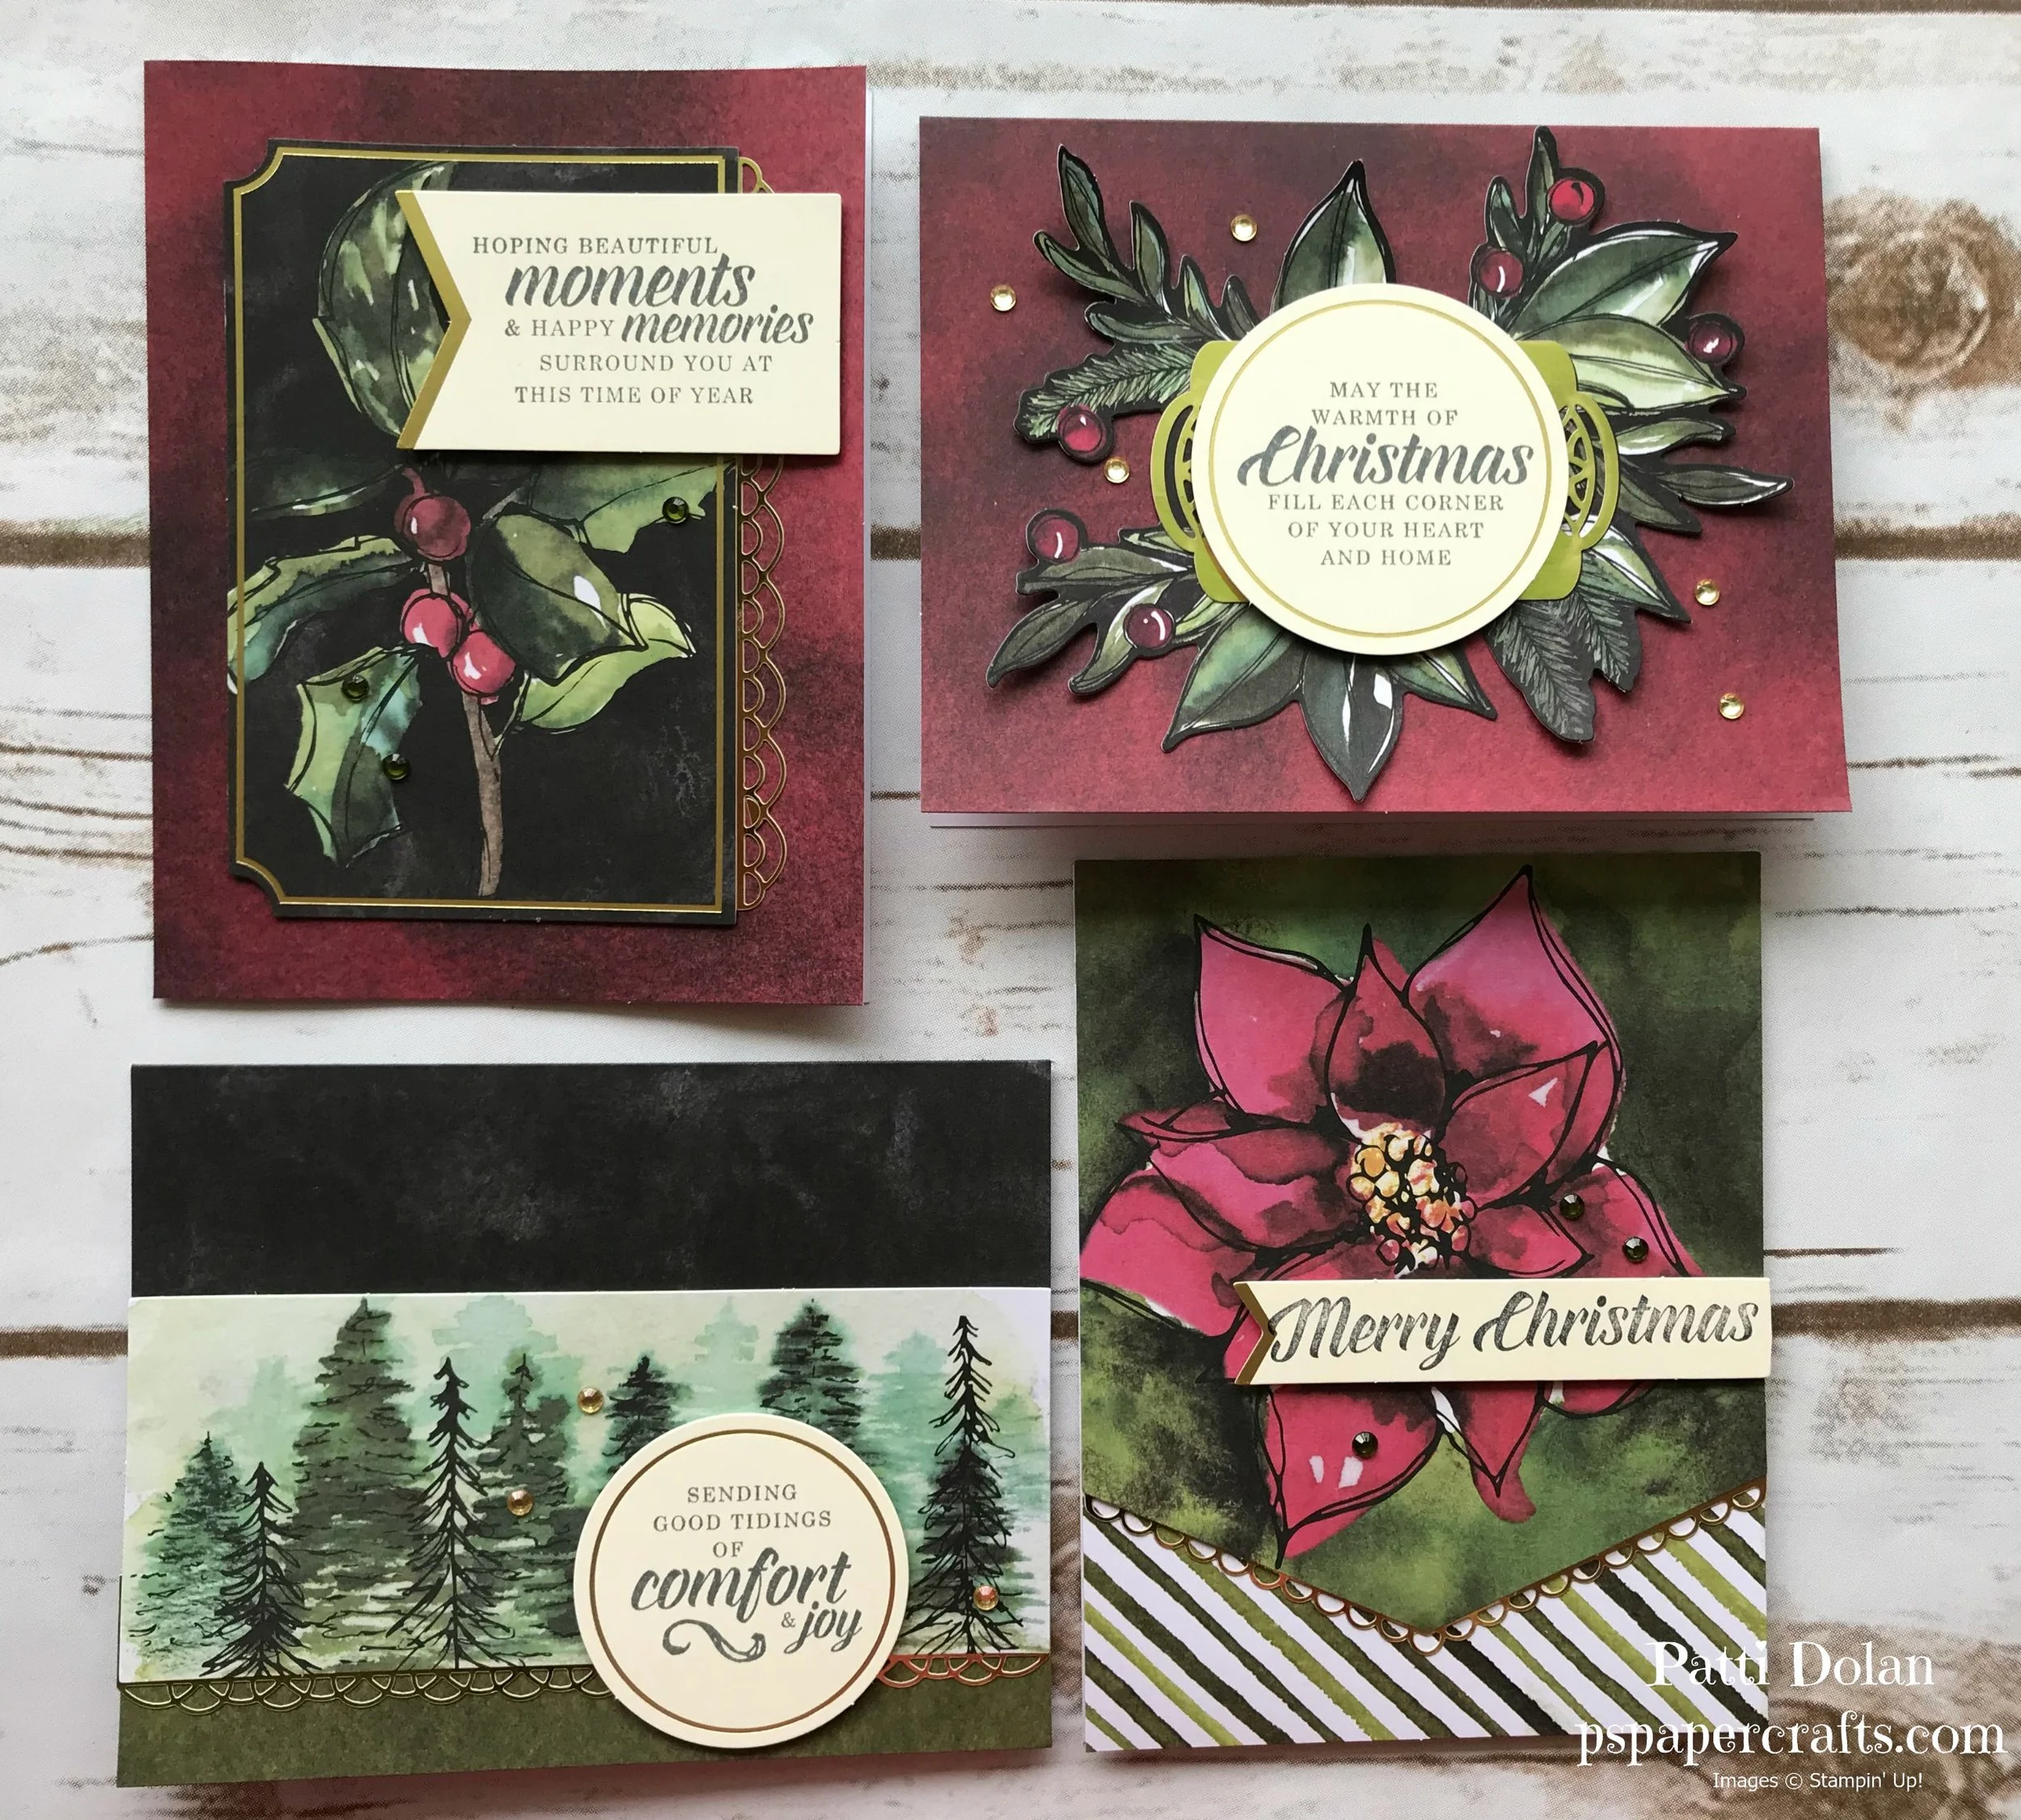
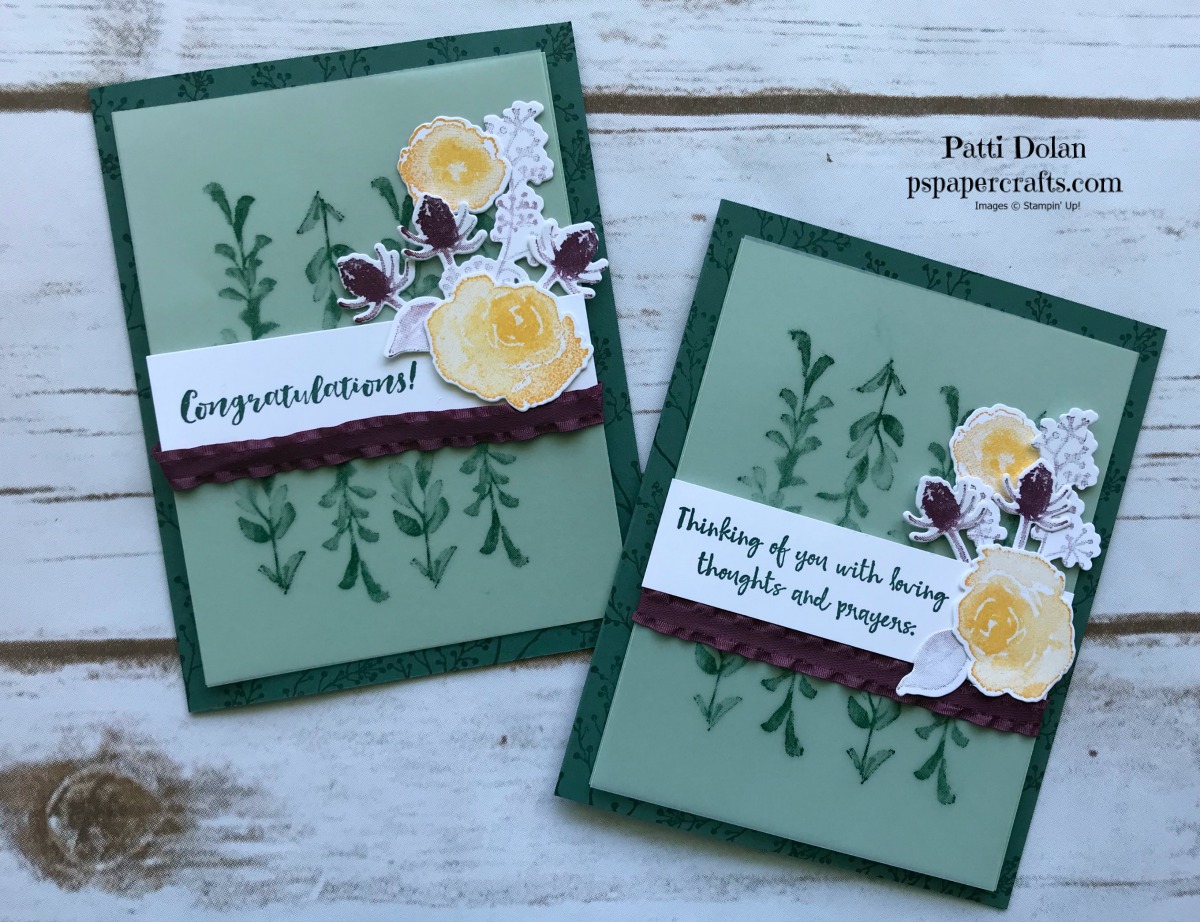
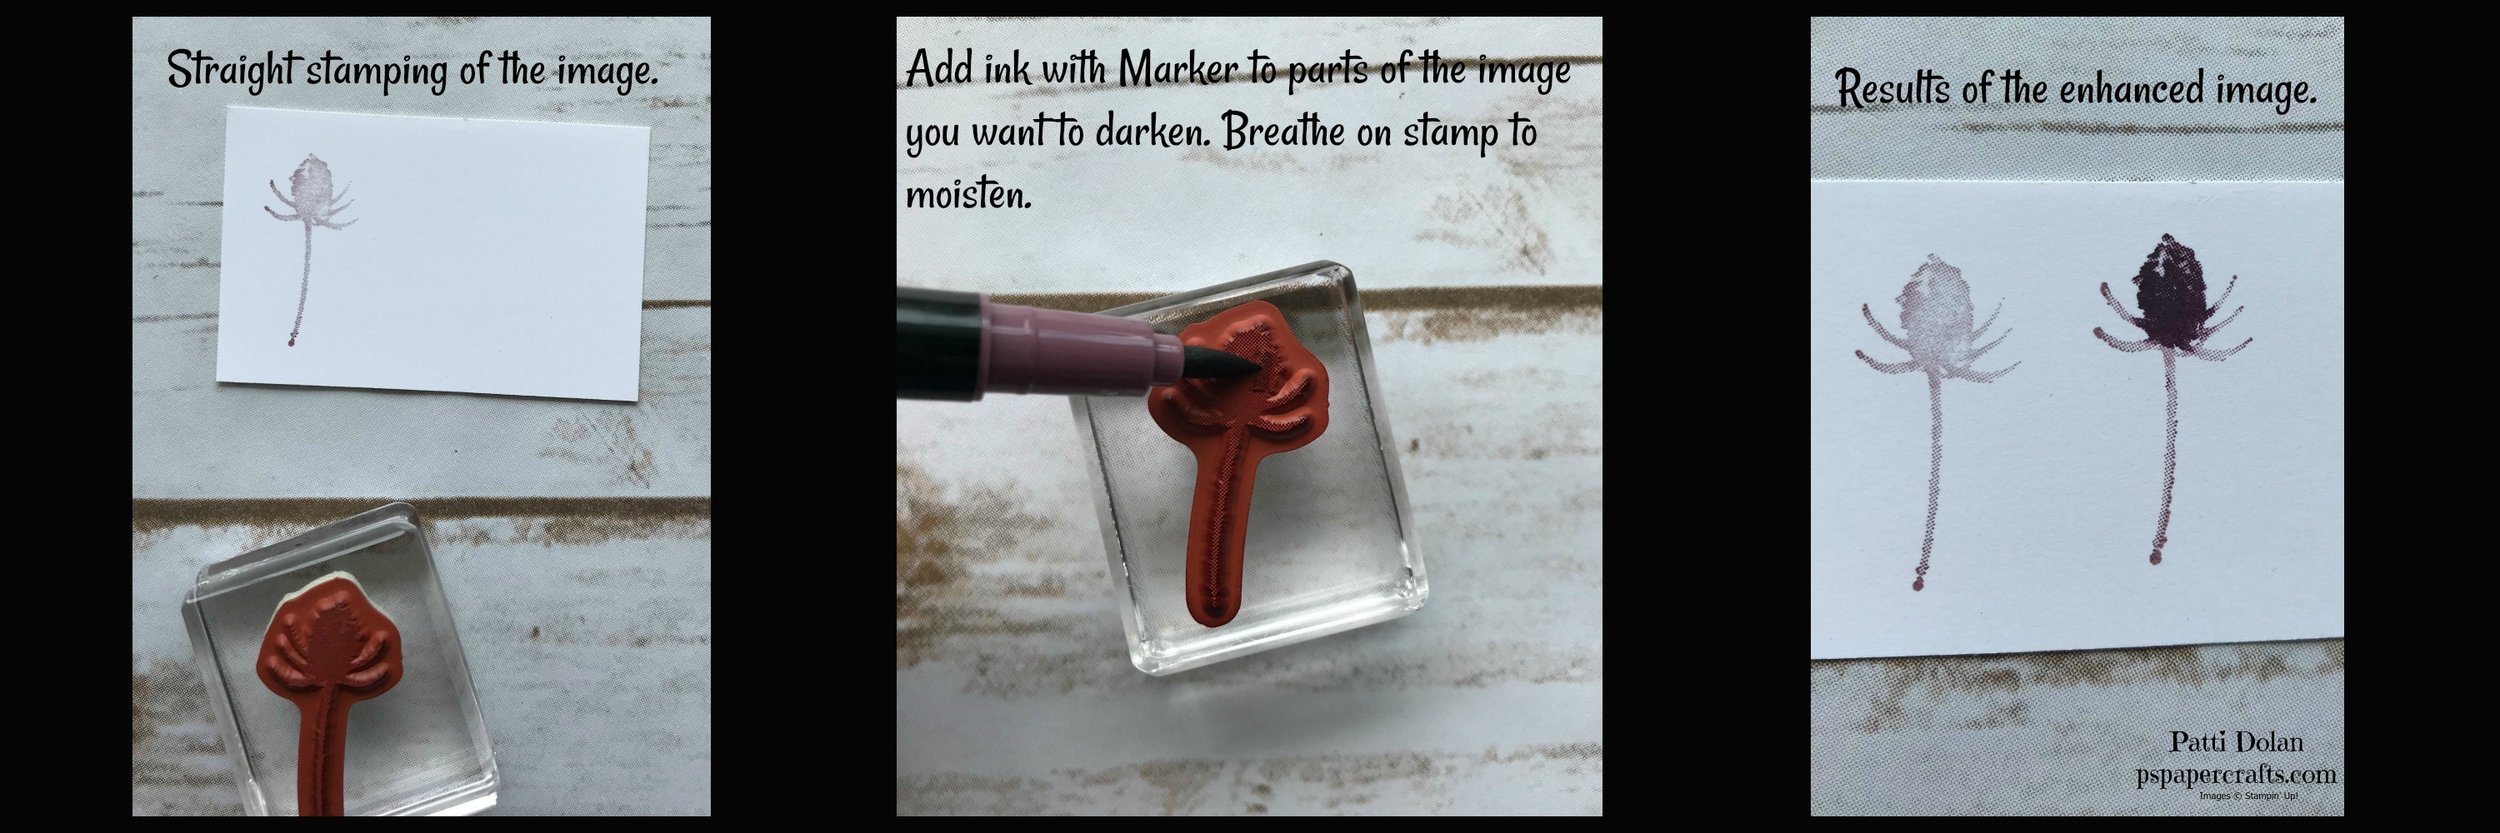
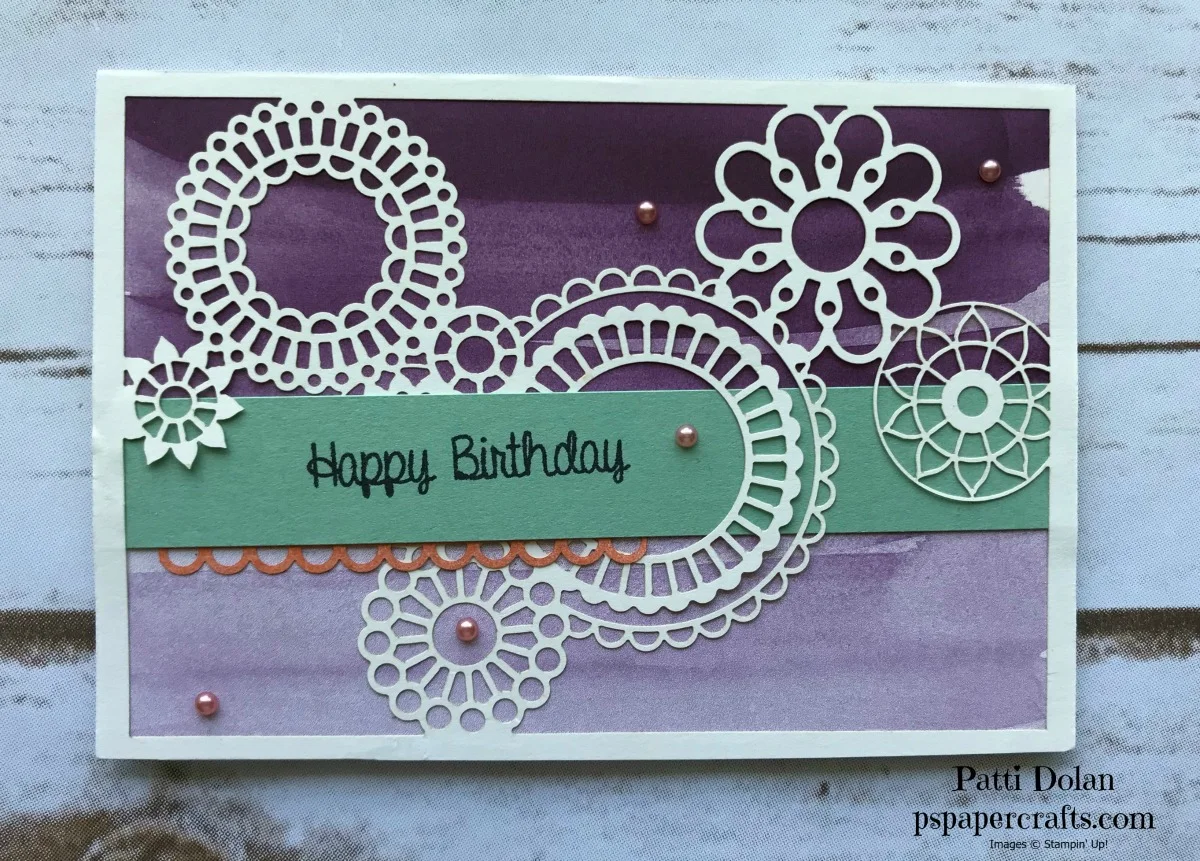
Today I have a really cool technique to show you. It’s called “thumping”. It gives you a multi-colored image. You get it by thumping or bouncing or tapping your Stampin’ Write Markers on your stamp. You’ll have to watch the video to see what I mean. I used this technique on the wreath image.

The card base is Merry Merlot and that’s the color I used for the bow and the sentiments as well. I just love this Wishing You Well stamp set. The images are so pretty and delicate.
I used Pear Pizzaz to first ink up the stamp to get good coverage. Then I used these markers: Pear Pizzaz, Grapefruit Grove, Old Olive, Call Me Clover, Tranquil Tide and Fresh Fig. You can try whatever colors you have handy that would work well with the image you’re using.

Once I thumped the markers on the stamp, I breathed on it to moisten the ink and then stamped it on a piece of 5 1/4 x 4 Very Vanilla. I stamped the bow in Merry Merlot over the bottom of the wreath. The strip of Very Vanilla for the sentiment is 1/2 x about 3 and then was cut using the Banner Triple Punch to give it a flag on both ends. I did the same with a 5/8 x 3 strip of Merry Merlot. The corners were punched with the Detailed Trio Punch.
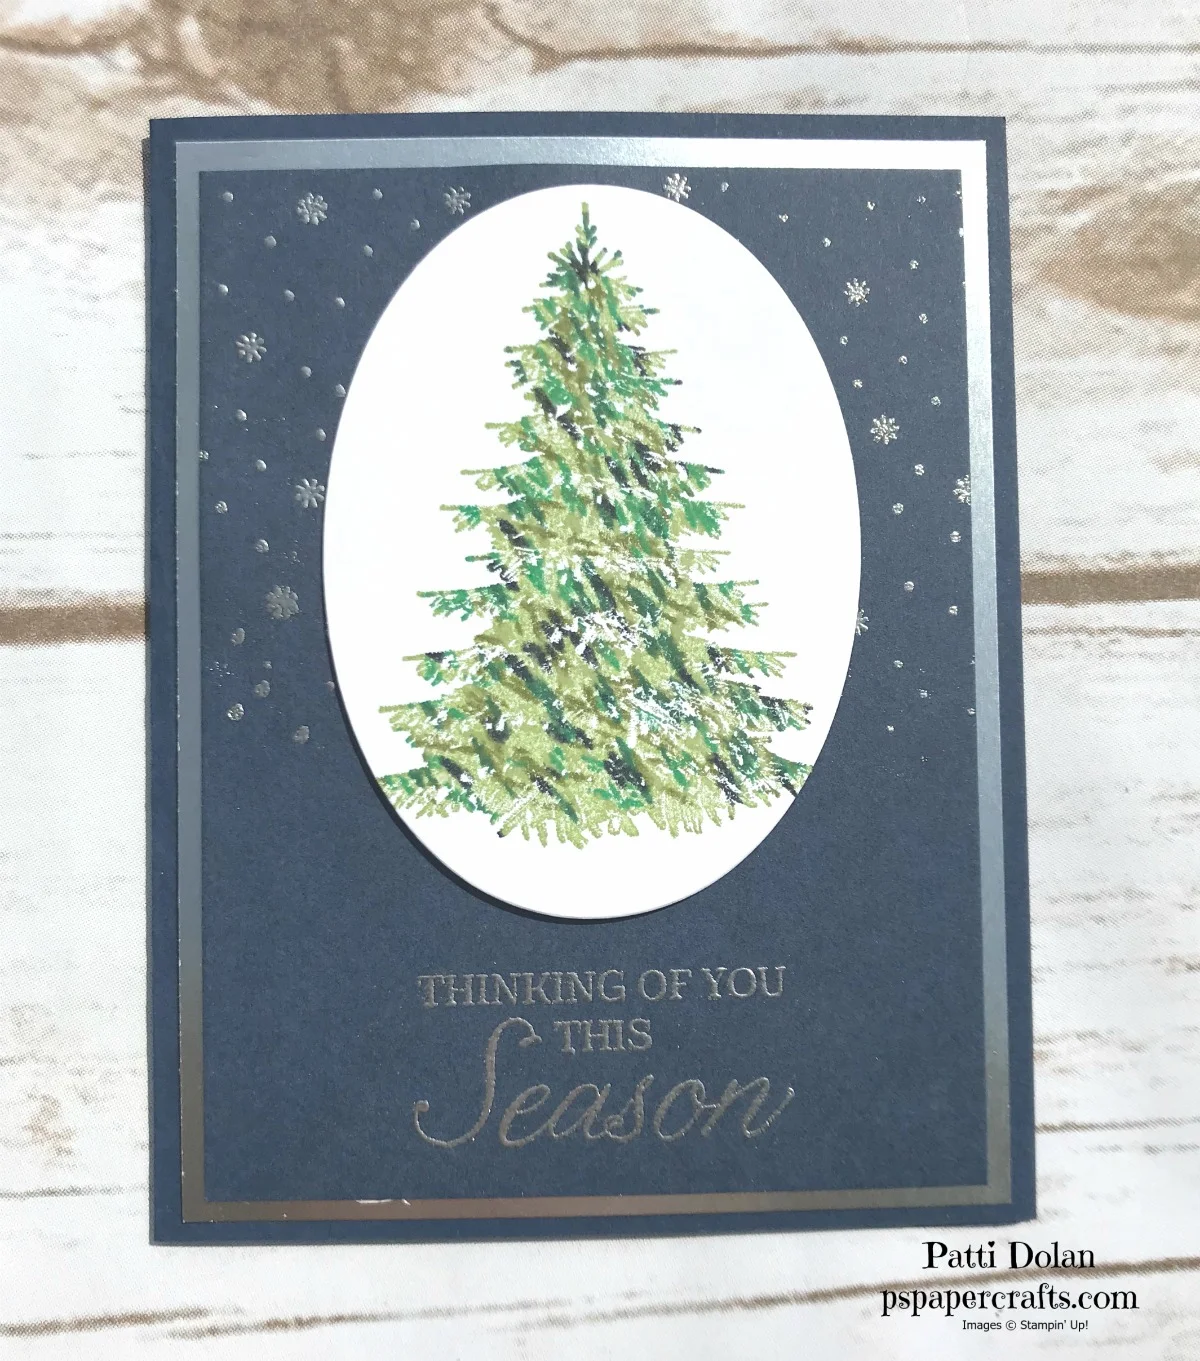
I used this technique on the tree on a Christmas Card. Isn’t it pretty? I used the same greens but left out the Grapefruit Grove and Tranquil Tide and added Night of Navy.
Watch the video to see how to do this technique, it’s really fun.
These are the products I used to make the Wishing You Well Card. You can click any of the products to purchase them on my Online Store.
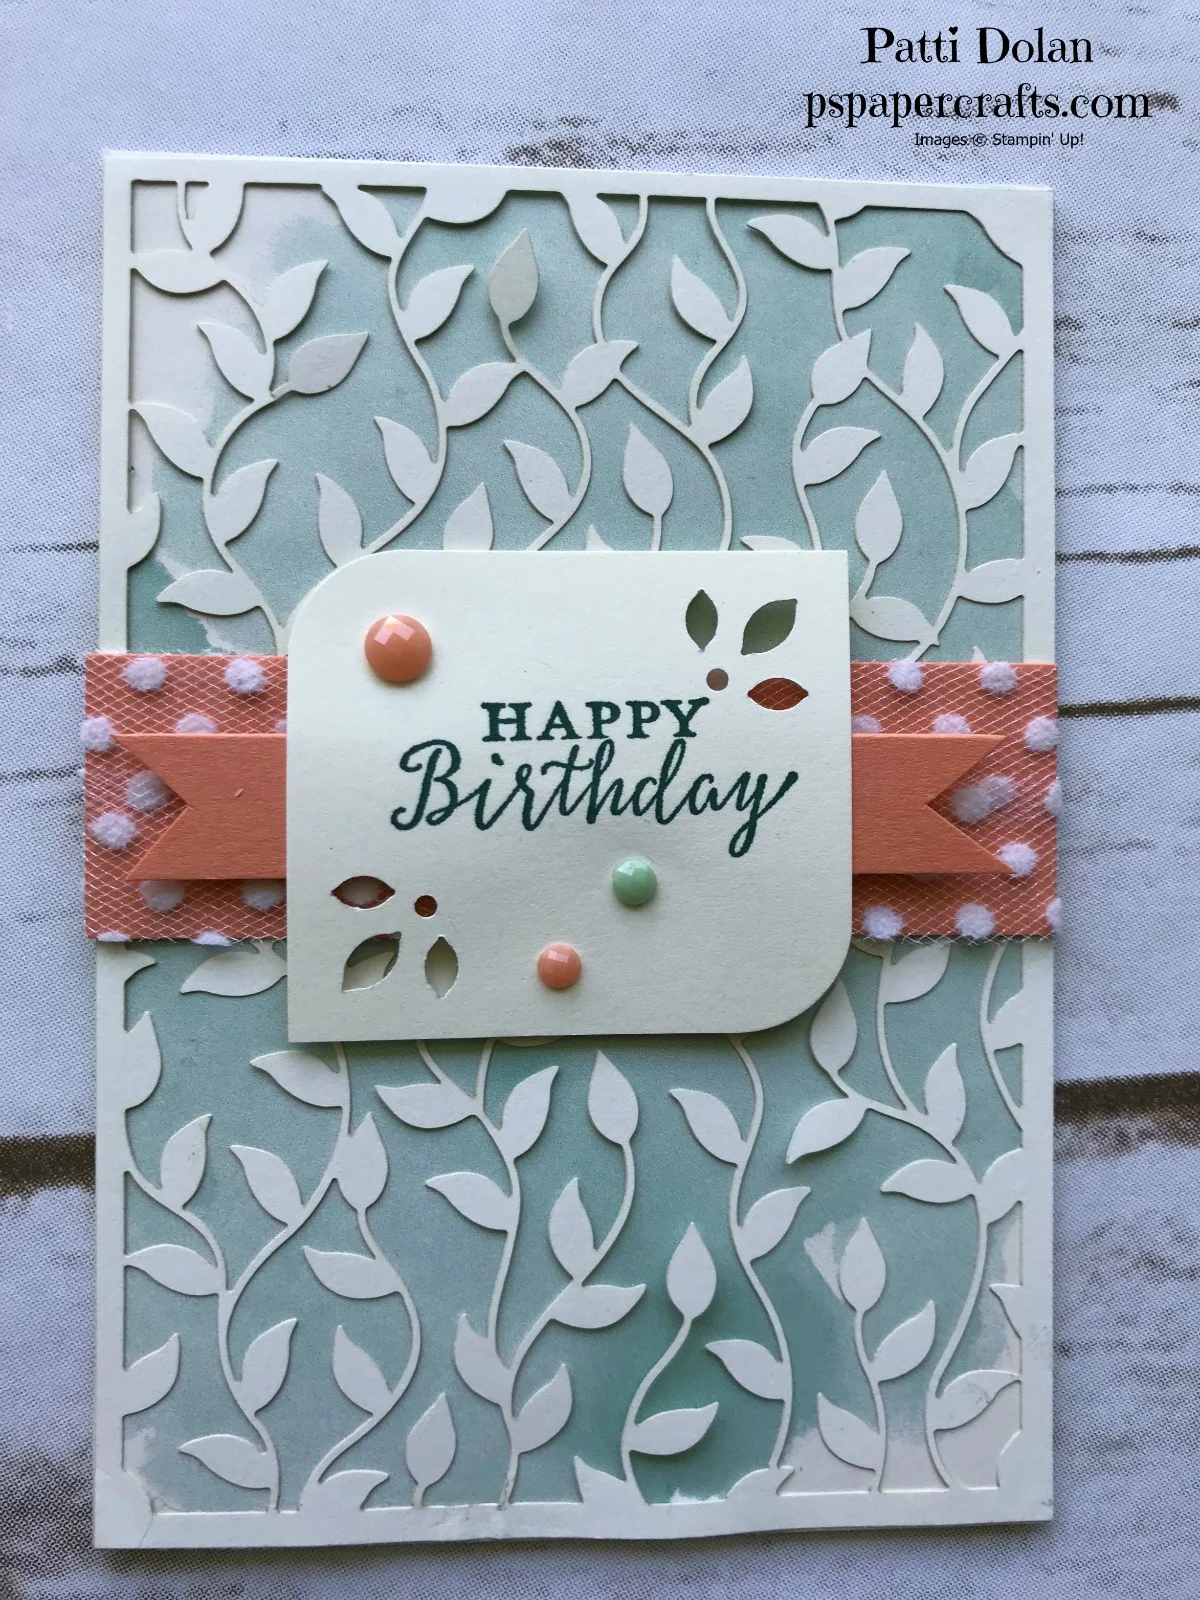
The Christmas Card has a Night of Navy Card Base with a 5 1/4 x 4 layer of Silver Foil Paper and then a 5 x 3 3/4 layer of Night of Navy. I used the Thumping Technique for the tree from the Winter Woods Stamp Set and cut it out with the largest Layering Oval Die. I stamped the snowflakes from the Christmas Pines Stamp Set with Versamark and then added Silver Embossing Powder and heated with the Heat Tool. I also embossed the sentiment. Below is the list of products for this card.
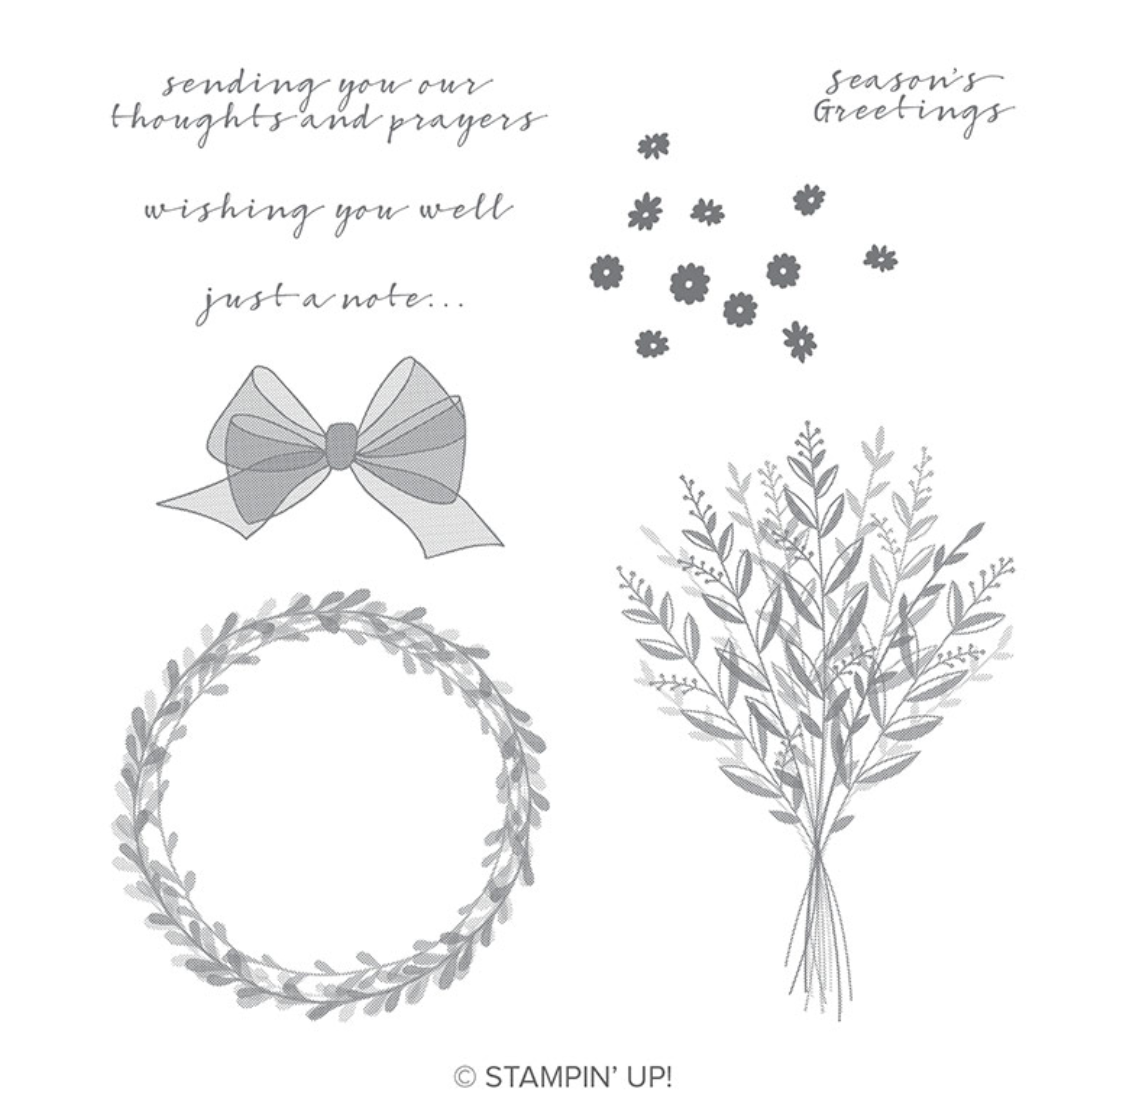
Product of the Week - Wishing You Well Stamp Set
This week I’m featuring the Wishing You Well Stamp Set. It is so pretty and easy to use. The images are very delicate and the bow is so simple and sweet. These are the images that come in the set. They are red rubber and you can get Clear Mount or Wood Mount.
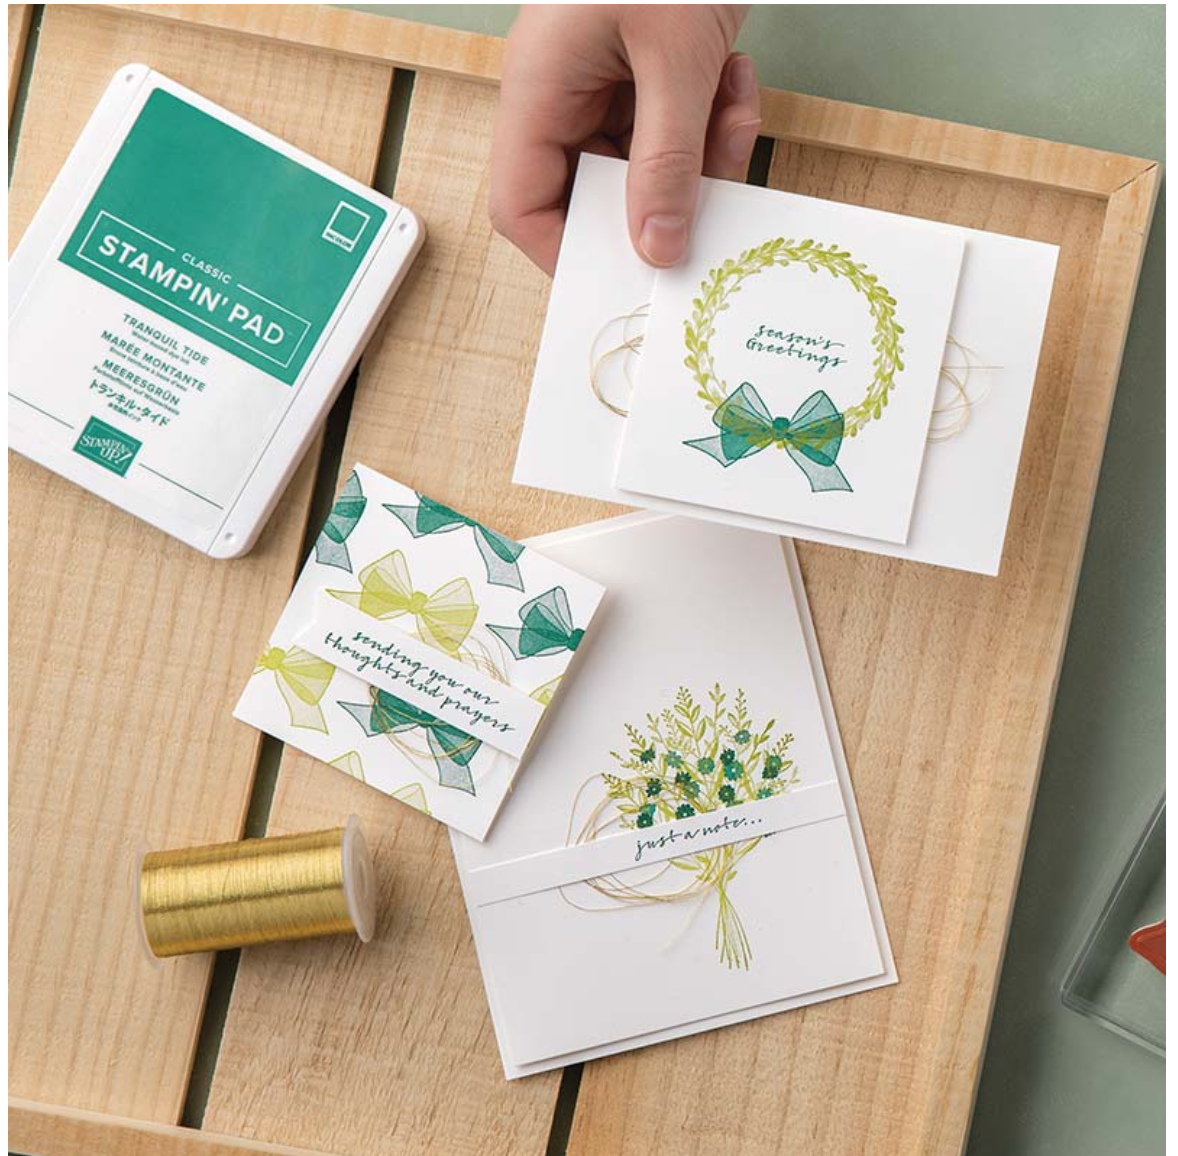
You can purchase this stamp set by itself or Stampin’ Up! put some products together that you can purchase in a set to make these cards below.
Stop back tomorrow when I’ll show you a neat tip/technique to add multiple colors to the image.
You can purchase the stamp set by clicking the product below in either Clear Mount or Wood Mount. You can also purchase the supplies together to make the samples that are in the catalog by clicking the card supplies set which include the stamp set.
Beautiful Falling For Leaves Card
Today I have such a beautiful card using the Falling For Leaves Bundle and Multipurpose Liquid Glue. How do they go together? Well, check out the video in this Blog Post to find out.

The card base is Shaded Spruce and I embossed a 5 1/4 x 4 piece of Very Vanilla Cardstock with the Woodland Embossing Folder. The leaves were cut out of Joyous Noel Glimmer Paper using the Detailed Leaves Thinlits. The Glimmer Paper (I called it Glitter Paper in the video) comes in a 6x6 pack and includes Copper, Merry Merlot and Tranquil Tide which are fantastic colors for Autumn and Christmas.

The sentiments that are included with this stamp set are perfect for Thanksgiving or just a Thank You card. Now, take a look at how the Multipurpose Liquid Glue works with the Glimmer Paper, intricate pieces and embossed layers.
If you want any of the products I used on this project, just click on the item below or the Shop Now button and it will bring you to my Online Store. Please use the current Host Code when you go to checkout your order. You can also click directly on an item to order.
TIP of the Week - Using Multipurpose Liquid Glue
I have a great tip that I've seen other Demonstrators use and thought I would share it with you. Many people don't want to use the Multipurpose Liquid Glue because they squeeze too much on and it oozes out of the side of their project.
My tip is to squeeze some on a Silicone Craft Sheet and then use a sponge or paintbrush to add it to your piece. This is especially helpful when trying to adhere an intricate embellishment to your project.

To clean your Silicone Craft Sheet, you just wait for the glue to dry and rub it off. You can wash your paint brush with a little soap and water. Give this a try, you may find this is your new go-to adhesive.
Product of the Week - Multipurpose Liquid Glue
One of my favorite adhesives is the Multipurpose Liquid Glue. It's very strong and dries clear. It has a fine tip (which is what I mostly use) and a broad tip.
The thing I like best is that you get a little time to get your pieces in just the right place before it dries.
It's only $4.00 and goes a long way.

These are some of the ways I like to use the Multipurpose Liquid Glue:
It's strong enough to hold boxes and bags together.
Great for embossed layers because it goes into all the nooks and crannies whether you use the embossed or debossed side of your piece.
Holds Burlap or heavier ribbon in place.
Simple for adhering sequins to your piece, just put a tiny drop where you want your sequin and then place it on top.
Great for rough surfaces like Glimmer Paper.