Harvest Meadow - Autumn Wreath

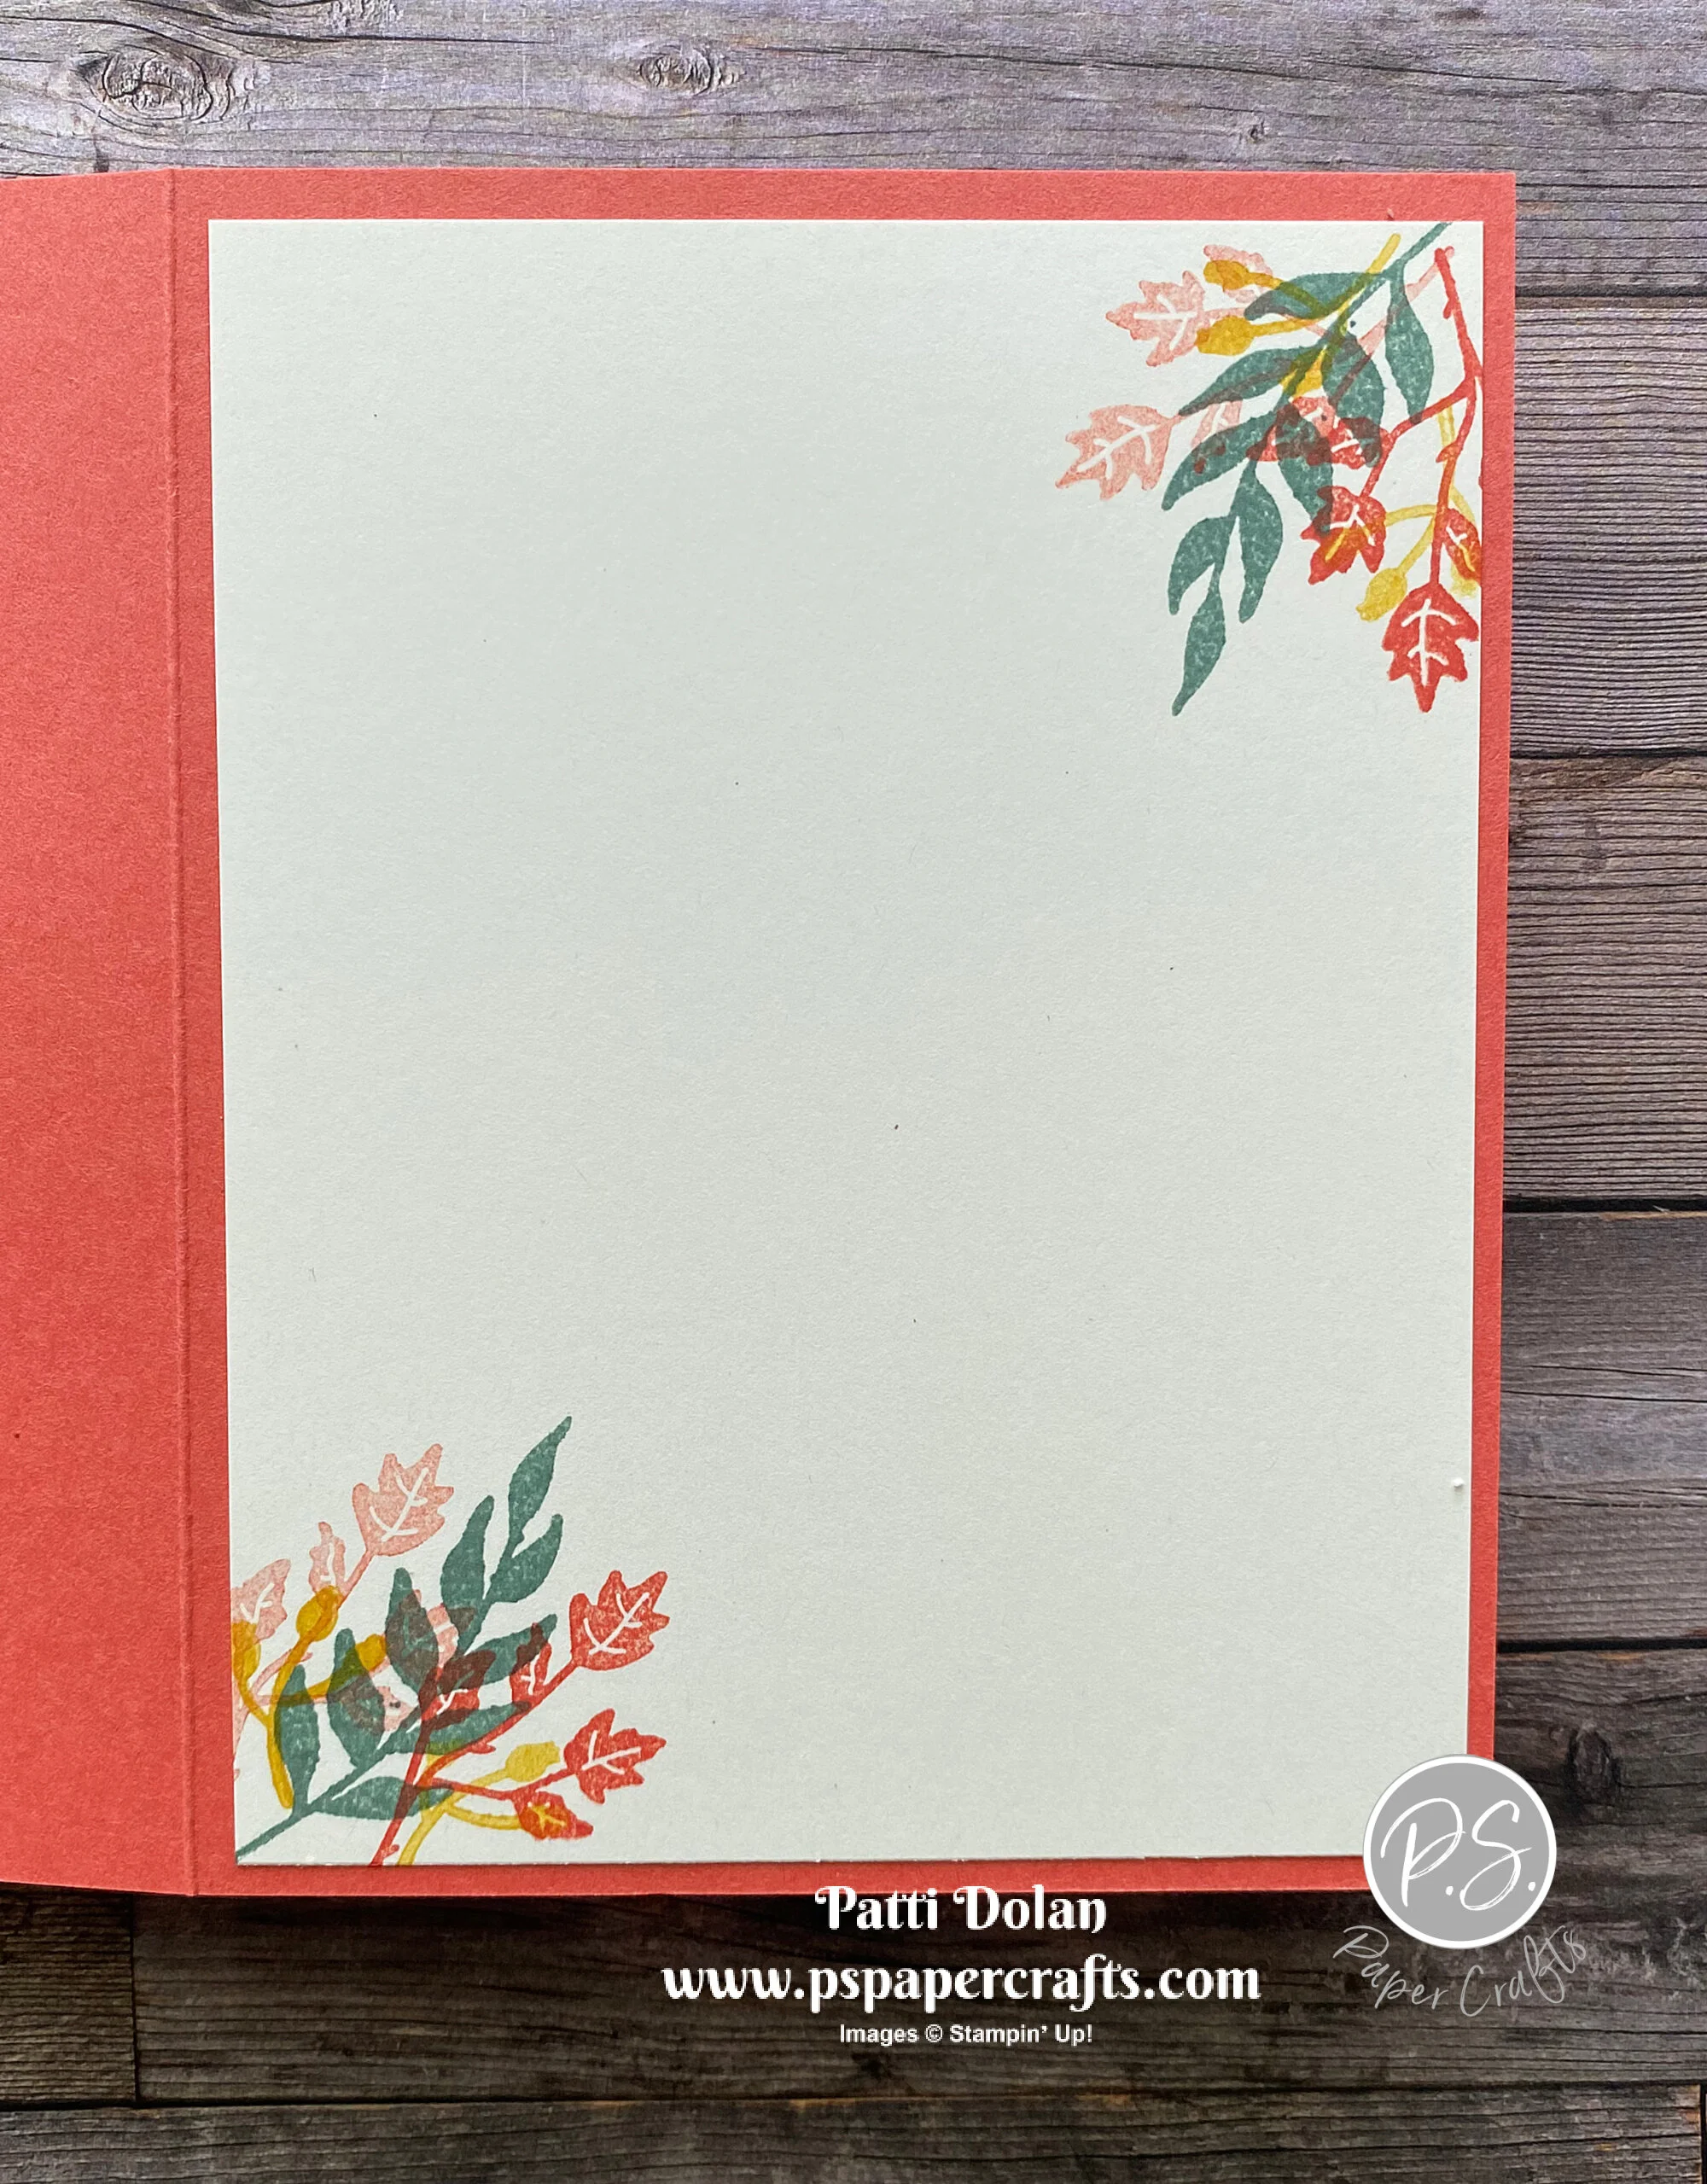
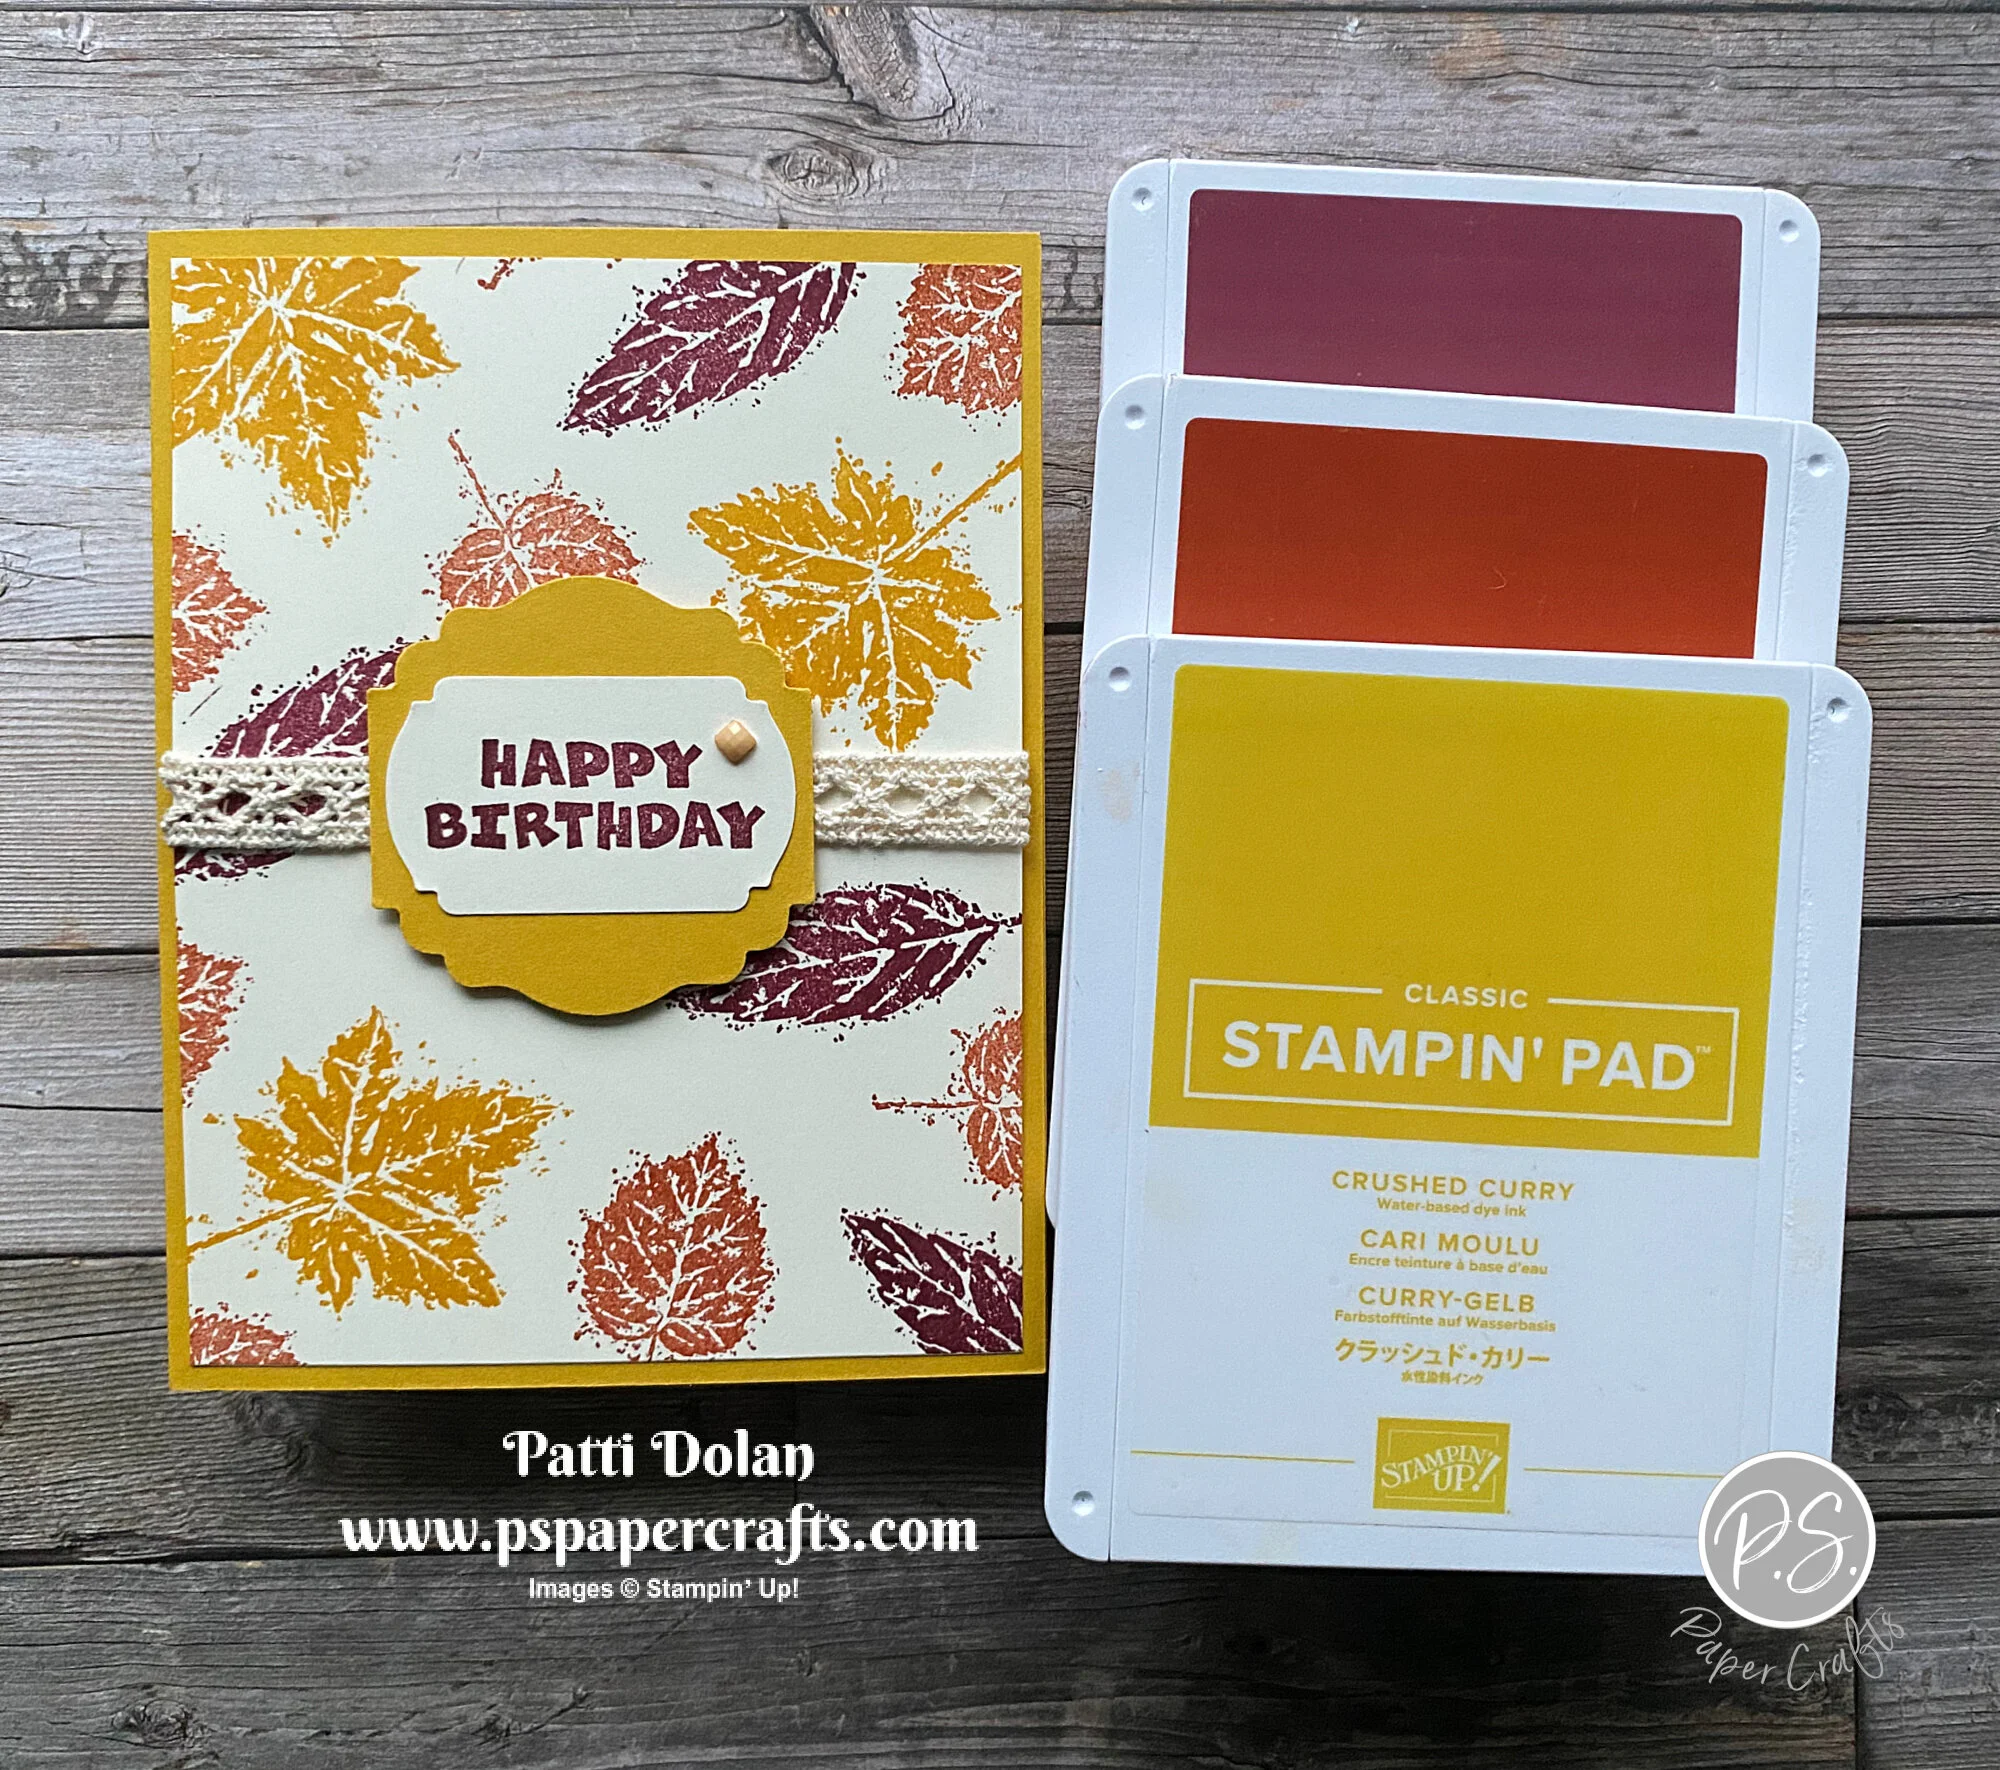
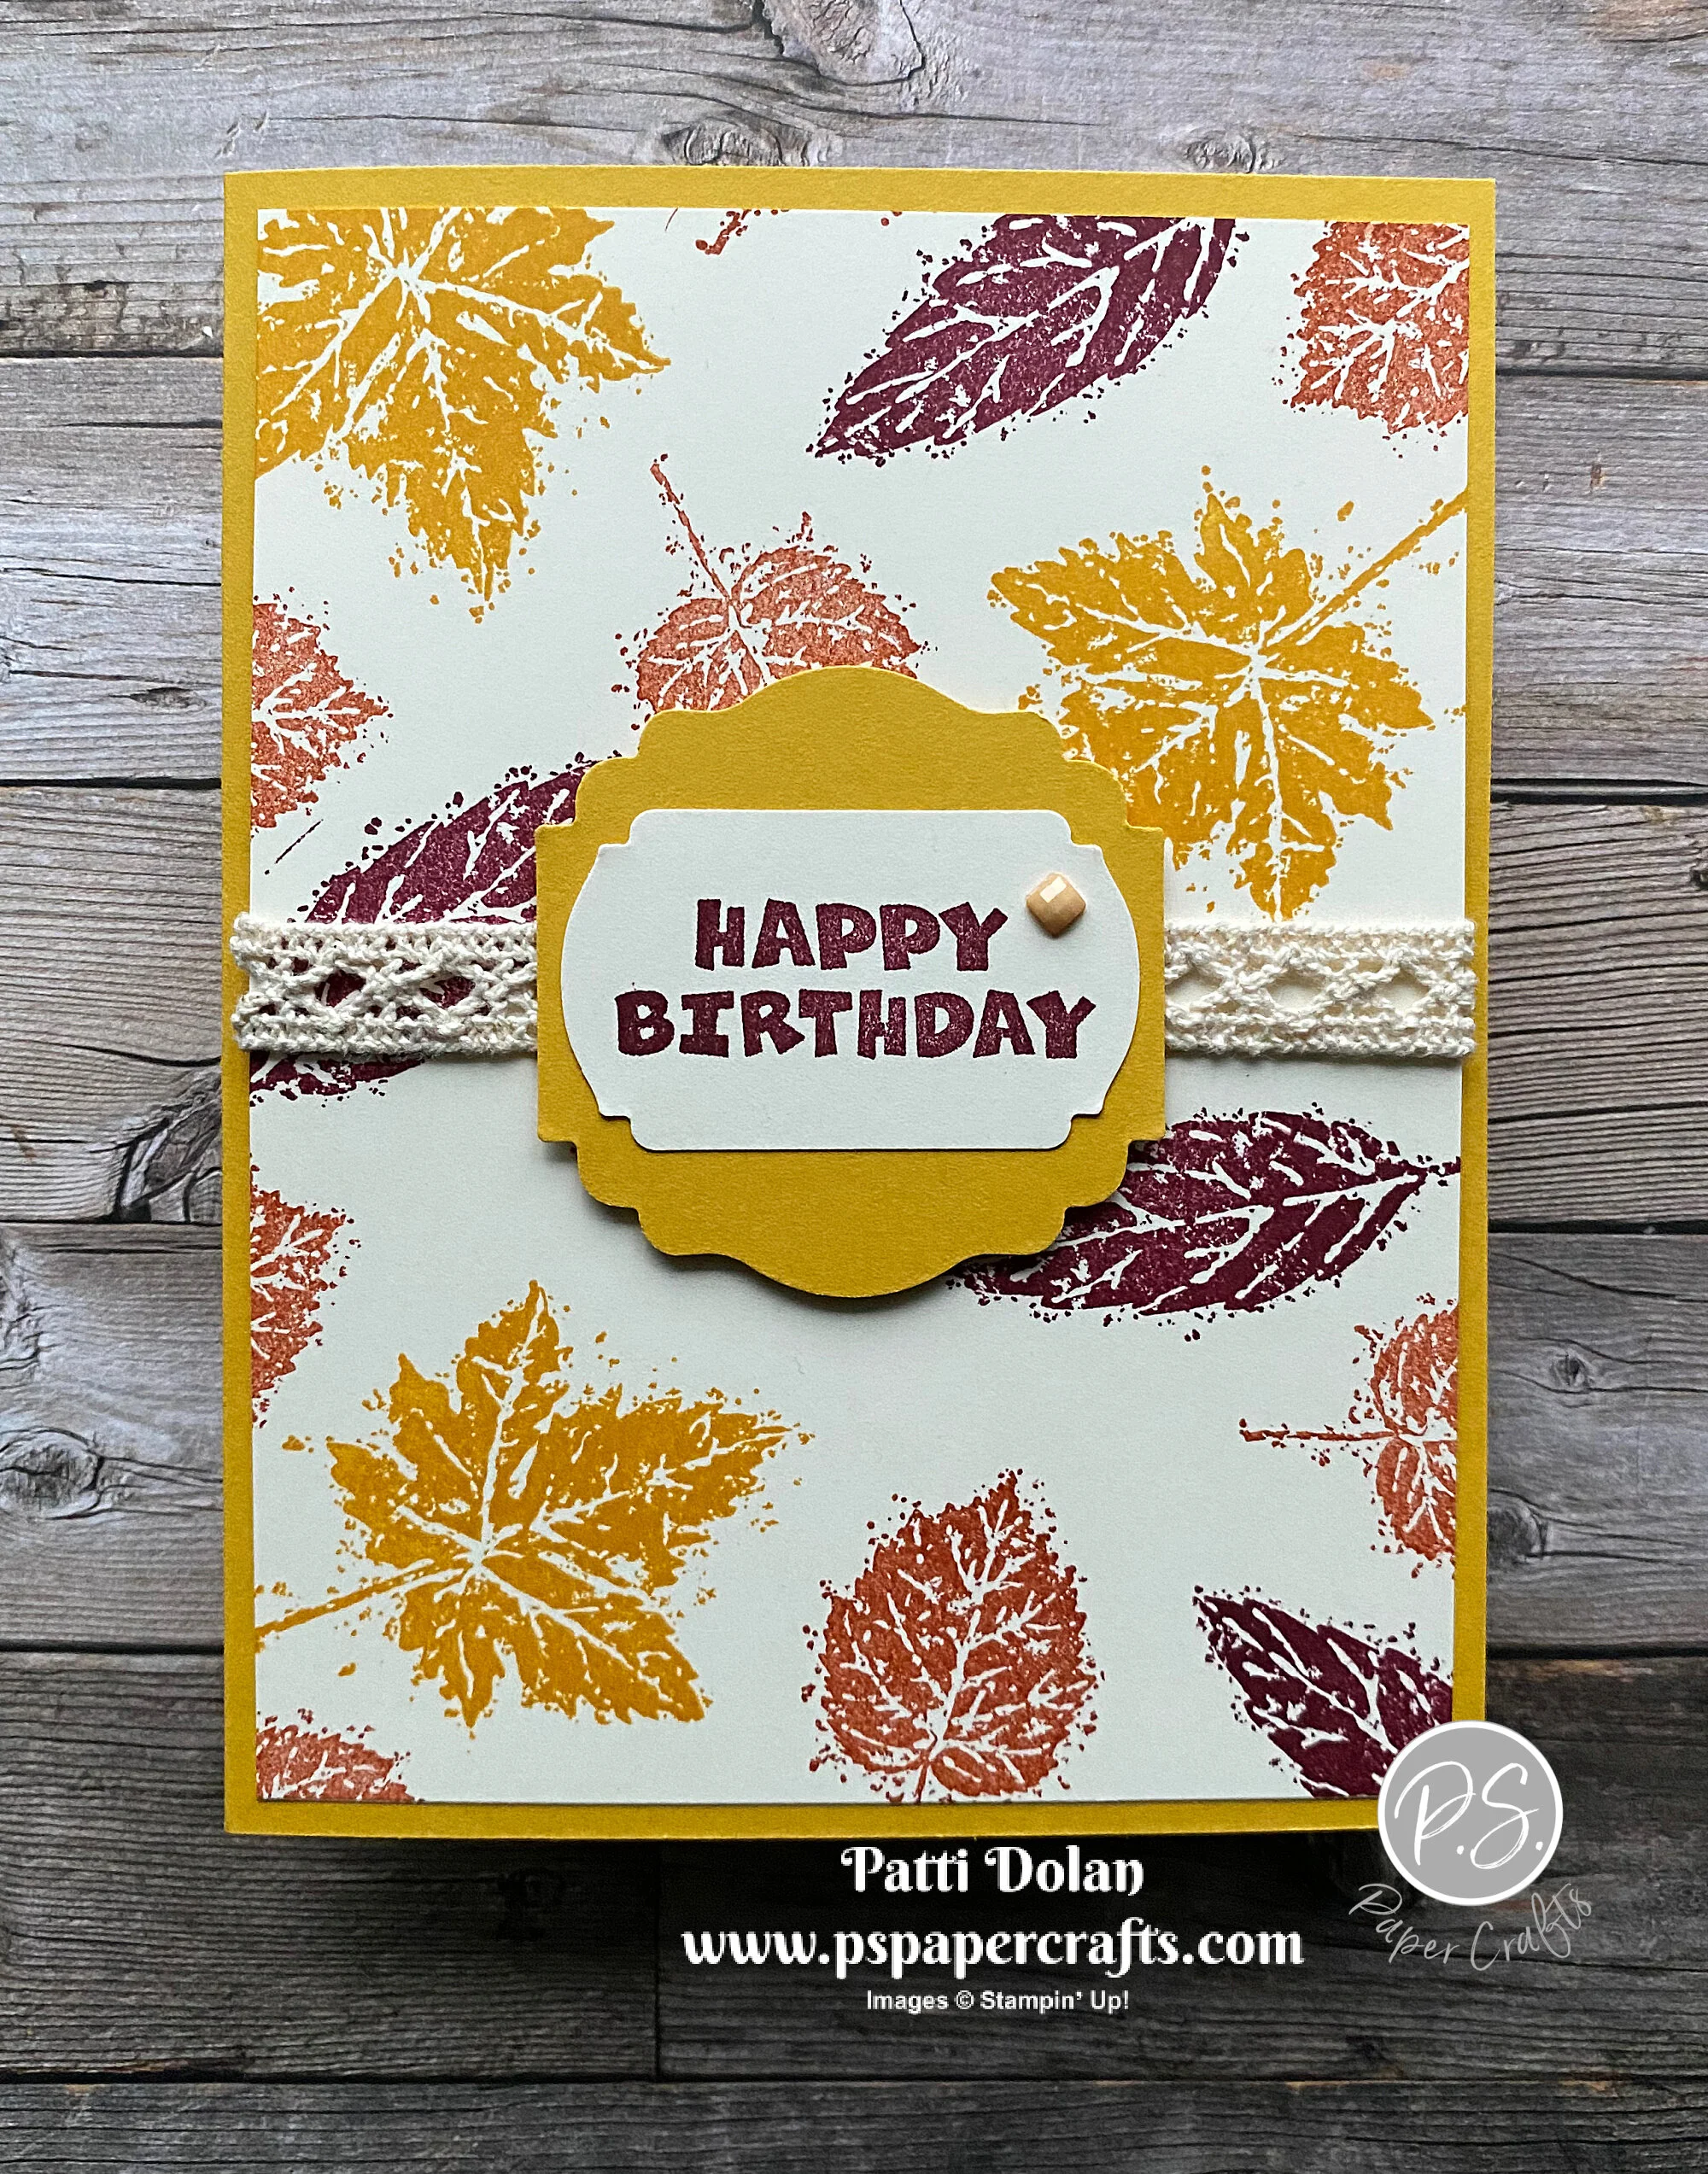
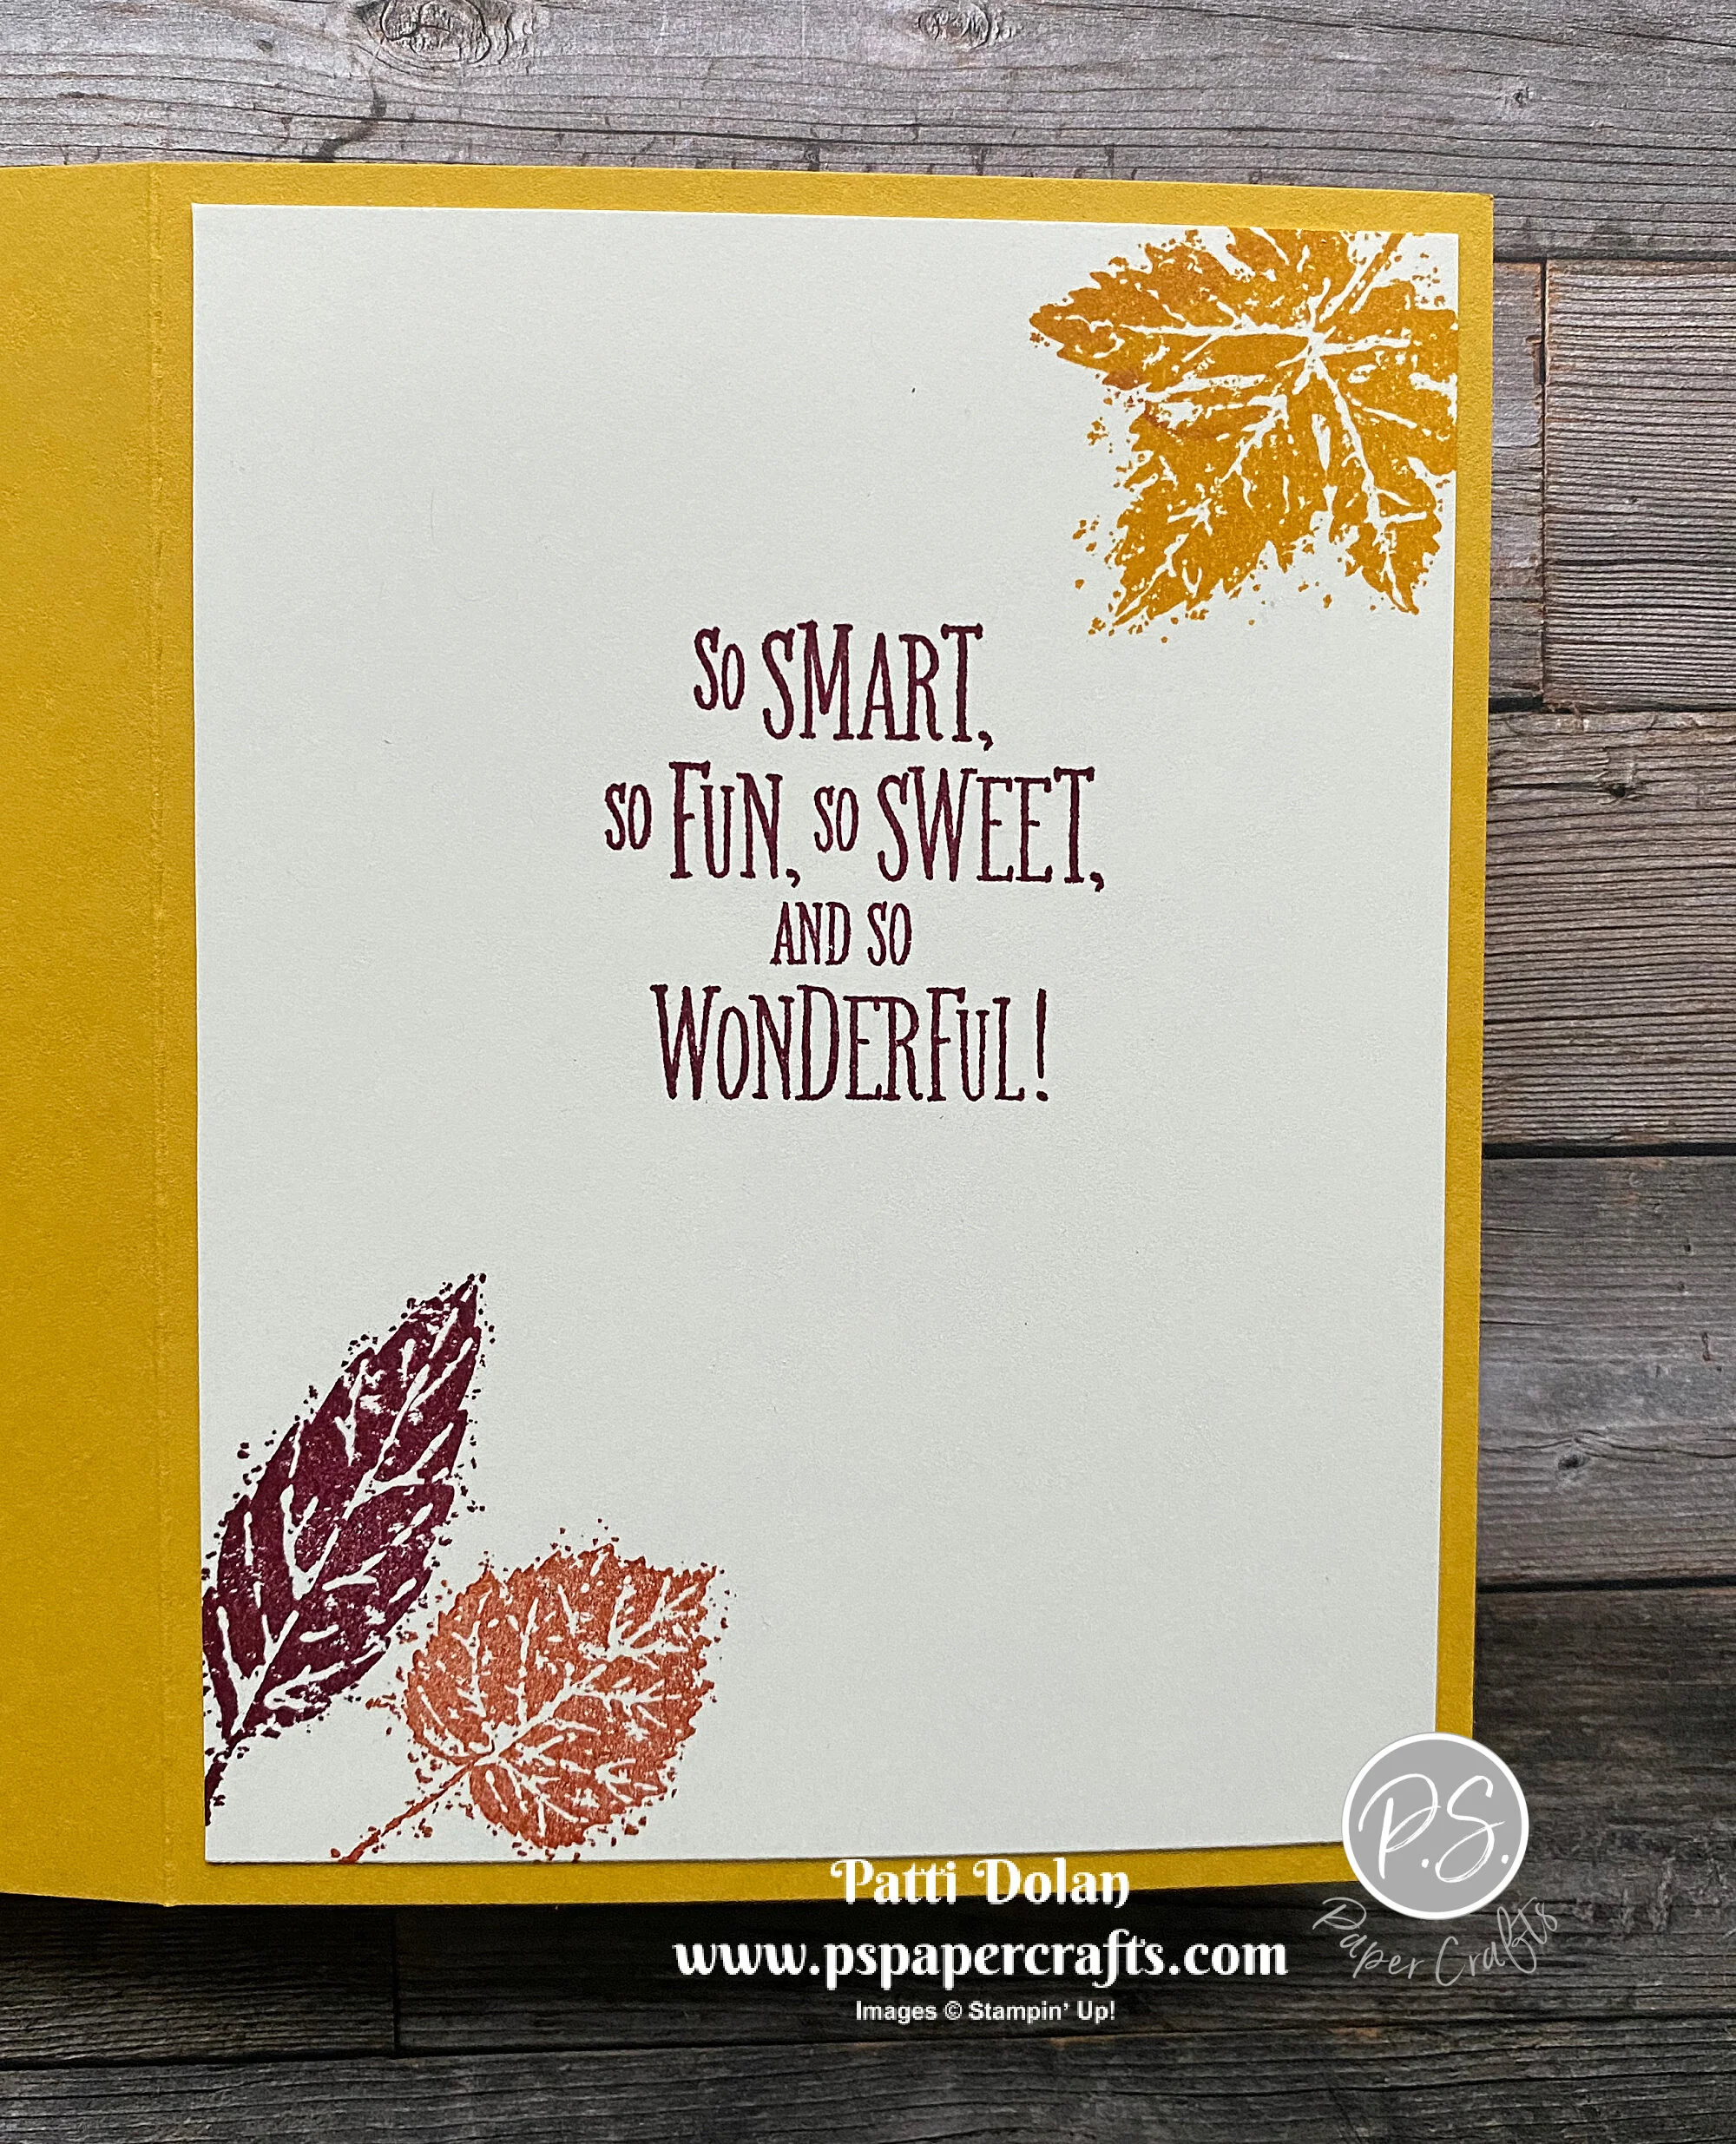
I made this card for this month’s Simple Suite Stampers Tutorial Bundle. We featured the Harvest Meadow Suite.

 
Harvest Meadow Autumn Wreath Card2.jpeg
 

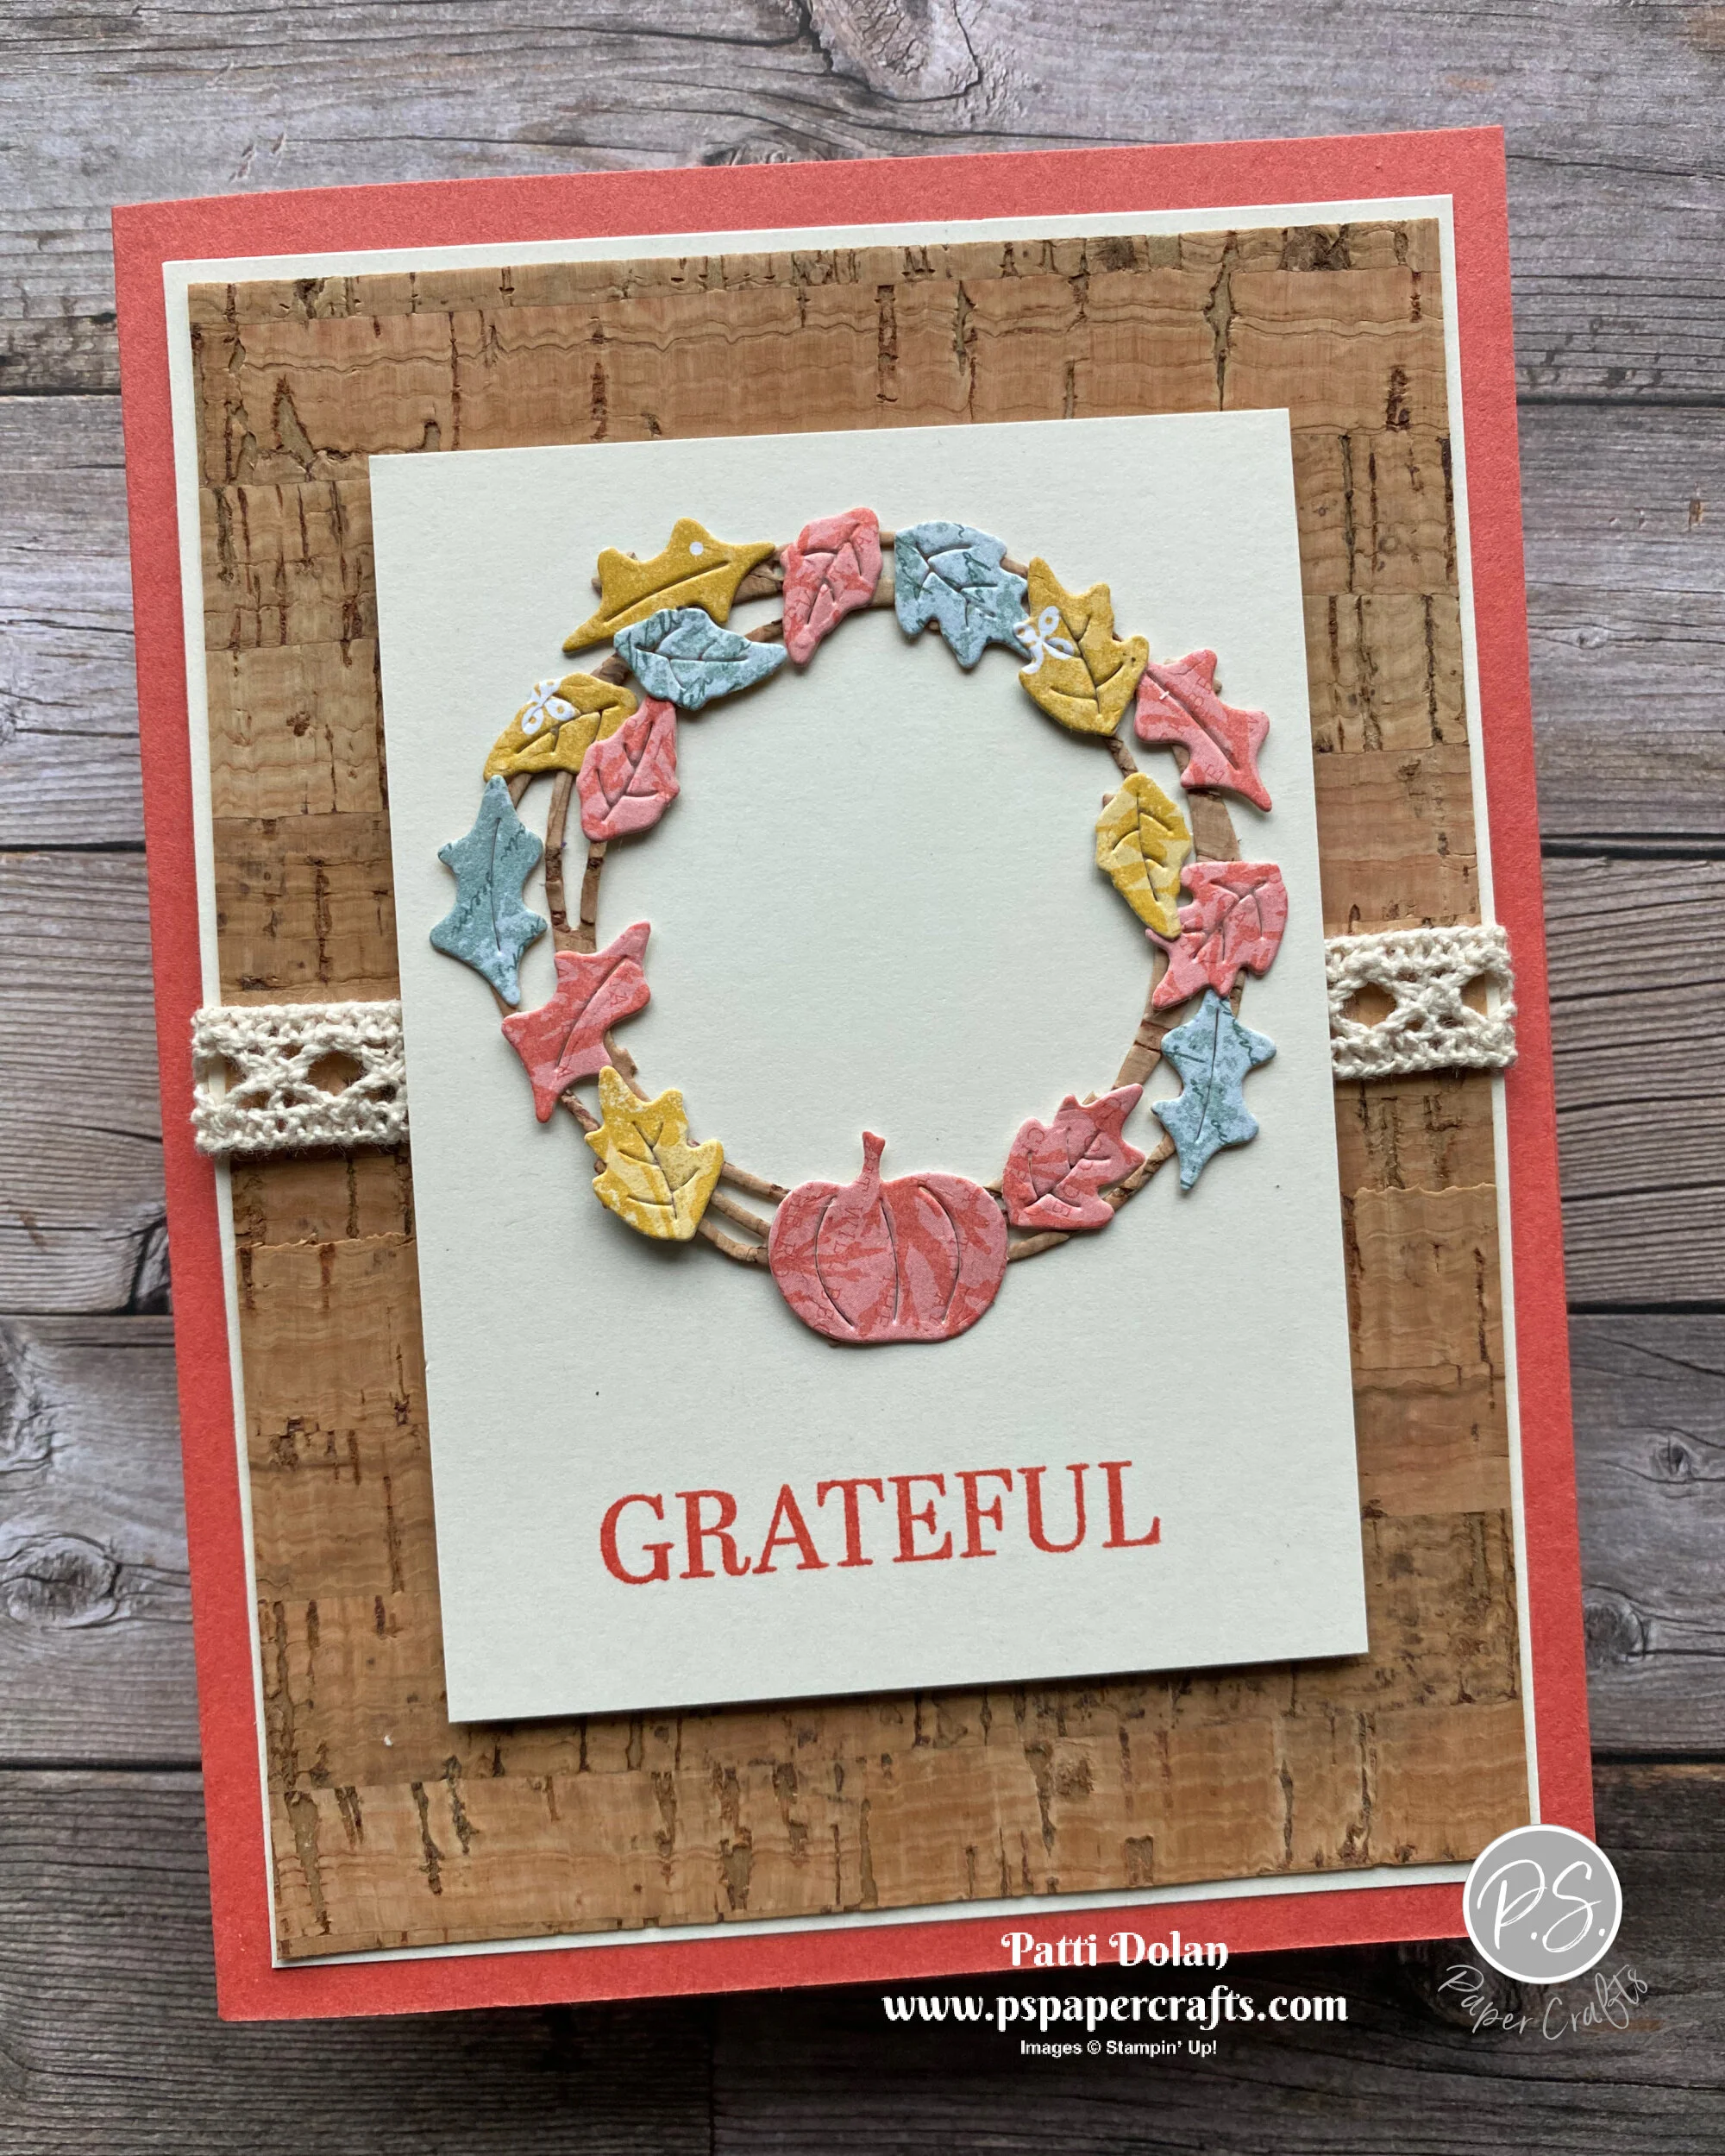
In the video I’ll show you a sneak peak of the Tutorial pdf that you can get for FREE when you place an order from my online store. To make this card I cut the wreath from the Cork Specialty Paper and the leaves from the Harvest Meadow Designer Series Paper.

Shop Here


Tips & Instructions

  • Calypso Coral Card Base - 5 1/2 x 8 1/2, score at 4 1/4

  • Very Vanilla Layer - 5 1/8 x 3 7/8

  • Cork Specialty Paper - 5 x 3 3/4, adhere to Very Vanilla Layer. Wrap piece of Diamond Weave Ribbon around layers and adhere to back.  Adhere layers to card base.

  • Very Vanilla Layer - 3 3/4 x 2 3/4, stamp sentiment with Calypso Coral Ink.

  • Cut wreath (with stars) from the Seasonal Swirl Dies from Cork Specialty Paper.

  • Cut leaves from various patterns from the Harvest Meadow Designer Series Paper using both sets of leaf dies from the Seasonal Swirl Dies.  Cut pumpkin from a Calypso Coral pattern.

  • Adhere pumpkin and leaves around the leaves covering the stars.  You can snip off some stars if needed.

  • Stamp sentiment with Calypso Coral Ink on smaller Very Vanilla Layer.  Adhere wreath.

  • Adhere layer to card using Dimensionals.  


On the inside stamp the greenery with Soft Succulent, Calypso Coral and Bumblebee Inks. You can stamp off first if you want a lighter shade.

 
Harvest Meadow Autumn Wreath inside.jpeg
 

Each month I collaborate with 11 other Demonstrators to create a tutorial bundle. It contains instructions with pictures and measurements for 12 beautiful projects. You can get this bundle for FREE if you place an order from my Online Store during the month of September.

I make this available each month for my customers. The suites change month-to-month. You can also purchase it if you want by clicking the Tutorials button at the top of my website.

 
Screen Shot 2021-09-09 at 8.47.49 PM.png
 

Supply List

Love Patti.png
Shop Here
 

Be Cool - Be Chill - Be Merry!

Here’s another cute card using the Penguin Playmates Designer Series Paper. I fussy cut this sweet polar bear from the paper.

 
Penguin Playmates Be Cool Card2.jpeg
 

The Penguin Playmates Designer Series Paper is a FREE Sale-a-bration item when you purchase $50 in product during this promotion. It coordinates with the Penguin Place Bundle.

 
Screen Shot 2021-09-08 at 9.38.10 PM.png
 

I love all the texture on this card with the embossed layer, scalloped layer and the pretty White Glittered Organdy Ribbon.

 
Penguin Playmates Be Cool Closeup.jpeg
 

The Star-Crossed Embossing Folder is so fun. You get two different embossed patterns with one run through your machine.

 
Screen Shot 2021-09-08 at 9.52.37 PM.png
 

Tips & Instructions

  • Misty Moonlight Card Base - 5 1/2 x 8 1/2, score at 4 1/4

  • Basic White Layer - 5 1/4 x 4, emboss with the Star-Crossed Embossing Folder.

  • Wrap piece of White Glittered Organdy Ribbon around the layer, adhering it to the back. Adhere layer to card.

  • Basic White Cardstock - cut using the second largest scalloped rectangle from the Scalloped Contours Dies.

  • Penguin Playmates Designer Series Paper - 3 7/8 x 2 5/8, adhere to scalloped rectangle and then adhere to card.

  • Fussy cut the bear and adhere to card using Dimensionals.

  • Stamp sentiment on 3/8” strip of Basic White with Misty Moonlight Ink. Punch each end with Banners Pick A Punch. Adhere to card using Dimensionals.

  • Tie bow and adhere to card using a Glue Dot.

 
Penguin Playmates Be Cool Card1.jpeg
 

On the inside stamp sentiment with Misty Moonlight Ink. The sentiment is from the Poinsettia Petals Stamp Set. You can use whatever stamp set you have on hand. Fussy cut penguin and tree and adhere to inside layer. Stamp some snowflakes with Fresh Freesia Ink.

 
Penguin Playmates Be Cool inside.jpeg
 
Love Patti.png
Shop Here
 

Cutest Halloween - Hey Boo Card!

I finally got to use the Cutest Halloween Bundle and it is really so adorable. I used the Cute Halloween Designer Series Paper with it.

 
Cutest Halloween Hey Boo! Bundle.jpeg
 

In the video I’ll show you these products and how you can either stamp and punch the ghost, pumpkin and cat OR you can punch them from the Designer Series Paper. The sentiments in the stamp set are really so fun.


The Black Glitter Paper is gorgeous. I have it peeking out behind the sentiment label and behind the boo strip of Designer Series Paper. I stamped 2 ghosts and punched one from the Designer Series Paper.

 
Cutest Halloween Hey Boo! card2.jpeg
 

Tips & Instructions

  • Thick Basic White Card Base - 5 1/2 x 8 1/2, score at 4 1/4.

  • Cute Halloween Designer Series Paper Layer - 5 1/4 x 4, adhere to the card base.

  • Designer Series Paper Strip 4 1/4 x 3/4, adhere to 4 1/4 x 1 Black Glitter Strip and adhere to card.

  • Stamp 2 ghosts and faces on Basic White Cardstock with Black Memento Ink. Add some cheeks to the ghosts by stamping the small circle with Flirty Flamingo Ink, stamping off first to get a light shade.

  • Punch the stamped ghosts and one from the Designer Series Paper.

  • Cut smallest scalloped rectangle using the Stitched So Sweetly Dies from scrap of Basic White Cardstock and stamp sentiment with Black Memento Ink.

  • Cut second from smallest scalloped rectangle from Black Glitter Paper and adhere behind the sentiment label.

  • Arrange and adhere the sentiment label and ghosts to card front using Dimensionals.

 
Cutest Halloween Hey Boo! card1.jpeg
 

On the inside stamp sentiment, ghost with face, skulls with faces and spider with Black Memento Ink. Stamp some cheeks on the ghost using Flirty Flamingo Ink, stamping off first.

 
Cutest Halloween Hey Boo! inside.jpeg
 

Supply List

Love Patti.png
Shop Here
 

Christmas Stamp A Stack

Sign up for this month’s Christmas Stamp A Stack where you’ll get kits to make  16 beautiful cards, 4 designs, 4 of each. 

I used the Tidings Of Christmas Designers Series Paper which is great for the holiday season. 

Here’s a sneak peak of the projects you’ll make.

 
September Christmas Stamp A Stack.jpeg
 

Email patti@pspapercrafts.com to sign up!!!

Deadline September 16, 2021

Here's what you get:

  • 16 card kits, including envelopes, layers and die cuts

  • Over $25 product goody bag (you'll use to make the cards)

  • PDF & videos with complete measurements & instructions

Class Fee Options:

  • Christmas Stamp A Stack - $50 ($42 for local pickup)

  • Add On Tidings & Trimmings Stamp Set - $68.00

  • Add on Tidings & Trimmings Bundle - $90.50

Other Info:

  • Email me and I will send you a PayPal Invoice.

  • Payment due by September 16.

  • I will pick up the shipping and tax for any Add-Ons.

  • If there is a backordered product, there may be a delay in shipping but I don't see a problem at this time.

  • Invite a friend and I will include a free gift with your kits.

Email patti@pspapercrafts.com to sign up!!!

Deadline September 16, 2021

Love Patti.png
Shop Her
 

Simple Beauty of Friendship Inspire Card

One of my favorite Stampin’ Up! products is their Designer Series Paper. I makes it so easy to create a quick card like the one I made today.

 
Beauty Of Friendship - Inspire Card2.jpeg
 

I used the Beauty Of The Earth Designer Series Paper which has great fall and winter patterns. These are great for masculine cards.

 
Screen Shot 2021-09-06 at 9.05.45 PM.png
 

Tips & Instructions

  • Old Olive Card Base - 5 1/2 x 8 1/2, score at 4 1/4.

  • Basic White Layer - 5 3/8 x 4 1/8, adhere to card base.

  • Beauty Of The Earth Designer Series Paper Layer - 5 1/4 x 4, adhere to card.

  • Cut Basic White Cardstock with the largest Tailored Made Tags Die. Stamp the background evergreen with Old Olive Ink, stamping off first. Stamp the detailed evergreen directly with Old Olive Ink. Stamp sentiment with Old Olive Ink.

  • Cut the small piece for the hole reinforcement from a scrap of Old Olive Cardstock and adhere around the hole.

  • Tie 2 pieces of Baker’s Twine through the hole and into a bow.

  • Adhere tag to card on an angle with Dimensionals.

 
Beauty Of Friendship - Inspire Card1.jpeg
 

On the inside stamp the sentiment with Old Olive Ink and stamp the evergreen tree like you did on the tag.

 
Beauty Of Friendship - Inspire inside.jpeg
 

Supply List

Love Patti.png
Shop Here
 

Sketch Saturday - Poinsettia Petals

I was so excited to see this week’s sketch was a slim line card. I used the Poinsettia Petals Stamp Set and coordinating Poinsettia Dies to make the focal piece for the card.

 
Sketch Saturday - Poinsettia Petals1.jpeg
 

Isn’t this a great sketch? It’s for the weekly Atlantic Hearts Sketch Challenge.

 
Screen Shot 2021-09-04 at 8.41.47 PM.png
 

The poinsettias were cut from the Snowy White Velvet Sheets. I used Red Foil Sheets to cut those little dots for the centers. They turned out so pretty; the picture doesn’t do them justice.

 
Sketch Saturday - Poinsettia Petals closeup.jpeg
 

Tips & Instructions

  • Evening Evergreen Card Base - 7 1/2 x 8 1/2, score at 3 3/4 (slim line card).

  • In Good Taste Designer Series Paper - 8 1/4 x 3 1/2, adhere to card base.

  • Basic White Cardstock - punch with Tailored Tag Punch, stamp sentiment. I covered the “Merry” with a Post-It Note and inked up the “Christmas” with Real Red Ink. Remove the Post-It Note and stamp on the label. Clean your stamp and repeat covering Christmas this time.

  • Evening Evergreen Cardstock - punch with Tailored Tag Punch, cut in half horizontally, spread apart and adhere to back of the label creating a border.

  • Cut 5 small poinsettias from a Snowy White Velvet Sheet using the Poinsettia Dies. Cut 5 sets of the tiny dots using the flower center die from a Red Foil Sheet.

  • Adhere 5 tiny dots to the center of each flower using Liquid Glue. I used the putty side of the Take Your Pick Tool to help with this.

  • Cut 4 small leaves from Evening Evergreen Cardstock.

  • Cut 1 berry spray from a Red Foil Sheet.

  • Adhere the leaves and spray to back of the label. Adhere label to card and adhere the poinsettias to label using Glue Dots.

  • Add some Wonderful Gems to card.

 
Sketch Saturday - Poinsettia Petals.jpeg
 

The inside layer is 8 1/4 x 3 1/2. Stamp the sentiment with Real Red Ink. Stamp the pine branches with Evening Evergreen Ink, stamping direct and then stamping off first. Stamp the berry outline with Evening Evergreen Ink. and the berries with Real Red Ink.

 
Sketch Saturday - Poinsettia Petals inside.jpeg
 

Supply List

Love Patti.png
Shop Here
 

Holly Jolly Christmas Card!

This was such a fun card to make using pieces of the Painted Christmas Designer Series Paper and the Wintry 3D Embossing Folder. Isn’t that ribbon for the bow gorgeous!!!

 
Holly Jolly Christmas Card2.jpeg
 

The Painted Christmas Designer Series Paper has beautiful patterns with holly, berries, pinecones and other seasonal greenery.

 
Screen Shot 2021-08-05 at 1.07.32 PM.png
 

The Wintry 3D Embossing Folders include 2 folders; an elegant pine bough pattern and a beautiful snowflakes with swirls pattern.

 
Screen Shot 2021-09-02 at 8.43.25 PM.png
 

Tips & Instructions

  • Evening Evergreen Card Base - 5 1/2 x 8 1/2, score at 4 1/4

  • Basic White Layer - 5 1/4 x 4

  • Painted Christmas Designer Series Paper (with berries) - 3 1/2 x 1 7/8

  • Pear Pizzazz Cardstock - 3 1/2 x 1 7/8, emboss with pine bough folder from the Wintry 3D Embossing Folders.

  • Painted Christmas Designer Series Paper (greenery) - 3 7/8 x 1 1/2

  • Arrange layers on white layer as shown and adhere, then adhere to card base.

  • Stamp sentiment on Basic White Cardstock with Cherry Cobbler Ink. Cut with Seasonal Label Dies. Use the small die to cut the slit for the ribbon (see the circled die below).

 
Seasonal Label Dies.png
 
  • Pull piece of Cherry Cobbler & Gold Metallic Ribbon through the slit and tie a bow. Adhere label to card using Dimensionals.

  • Add some gold Brushed Metallic Adhesive Backed Dots.


On the inside stamp the sentiment with Cherry Cobbler Ink. Stamp greenery with Pear Pizzazz Ink and add some berries with Cherry Cobbler Ink.

 
Holly Jolly Christmas inside.jpeg
 

Supply List

Love Patti.png
Shop Here
 

Nature's Harvest Sympathy Card

I made this pretty Sympathy Card using the Nature’s Harvest and Inspired Thoughts Stamp Sets. I love these cone flowers. I had them in my garden when I lived in NY.

 
Nature's Harvest Sympathy Card2.jpeg
 

I used Stampin’ Blends to color the flowers. I used Rich Razzleberry which is no longer available but you can use a Stampin’ Write Marker or Ink Pad with a Blender Pen. The flower centers were colored with Dark So Saffron and then I added some Wink Of Stella to the flowers.

 
Nature's Harvest Sympathy blends.jpeg
 

The Nature’s Harvest Stamp set has this beautiful cone flower and I thought it would work well for a sympathy card.

 
Screen Shot 2021-09-01 at 8.54.21 PM.png
 

Tips & Instructions

  • Rich Razzleberry Card Base - 5 1/2 x 8 1/2, score at 4 1/4.

  • So Saffron Layer - 5 1/4 x 4, emboss with the Timeworn Type 3D Embossing Folder and adhere to card base.

  • Basic White Cardstock, cut with the Scalloped Contour Dies.

  • Stamp flower and sentiment with Black Memento Ink.

  • Color with Stampin’ Blends; the flower petals with Rich Razzleberry and the flower centers with Dark So Saffron. Add some Wink of Stella. Color stems and leaves with Old Olive. Adhere layer to card using Dimensionals.

  • Adhere clear Elegant Faceted Gems.

 
Nature's Harvest Sympathy Card1.jpeg
 

On the inside stamp the sentiment and flower with Black Memento Ink. Color flower like you did on the card front.

 
Nature's Harvest Sympathy inside.jpeg
 

Supply List

Love Patti.png
Shop Here
 

Painted Christmas - Love & Joy

The Painted Christmas Suite in the Mini Catalog has beautiful products. I used the Christmas Season and Christmas To Remember Bundles from the suite to make this card. I love the greenery and pinecones.

 
Painted Christmas - Love & Joy card2.jpeg
 

In the video I’ll show you how to use these amazing dies to create the large floral background with the pinecones. They layer together to create a pretty Christmas bough.


The pinecones were made with Early Espresso Cardstock and Copper Foil Sheets. This combination is gorgeous!

 
Painted Christmas - Love & Joy closeup.jpeg
 

Tips & Instructions

  • Cherry Cobbler Card Base - 5 1/2 x 8 1/2, score at 4 1/4.

  • Crumb Cake Layer 5 1/4 x 4, adhere to card base.

  • Cut large floral pieces from Evening Evergreen and Soft Succulent Cardstock. Adhere together using Liquid Glue and adhere to card.

  • Cut 5 pinecones (2 large and 3 small) using Early Espresso Cardstock. for the intricate top layer and Copper Foil for the background layer. Adhere together and adhere to card.

  • Stamp sentiment on Basic White Cardstock using Cherry Cobbler Ink. Cut with the label from the Seasonal Labels Dies and adhere to card using Dimensionals.

  • Add Cherry Cobbler Decorative Matte Dots to label.

 
Painted Christmas - Love & Joy card1.jpeg
 

On the inside stamp sentiment with Cherry Cobbler Ink and the greenery with Evening Evergreen and Soft Succulent Inks.

 
Painted Christmas - Love & Joy inside.jpeg
 

Supply List

Love Patti.png
Shop Here
 

Feels Like Home Missing You Card

You can create this beautiful scene with one stamp from the Feels Like Home Stamp Set. I embossed it in gold and used the brick pattern from the Bloom Where You’re Planted Designer Series Paper. So easy but so pretty!

 
Feels Like Home Missing You Card2.jpeg
 

The Feels Like Home Stamp Set is free during Sale-A-Bration with a $50 product order. The set has beautiful images and heartfelt sentiments.

 
Screen Shot 2021-08-30 at 9.26.06 PM.png
 

I love the patterns on the Bloom Where You’re Planted Designer Series Paper. This brick pattern worked so well with this stamp set.

 
Screen Shot 2021-08-30 at 9.26.28 PM.png
 

Tips & Instructions

  • Cinnamon Cider Card Base - 5 1/2 x 8 1/2, score at 4 1/4

  • Basic White Layer - 5 1/4 x 4

  • Bloom Where You’re Planted Designer Series Paper Layer - 5 1/8 x 3 7/8

  • Basic White Layer - 4 x 3, stamp image with Versamark Ink and heat emboss with Gold Embossing Powder. Stamp sentiment with Cinnamon Cider Ink.

  • Cinnamon Cider Layer - 4 1/8 x 3 1/8, adhere behind stamped layer and adhere to card using Dimensionals.

 
Feels Like Home Missing You Card1.jpeg
 

On the inside stamp flower pot with Versamark Ink and heat emboss with Gold Embossing Powder.

 
Feels Like Home Missing You inside.jpeg
 

Supply List

Love Patti.png
Shop Here
 

Sketch Saturday - Whimsical Trees

I love the Fresh Freesia and Misty Moonlight color combo that I used on yesterday’s penguin cards so I decided to use it for this week’s sketch challenge.

 
Sketch Saturday - Whimsical Trees Card1.jpeg
 

The sketch is another from the Atlantic Hearts Sketch Challenge. I love doing their challenges.

 
Screen Shot 2021-08-27 at 10.23.56 PM.png
 

Tips & Instructions

  • Fresh Freesia Card Base - 4 1/4 x 11, score at 5 1/2 (top folding)

  • Vellum Cardstock - 4 x 3

  • Whimsy & Wonder Designer Series Paper 4 1/4 x 1 3/4, adhere to Vellum, then adhere to card putting adhesive only behind the Designer Series Paper.

  • Adhere a snowflake from the Wonderful Snowflakes pack.

  • Stamp sentiment with Misty Moonlight Ink on 1/2” strip of Basic White. Punch both ends with the Banners Pick A Punch and adhere using Dimensionals.

  • Add some Subtle Shimmer Sequins.

 
Sketch Saturday - Whimsical Trees card2.jpeg
 

The Wonderful Snowflakes feature an iridescent foil and can be easily added to tags and gifts. You get 24 pre-cut 2-3/8" x 2-3/4" snowflakes in the package.

 
Screen Shot 2021-08-27 at 10.42.29 PM.png
 

On the inside stamp sentiment with Misty Moonlight Ink and the tree with Fresh Freesia Ink.

 
Sketch Saturday - Whimsical Trees inside.jpeg
 

Supply List

Love Patti.png
Shop Here
 

Simple Fun Fold Book Binding Card

Making this Book Binding Fun Fold Card was so easy and I love how it turned out. Aren’t they so cute!

 
Book Binding Penguin Card both.jpeg
 

In the video I’ll walk you through the steps to make these cards. You can use this design for any occasion. I made these for Christmas; one for a boy and one for a girl.


The Penguin Place Bundle has a fun stamp set and a coordinating punch.

 
Screen Shot 2021-08-26 at 9.15.34 PM.png
 

The Penguin Playmates Designer Series Paper had some really fun patterns and the colors are great. You can get this paper for free during Sale-A-Bration with a $50 product purchase.

 
Screen Shot 2021-08-26 at 9.16.25 PM.png
 

Tips & Instructions

  • Misty Moonlight Card Base - 4 1/4 x 11, score at 4 1/4 and 5 1/2

  • Penguin Playmates Designer Series Paper - snowflake pattern - 4 x 4 and striped pattern 4 x 1. Adhere to card base.

  • Open card and put strong adhesive on the 1 1/4” part. Color piece of Fresh Freesia Open Weave Ribbon with a Dark Misty Moonlight Blends Marker. Adhere ribbon to the card where you put the strong adhesive and close card. Tie the ribbon in a knot.

  • Basic White Layer - 2 3/4 x 2 3/4, stamp sentiment with Misty Moonlight Ink at the bottom. Stamp penguin with Black Memento Ink. Stamp feet and beak with Mango Melody Ink. Stamp hat and bow-tie with Misty Moonlight Ink. Stamp snowflakes with Fresh Freesia Ink.

  • Adhere layer to a 3 x 3 piece of Misty Moonlight Cardstock and adhere to card using Dimensionals.

 
Book Binding Penguin Card blue.jpeg
 

For the “girl” version, stamp the hat and scarf with Fresh Freesia Ink and use Fresh Freesia Open Weave Ribbon.

 
Book Binding Penguin Card pink.jpeg
 

On the inside stamp trees with Just Jade Ink and snowflakes with Fresh Freesia Ink. Stamp sentiment (from Christmas To Remember Stamp Set) with Misty Moonlight Ink.

 
Book Binding Penguin inside.jpeg
 

Supply List

Love Patti.png
Shop Here
 

In Symmetry - Catalog CASE

I CASEd (Copy And Share Everything) this card from the Annual Catalog. I changed up the colors a little bit but the basic layout is the same.

 
In Symmetry Catalog CASE card2.jpeg
 

There are some pretty flower images and great sentiments in this stamp set.

 
In Symmetry Catalog CASE stamp.jpeg
 

The Sweet Symmetry Designer Series Paper is full of vibrant patterns. They remind me of Pennsylvania Dutch.

 
Screen Shot 2021-08-23 at 10.20.01 PM.png
 

Tips & Instructions

  • Calypso Coral Card Base - 5 1/2 x 8 1/2, score at 4 1/4

  • Sweet Symmetry Designer Series Paper - 5 1/4 x 3 1/2

  • Basic White Layer - 3 1/2 x 3 1/2, stamp large flower with Calypso Coral Ink, stamping off first to get a lighter shade. Stamp stem and small leaves with Just Jade Ink. You may need to extend the stem by cleaning the stamp and inking just a small portion, then stamping to line up with the stem.

  • Adhere layers to card as shown.

  • On a strip of 5/8” Bumblebee Cardstock, stamp the sentiment with Versamark Ink and heat emboss with White Embossing Powder. Cut one end on an angle and then cut to fit.

  • Take a piece of Flirty Flamingo Metallic Ribbon and fold to 3 layers, adhering together with Glue Dots. Adhere to sentiment label with a Glue Dot, then adhere label to card using Dimensionals.

  • Add some Artistry Blooms Adhesive-Backed Sequins.

 
In Symmetry Catalog CASE card1.jpeg
 

On the inside stamp flower with Calypso Coral Ink and the stem and leaves with Just Jade Ink.

 
In Symmetry Catalog CASE inside.jpeg
 

Supply List

Love Patti.png
Shop Here
 

Sketch Saturday - Snowman Season

I made this cute monochromatic winter card for this week’s sketch challenge using the Snowman Season Stamp Set and Peaceful Place Designer Series Paper.

 
Sketch Saturday - Snowman Season card1.jpeg
 

Here’s the sketch I used from this week’s Atlantic Hearts Sketch Challenge. I love doing these challenges, it really stretches my creativity.

 
Screen Shot 2021-08-20 at 1.47.32 PM.png
 

The stamp set is an older one, from the Annual Catalog. It has such fun images and I’ve used it quite a bit over the last couple of years. There’s a coordinating punch that punches out the snowman, hat, nose and arms.

 
Sketch Saturday - Snowman Season stamp.jpeg
 

The Peaceful Place Designer Series Paper is absolutely gorgeous! It’s one of my favorite papers in the Mini Catalog. Some of the papers have silver accents like the snowflakes on the sheet I used for this card.

 
Screen Shot 2021-08-20 at 8.12.16 PM.png
 

Tips & Instructions

  • Basic Gray Card Base - 5 1/2 x 8 1/2, score at 4 1/4

  • Basic White Layer - 5 3/8 x 4 1/8, adhere to card base.

  • Peaceful Place Designer Series Paper Layer - 5 1/4 x 4, adhere to card.

  • Cut 2 strips of the Designer Series Paper at 3 3/4 x 3/4

  • Basic White Cardstock - 3 x 2, stamp snowman image and sentiment with Black Memento Ink. Color nose with Dark Pumpkin Pie Stampin’ Blend Marker. Color the snow, accents on the snowman, snowballs with Light Smoky Slate Stampin’ Blend Marker and then add some Wink Of Stella.

  • Adhere the stamped layer to a piece of Basic Gray Cardstock cut at 3 1/8 x 2 1/8.

  • Lay out the strips and the stamped layer to determine placement and then adhere the two strips. Adhere the stamped layer using Dimensionals.

  • Adhere 3 small sequins using dots of Liquid Glue. I used the Take Your Pick Tool to help with this.

 
Sketch Saturday - Snowman Season card2.jpeg
 

On the inside stamp sentiments with Black Memento Ink and snowflakes with Smoky Slate Ink.

 
Sketch Saturday - Snowman Season inside.jpeg
 

Supply List

Love Patti.png
Shop Here
 

Gorgeous Leaves Birthday Card

I love making my own background layer and the Gorgeous Leaves Stamp Set has beautiful leaf images for this technique. This is a great fall birthday card and perfect for a guy.

 
Gorgeous Leaves Card2.jpeg
 

The name of this stamp set describes it perfectly. These leaves are gorgeous! I love all the little splatter dots around the images.

 
Gorgeous Leaves Card - Stamp.jpeg
 

I used Crushed Curry, Cajun Craze and Merry Merlot for this card which are such beautiful autumn colors.

 
Gorgeous Leaves Card - Inks.jpeg
 

Tips & Instructions

  • Crushed Curry Card Base - 5 1/2 x 8 1/2, score at 4 1/4

  • Very Vanilla Layer - 5 1/4 x 4

  • Stamp leaves randomly on the Very Vanilla layer starting with the largest leaf first and then filling in with the smaller ones.

  • Wrap piece of Diamond Weave Ribbon around the stamped layer and adhere to back. Adhere to card base.

  • Stamp sentiment (from A Grand Kid Stamp Set) on scrap of Very Vanilla Cardstock using Merry Merlot Ink. Punch with Label Me Fancy Punch.

  • Punch a piece of Crushed Curry Cardstock with the Label Me Lovely Punch. Adhere behind the stamped label.

  • Adhere label to card using Dimensionals.

  • Add a Bumblebee Square Gem to label.

 
Gorgeous Leaves Card1.jpeg
 

On the inside stamp the sentiment with Merry Merlot Ink. Stamp the leaves with Crushed Curry, Merry Merlot and Cajun Craze Ink.

 
Gorgeous Leaves Card inside.jpeg
 

Supply List

Love Patti.png
Shop Here
 

Be Dazzling Gorgeous Leaves

The Be Dazzling Specialty Paper is so gorgeous and you can color it with Stampin’ Blends to make it even more beautiful!


In my video I’ll show you how to cut and color the Intricate Leaves with the Be Dazzling Specialty Paper to make this card.


The Gorgeous Leaves Stamp Set has beautiful leaf images which I stamped on the inside layer. The Intricate Leaves Dies can cut the stamped image and also has the dies for the leaves I used on these cards.

 
Screen Shot 2021-08-17 at 8.04.24 PM.png
 

The Be Dazzling Specialty Paper is a Sale-A-Bration Product which means you can get it for FREE when you spend $50 on Stampin’ Up! Products during the Sale-A-Bration event.

 
Screen Shot 2021-08-17 at 8.14.16 PM.png
 

Tips & Instructions

  • Old Olive Card Base - 5 1/2 x 8 1/2, score at 4 1/4

  • Basic White Layer - 5 1/4 x 4, emboss with the Timber 3D Embossing Folder.

  • Cut leaves from Be Dazzling Specialty Paper and color with Stampin’ Blends (Old Olive, Rich Razzleberry and Cinnamon Cider).

  • Wrap a piece of Fine Art Ribbon around the embossed layer and adhere to the back. Adhere layer to card base.

  • Arrange and adhere leaves to card using Liquid Glue.

  • Stamp sentiment (from Inspired Thoughts Stamp Set) with Old Olive Ink on Basic White Cardstock and punch with Tailored Tag Punch. Adhere to card using Dimensionals.

  • Tie bow with ribbon and adhere to label using a Glue Dot.

 
Be Dazzling Gorgeous Leaves Card1.jpeg
 

On the inside stamp sentiment if you want with Old Olive Ink. Stamp leaves with Old Olive Ink and also with Cinnamon Cider and Rich Razzleberry Inks, stamping off first.

 
Be Dazzling Gorgeous Leaves inside.jpeg
 

Supply List

Love Patti.png
Shop Here
 

Great Tidings - Three Wise Men Christmas Card

I made this beautiful Christmas Card using the Great Tidings Bundle. I love the cut out for the layer that the wisemen fit in.

 
Great Tidings - Three Wise Men2.jpeg
 

The stamp set has some beautiful sentiments. One of my favorite’s is the one I used; “Wise men still seek Him”. The dies fit the wisemen so nicely.


I really enjoyed coloring these three wisemen from the Great Tidings Stamp Set with Stampin’ Blends.

 
Great Tidings - Three Wise Men Blends.jpeg
 

Tips & Instructions

  • Night Of Navy Card Base - 5 1/2 x 8 1/2, score at 4 1/4

  • Basic White Layer - 5 3/8 x 4 1/8, adhere to card base.

  • Night Of Navy Layer - 5 1/4 x 4, cut out with large cut out die leaving room for the sentiment at the bottom. Adhere to card using Dimensionals.

  • Stamp star with Daffodil Delight Ink and cut out with coordinating die. Add some Wink Of Stella.

  • Stamp the 3 wisemen with Black Memento Ink on Basic White Cardstock.

  • Color the wisemen with Stampin’ Blends. The faces and hands were colored with Light Crumb Cake.

    • For the first one I used Dark Blackberry Bliss, Light Highland Heather, Light Mint Macaron and Daffodil Delight.

    • The second was colored with Light and Dark Balmy Blue and Dark Daffodil Delight; the gift is Dark Smoky Slate.

    • The third was colored with Dark Evening Evergreen, Light Blackberry Bliss, Light Soft Succulent and Dark & Light Smoky Slate; the gift is Light & Dark Balmy Blue.

  • Cut out the wisemen with coordinating dies and adhere them to the white layer behind the cut out.

  • Stamp sentiment on 1/2” strip of Basic White with Night Of Navy Ink. Punch both ends with the Banners Pick A Punch. Adhere using Dimensionals.

 
Great Tidings - Three Wise Men1.jpeg
 

On the inside stamp the sentiment with Night Of Navy Ink and the star with Daffodil Delight Ink. Stamp the gifts with Black Memento Ink and color with Stampin’ Blends. I used Dark & Light Balmy Blue, Dark Daffodil Delight, Light Highland Heather, Light Blackberry Bliss, Light Smoky Slate, Light Mint Macaron and Light Soft Succulent.

 
Great Tidings - Three Wise Men inside.jpeg
 

Supply List

Love Patti.png
Shop Here
 

Sketch Saturday - Penguin Place

I made this cute birthday card for my granddaughter for this week’s sketch challenge. I used the Penguin Place Bundle along with the Sale-A-Bration Penguin Playmates Designer Series Paper. So cute, right?

 
Sketch Saturday - Penguin Place.jpeg
 

Here’s the sketch for this week’s Atlantic Heart Sketch Challenge that I used for the card.

 
Screen Shot 2021-08-13 at 5.22.09 PM.png
 

The Penguin Place Bundle is so adorable. You can buy them separately but you save 10% if you purchase them as a bundle. There are so many little extras in the stamp set like a hat, antlers, presents and the cute bow I used.

 
Screen Shot 2021-08-13 at 5.13.27 PM.png
 

The Penguin Playmates Designer Series Paper is FREE if you spend $50 on Stampin’ Up! products (before shipping & tax). So purchase the bundle, a coordinating ink pad, cardstock and a package of Dimensionals and you can get the paper for free.

 
Screen Shot 2021-08-13 at 5.10.58 PM.png
 

Tips & Instructions

  • Fresh Freesia Card Base - 5 1/2 x 8 1/2, score at 4 1/4

  • Cut 2 strips of Penguin Playmates Designer Series Paper -

    • one at 5 1/4 x 1 3/4 (dots)

    • one at 5 1/4 x 1 1/4 (stripes)

  • Cut Basic White strip at 5 1/4 x 3/4 and emboss using the Dots Embossing Folder.

  • Adhere the 3 strips as shown on the card leaving a border around each.

  • Stamp the sentiment (from A Grand Kid Stamp Set) on Basic White Cardstock with Fresh Freesia Ink and cut using the Tasteful Labels Die.

  • Punch the penguin from the Designer Series paper with Penguin Punch. I didn’t have the punch….forgot to order it so I fussy cut it.

  • Stamp the bow with Fresh Freesia Ink and fussy cut. Adhere to penguin and then adhere penguin to label.

  • Adhere label to card using Dimensionals.

  • Tie bow with Fresh Freesia Open Weave Ribbon and add with a Glue Dot.

  • Add a Pastel Pearl to label.

 
Sketch Saturday - Penguin Place Card2.jpeg
 

On the inside stamp sentiment with Fresh Freesia Ink (from A Grand Kid Stamp Set). Stamp penguin with Black Memento Ink, beak and feet with Calypso Coral Ink and bow with Fresh Freesia Ink. Stamp balloon with Fresh Freesia Ink and string with Black Memento Ink.

 
Sketch Saturday - Penguin Place inside.jpeg
 

Supply List

Love Patti.png
Shop Here
 

Celebrate Sunflowers using Soft Pastels

I love how this card turned out using the Soft Pastels Assortment. I stamped the sunflowers and then colored with the pastels.

 
Celebrate Sunflowers using Soft Pastels card2.jpeg
 

Watch the video to see how to use the Soft Pastels Assortment. They were easy to apply and create a beautiful result.


These easy to use chalk pastels work with a variety of coloring tools like Stampin' Up!'s Sponge Daubers, Blending Brushes, and Water Painters.

 
Screen Shot 2021-08-12 at 11.22.12 PM.png
 

Tips & Instructions

  • Early Espresso Card Base - 5 1/2 x 8 1/2, score at 4 1/4

  • Very Vanilla Layer - 5 1/4 x 4

  • Stamp the large sunflower with Soft Suede Ink on the bottom left corner of the Very Vanilla Layer. Cut the sunflower from a piece of Post-It Note using the coordinating Sunflower Dies to create a mask.. Lay the Post-It Note flower over the stamped flower and stamp the leaves with Evening Evergreen Ink. Stamp the smaller sunflowers, masking the first when stamping the second.

  • Using the pastels, color the flowers, flower centers and leaves. I used Mango Melody, Poppy Parade and Granny Apple Green. Rub in the chalk using Sponge Daubers. Wipe with a tissue or paper towel.

  • Stamp sentiment (from the Sunny Sentiments Stamp Set) with Soft Suede Ink.

  • Adhere layer to card base.

  • Add a Genial Gem.

 
Celebrate Sunflowers using Soft Pastels card1.jpeg
 

On the inside stamp the large sunflower with Soft Suede Ink and color with the Soft Pastels.

 
Celebrate Sunflowers using Soft Pastels inside.jpeg
 

Supply List

Love Patti.png
Shop Here
 

Pretty Pumpkin Fall Card

I made this beautiful card using the Detailed Pumpkin Dies and Paper Lattice. I used the Copper Foil Sheets for the pumpkin and the embossed strip. A few Brushed Metallic Dots finish off the card. No sentiment needed!

 
Pretty Pumpkin Fall Card2.jpeg
 

The Detailed Pumpkin Dies in the Pretty Pumpkins Bundle are really cool. I love the intricate pattern on the one that I used on the card.

 
Screen Shot 2021-08-11 at 5.17.20 PM.png
 

Tips & Instructions

  • Pumpkin Pie Card Base - 5 1/2 x 8 1/2, sore at 4 1/4

  • Very Vanilla Layer - 5 1/8 x 3 3/8, adhere behind the Paper Lattice. Adhere to card base.

  • Copper Foil Strip - 4 x 5/8, emboss with the Tasteful Textile 3D Embossing Folder. Adhere to card.

  • Cut pumpkin from a piece of Copper Foil Sheet using the Detailed Pumpkin Dies. Adhere to a 3 3/4 x 2 1/4 piece of Vellum Cardstock. Add some Brushed Metallic Adhesive Dots to the vellum. Adhere vellum layer to card putting small amounts of Liquid Glue behind the dots and the pumpkin (to hide the glue).

 
Pretty Pumpkin Fall Card1.jpeg
 

On the inside stamp the pumpkin image with Versamark and heat emboss with Copper Embossing Powder.

 
Pretty Pumpkin Fall Card inside.jpeg
 

Supply List

Love Patti.png
Shop Here