Sketch Saturday - To A Wild Rose

 
Card Sketch - To A Wild Rose.jpg
 

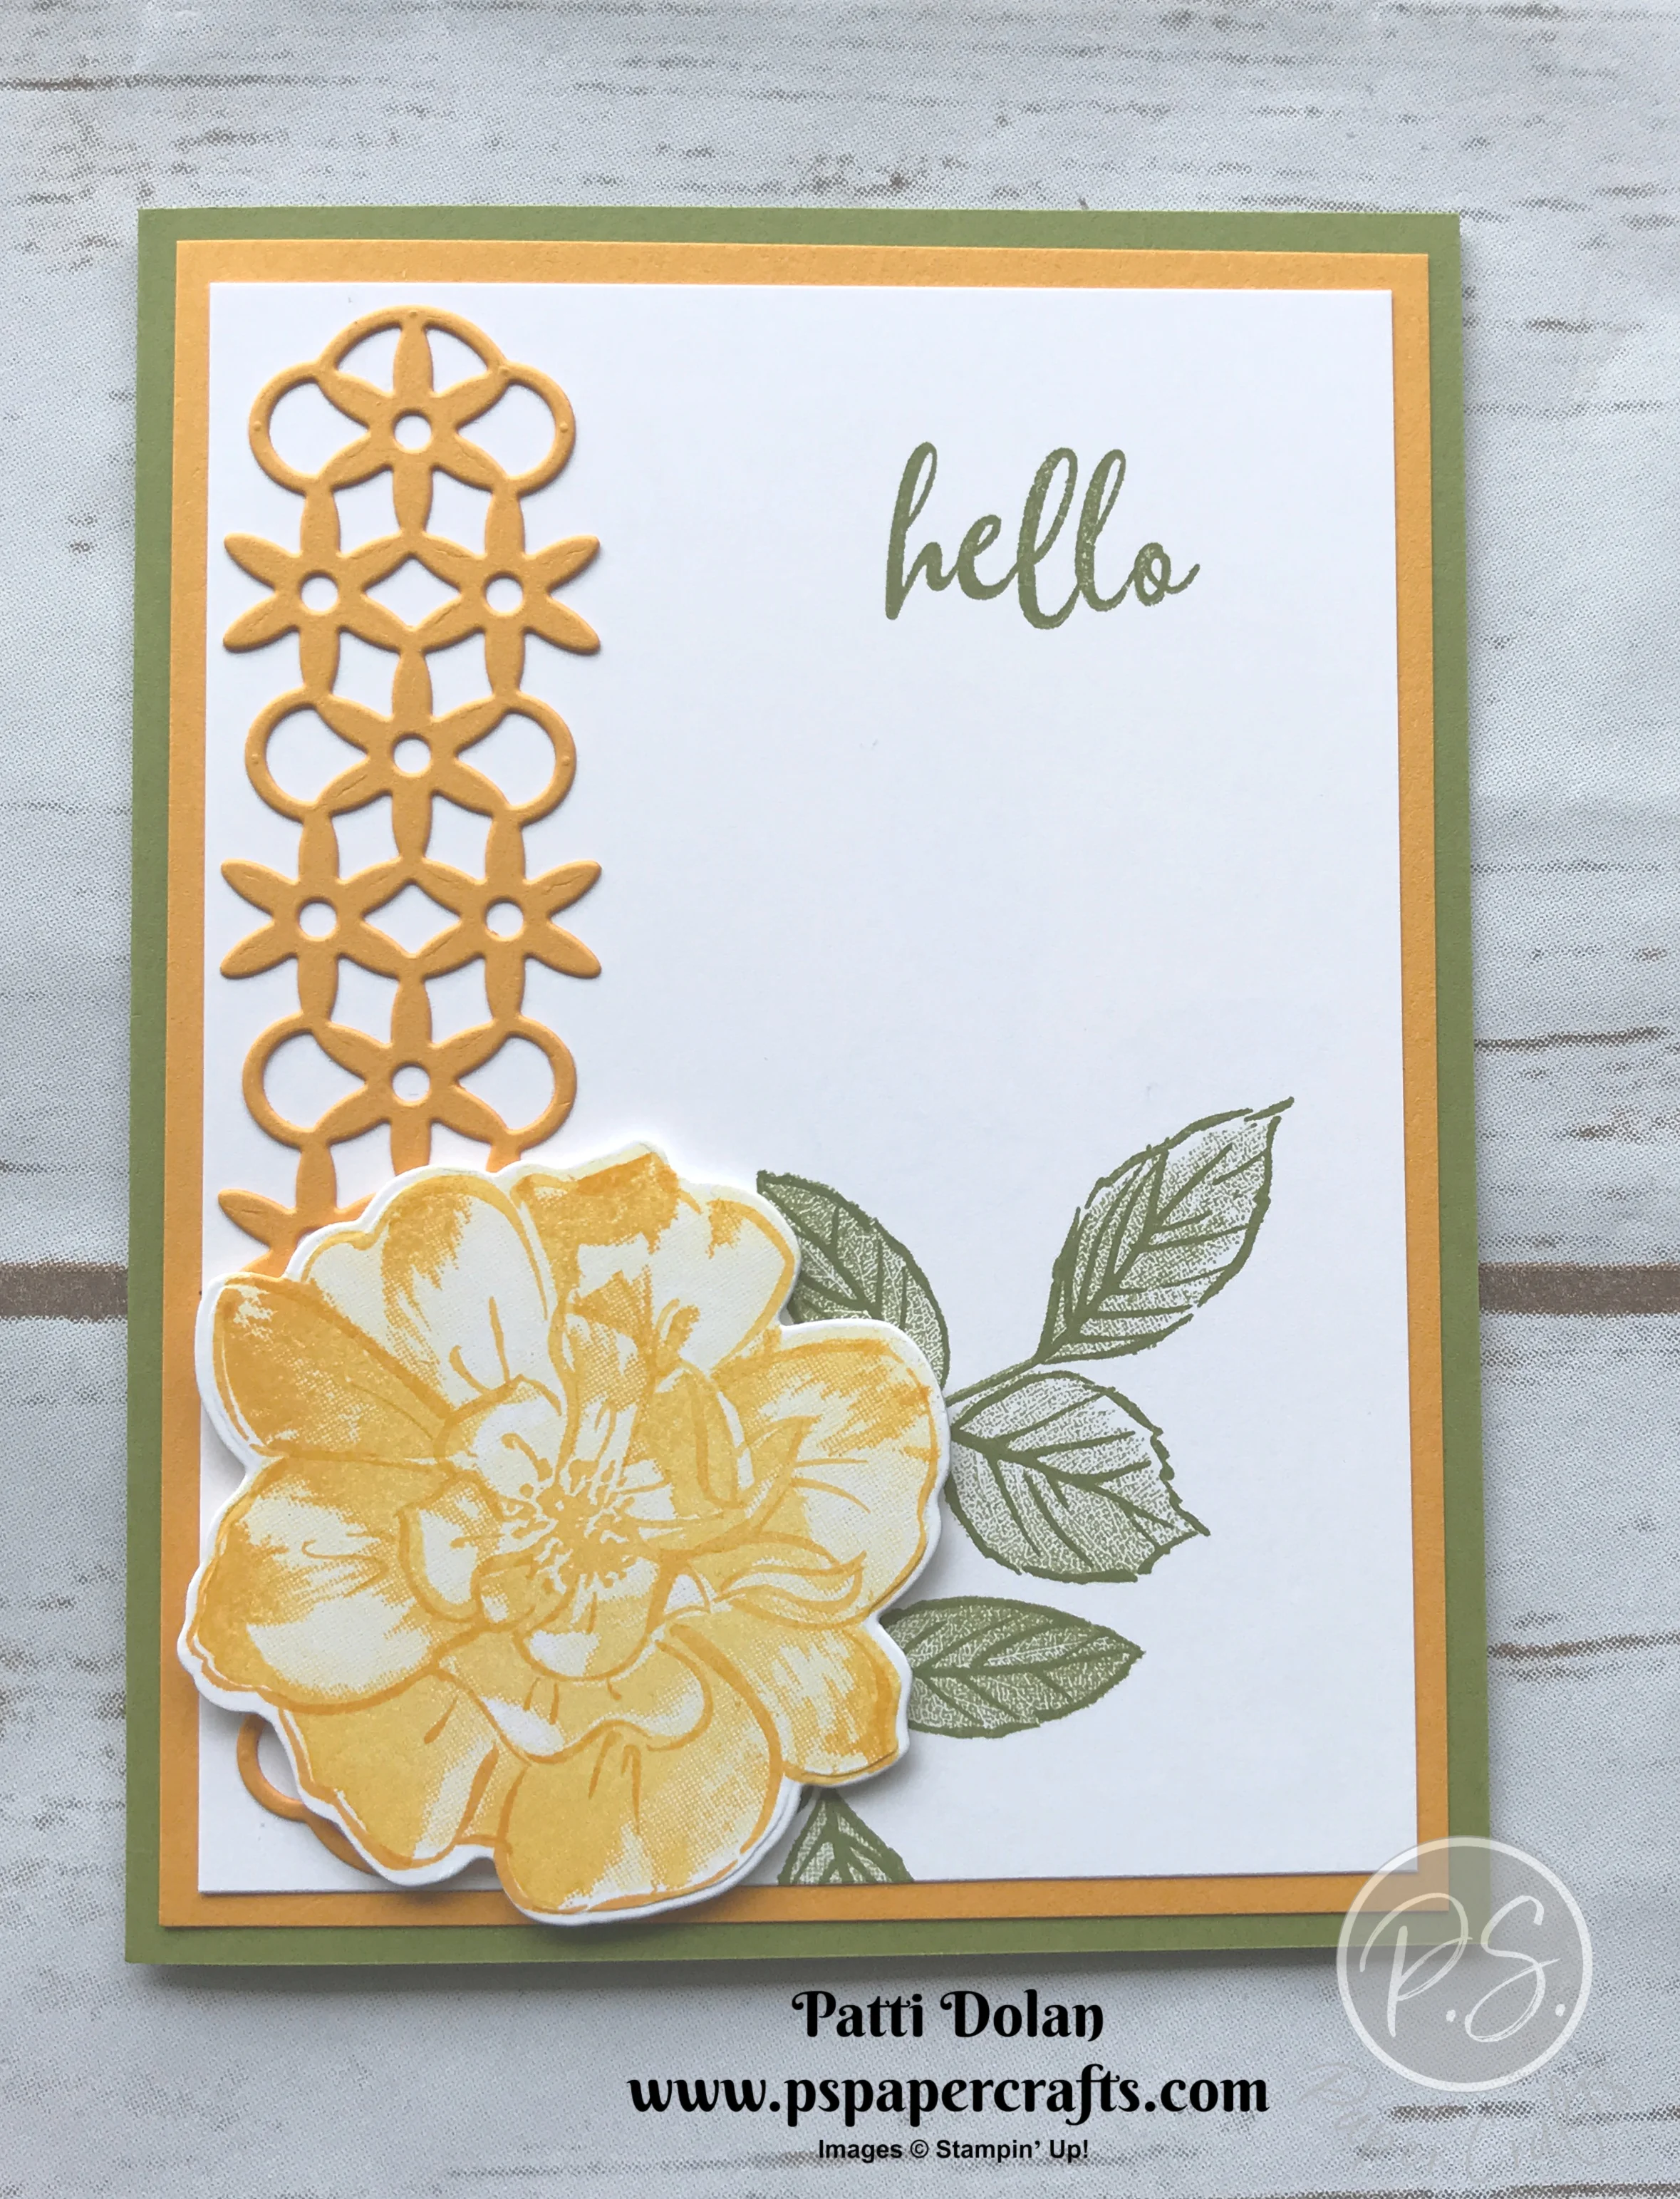
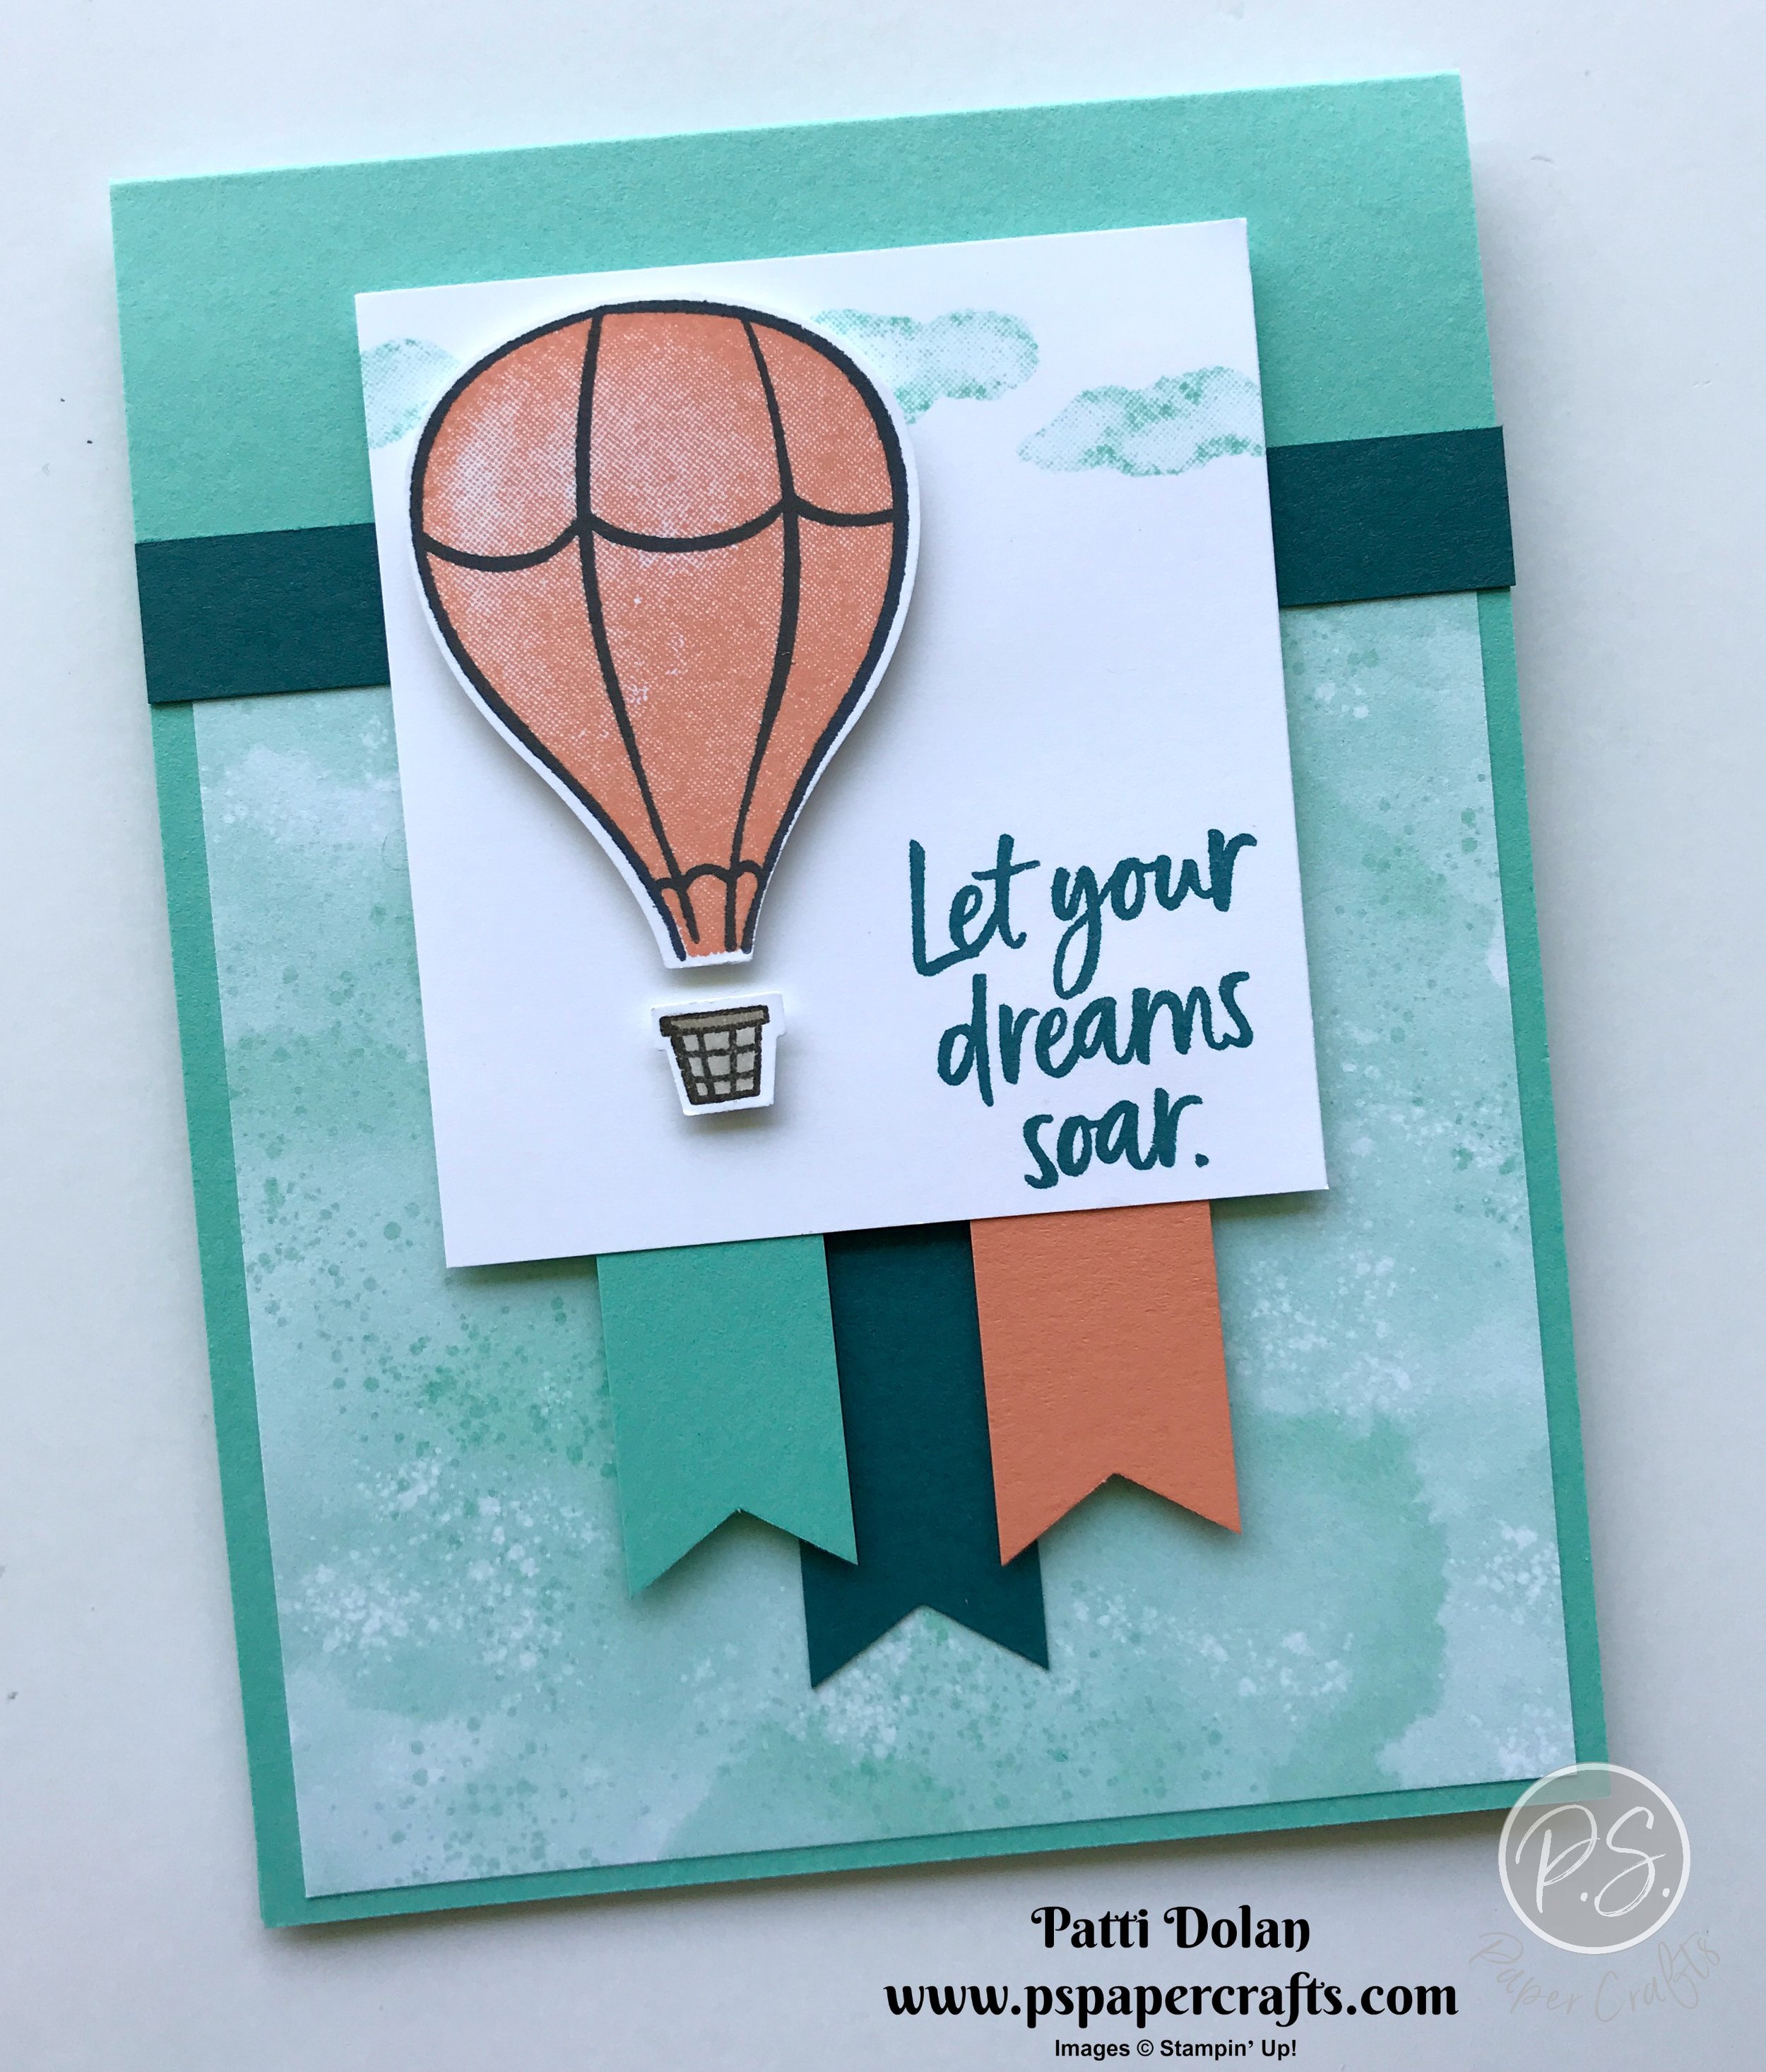
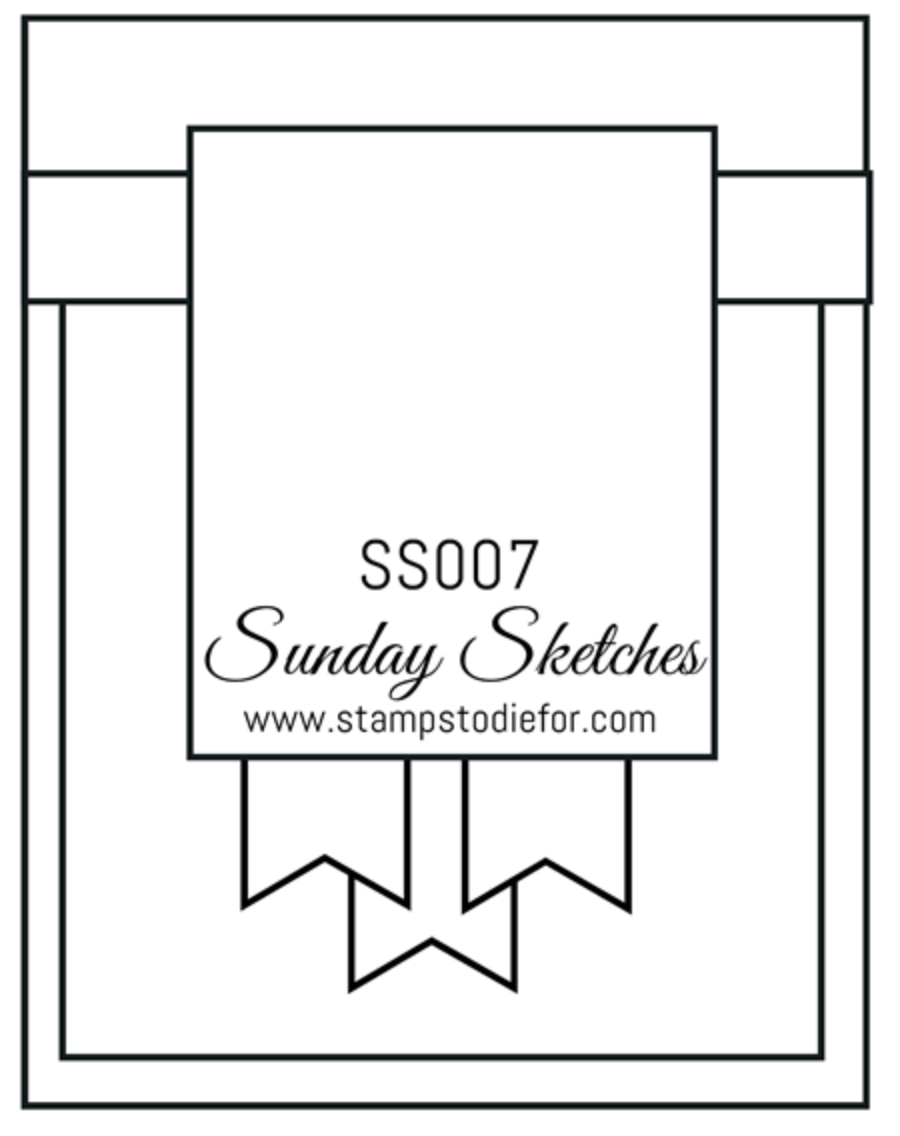
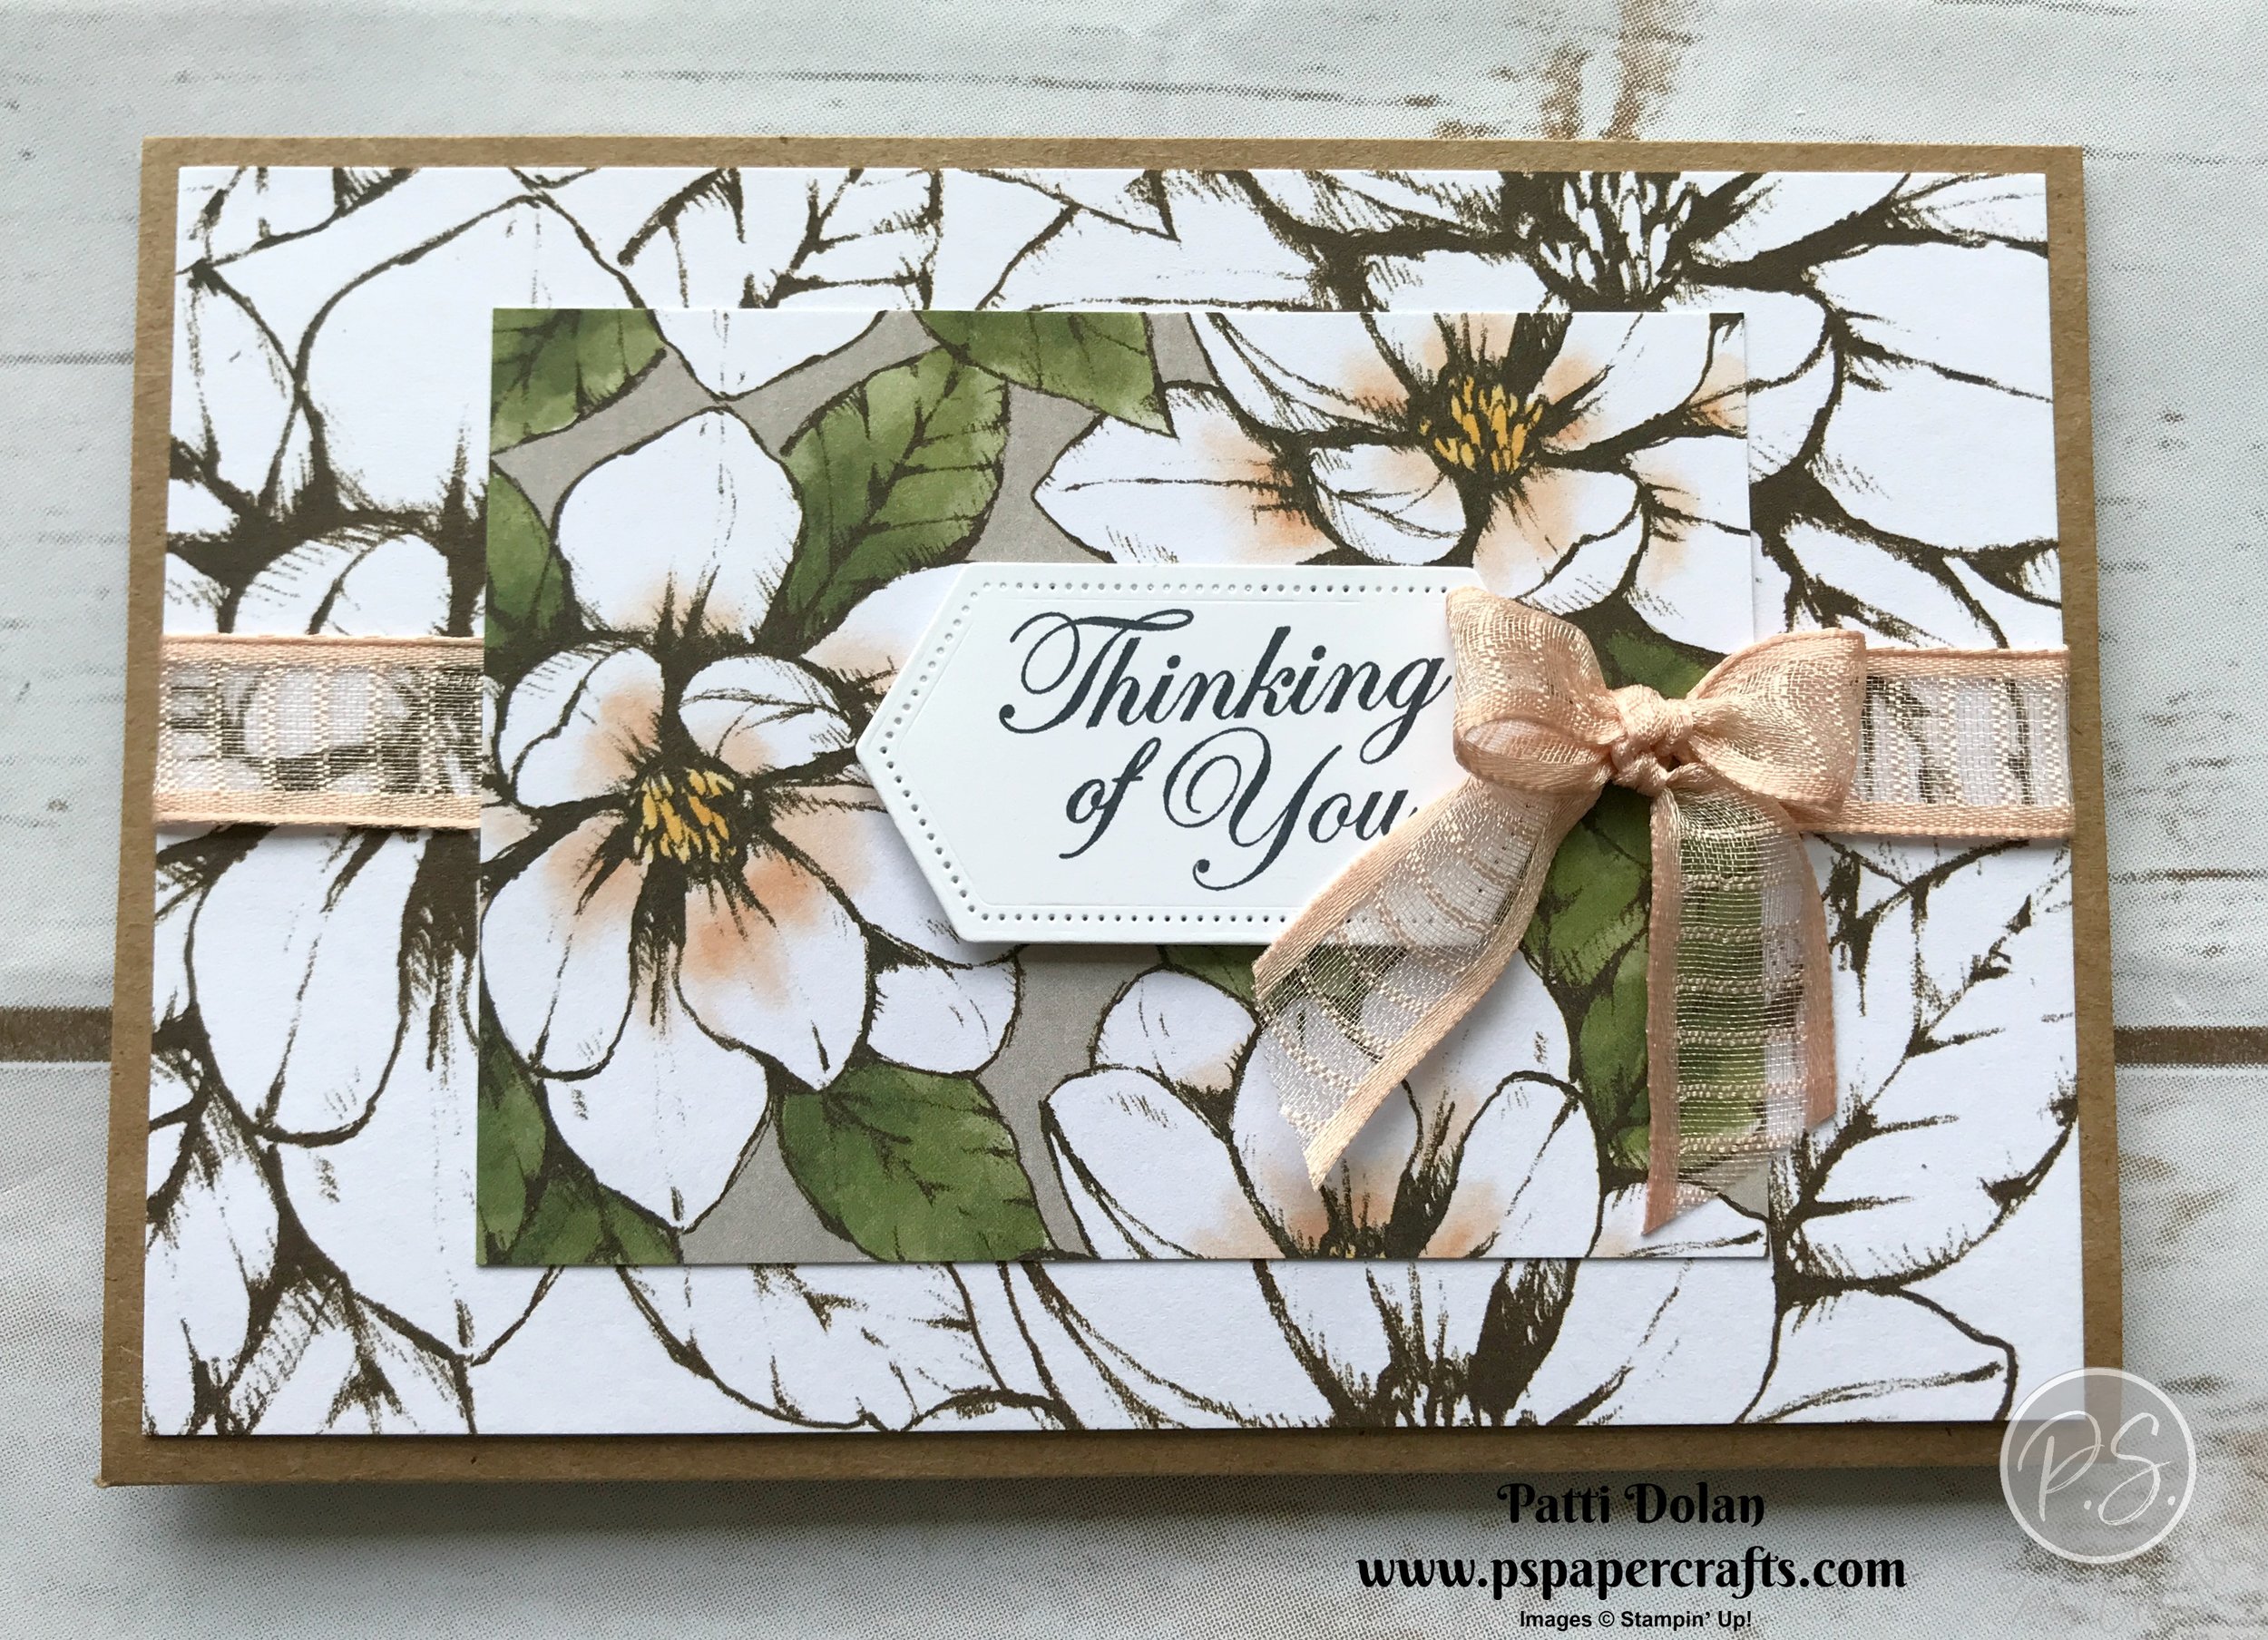
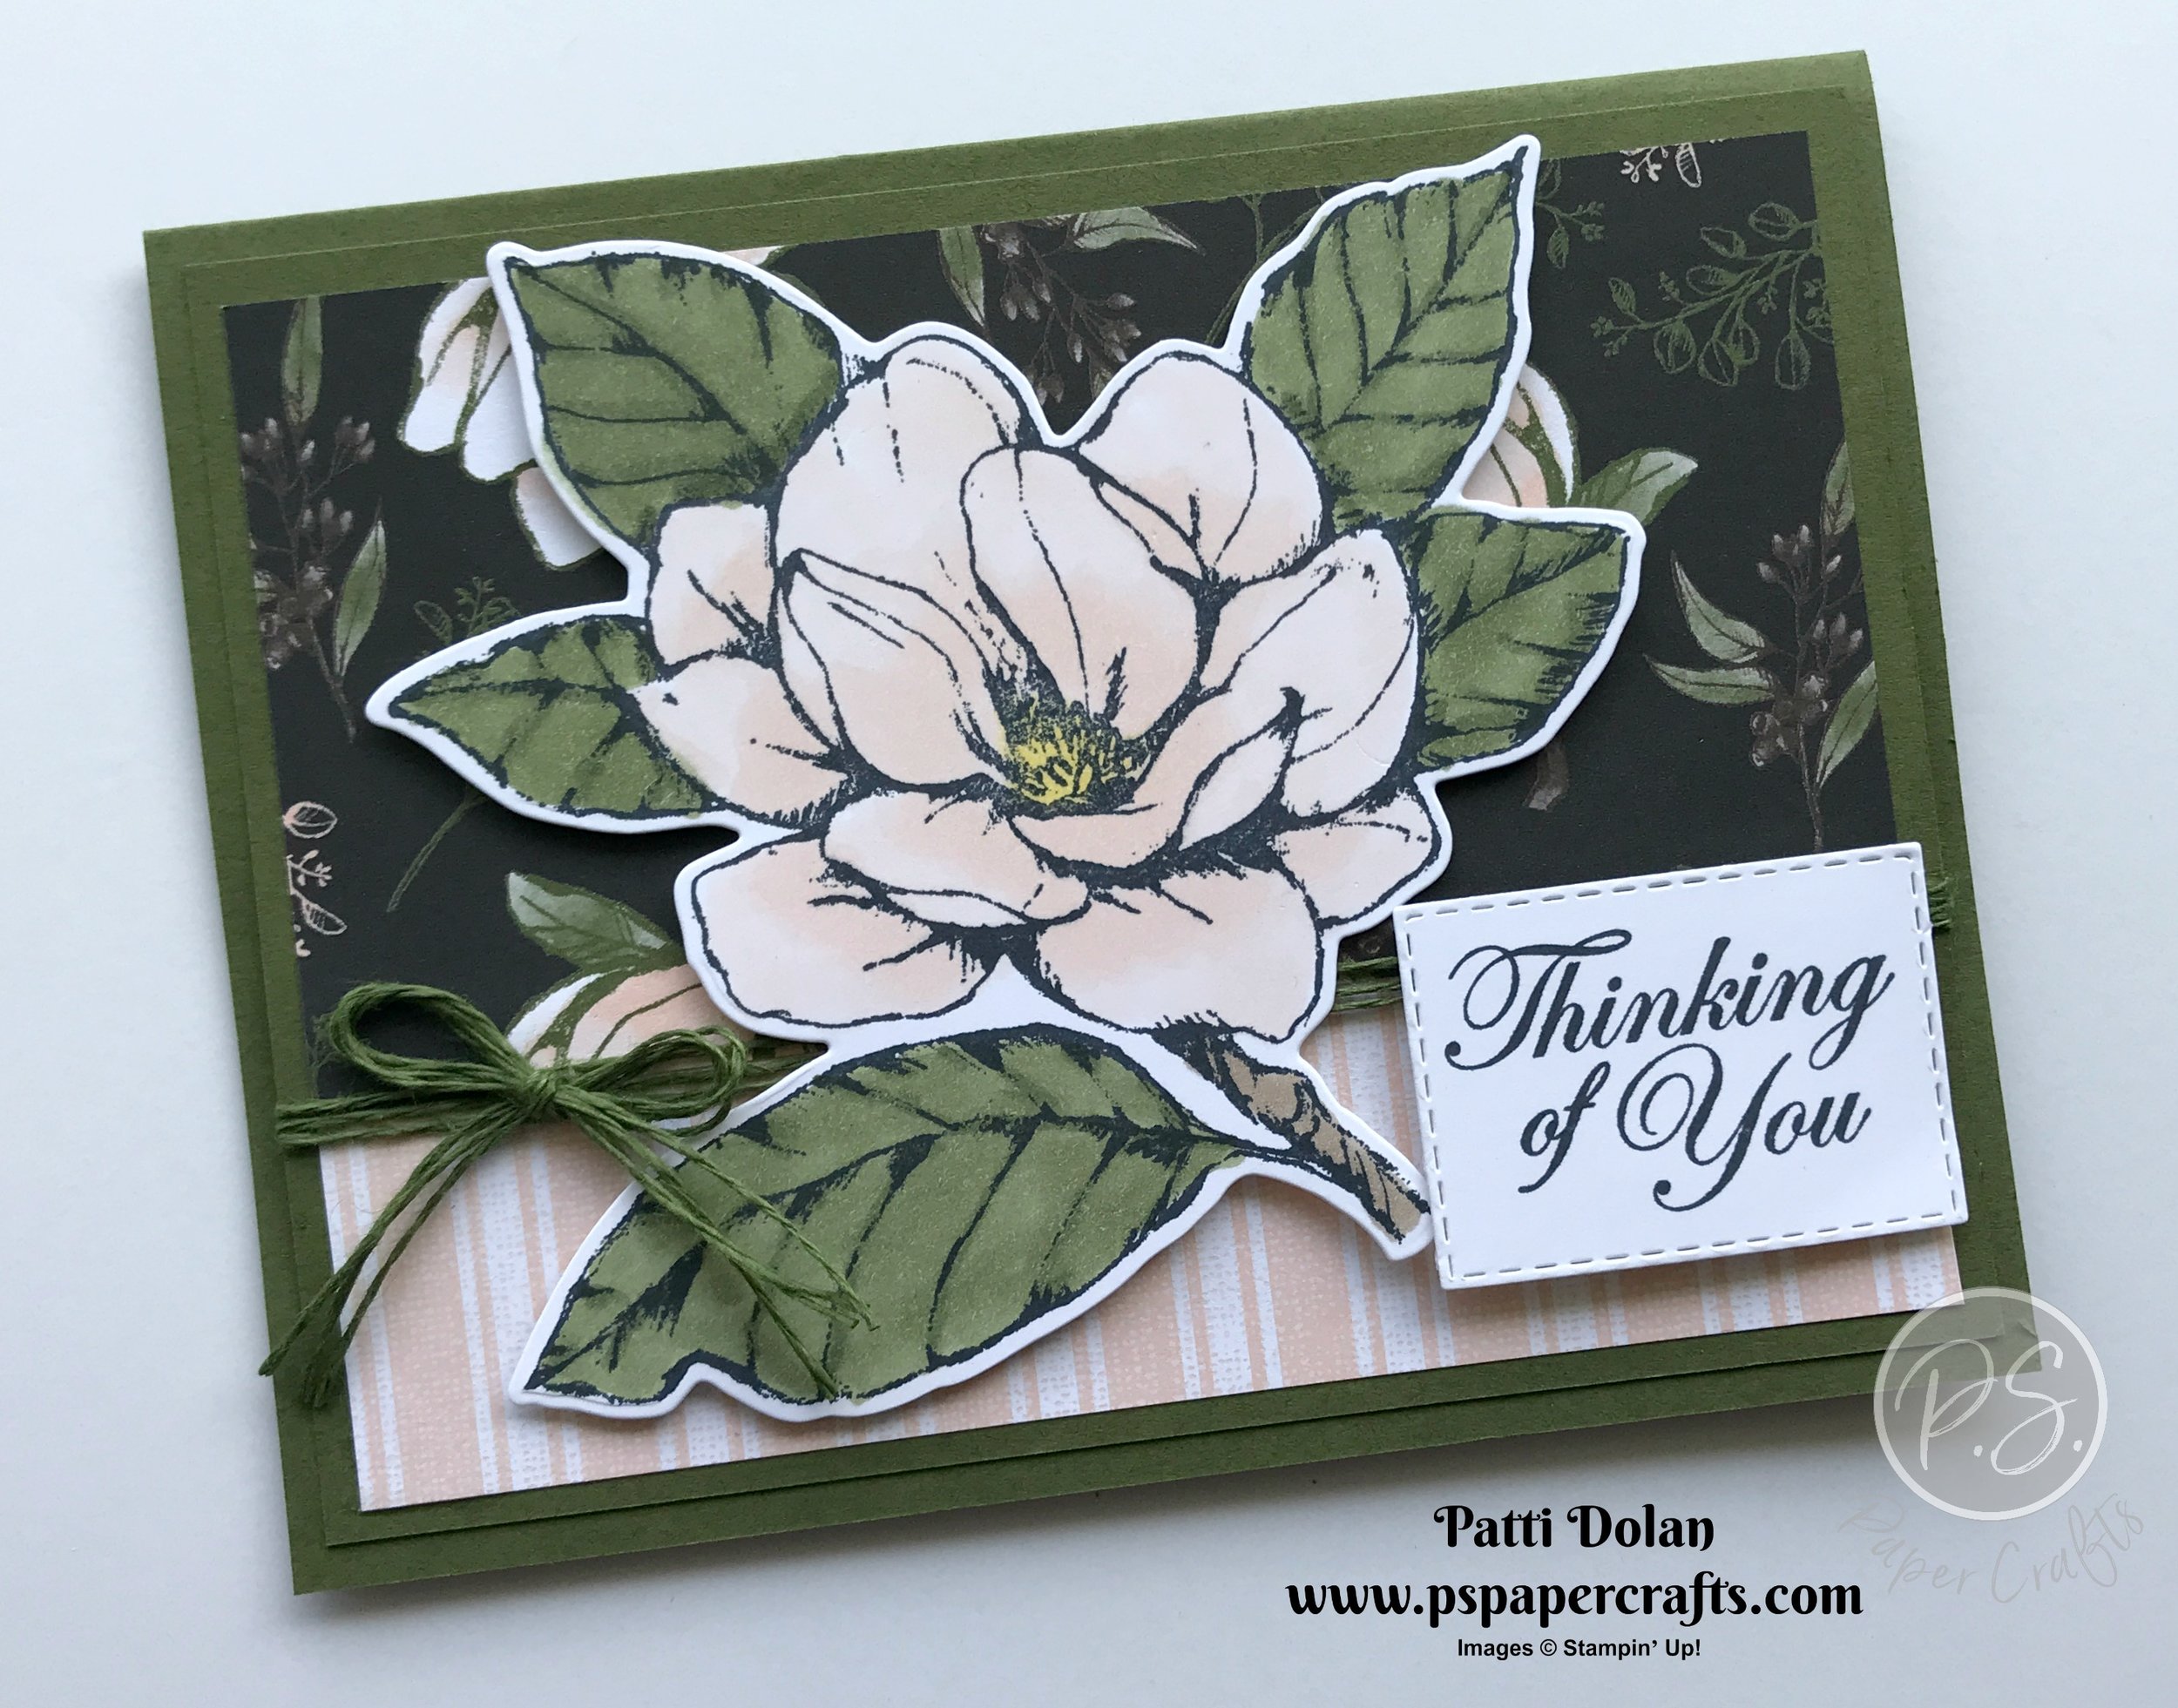
It’s time for another Sketch. This one is from a challenge that my team is doing. We have great fun in our FaceBook group and always have color or sketch challenges.

Here’s the sketch.

 
Screen Shot 2019-06-07 at 1.59.26 PM.png
 

Tips & Measurements

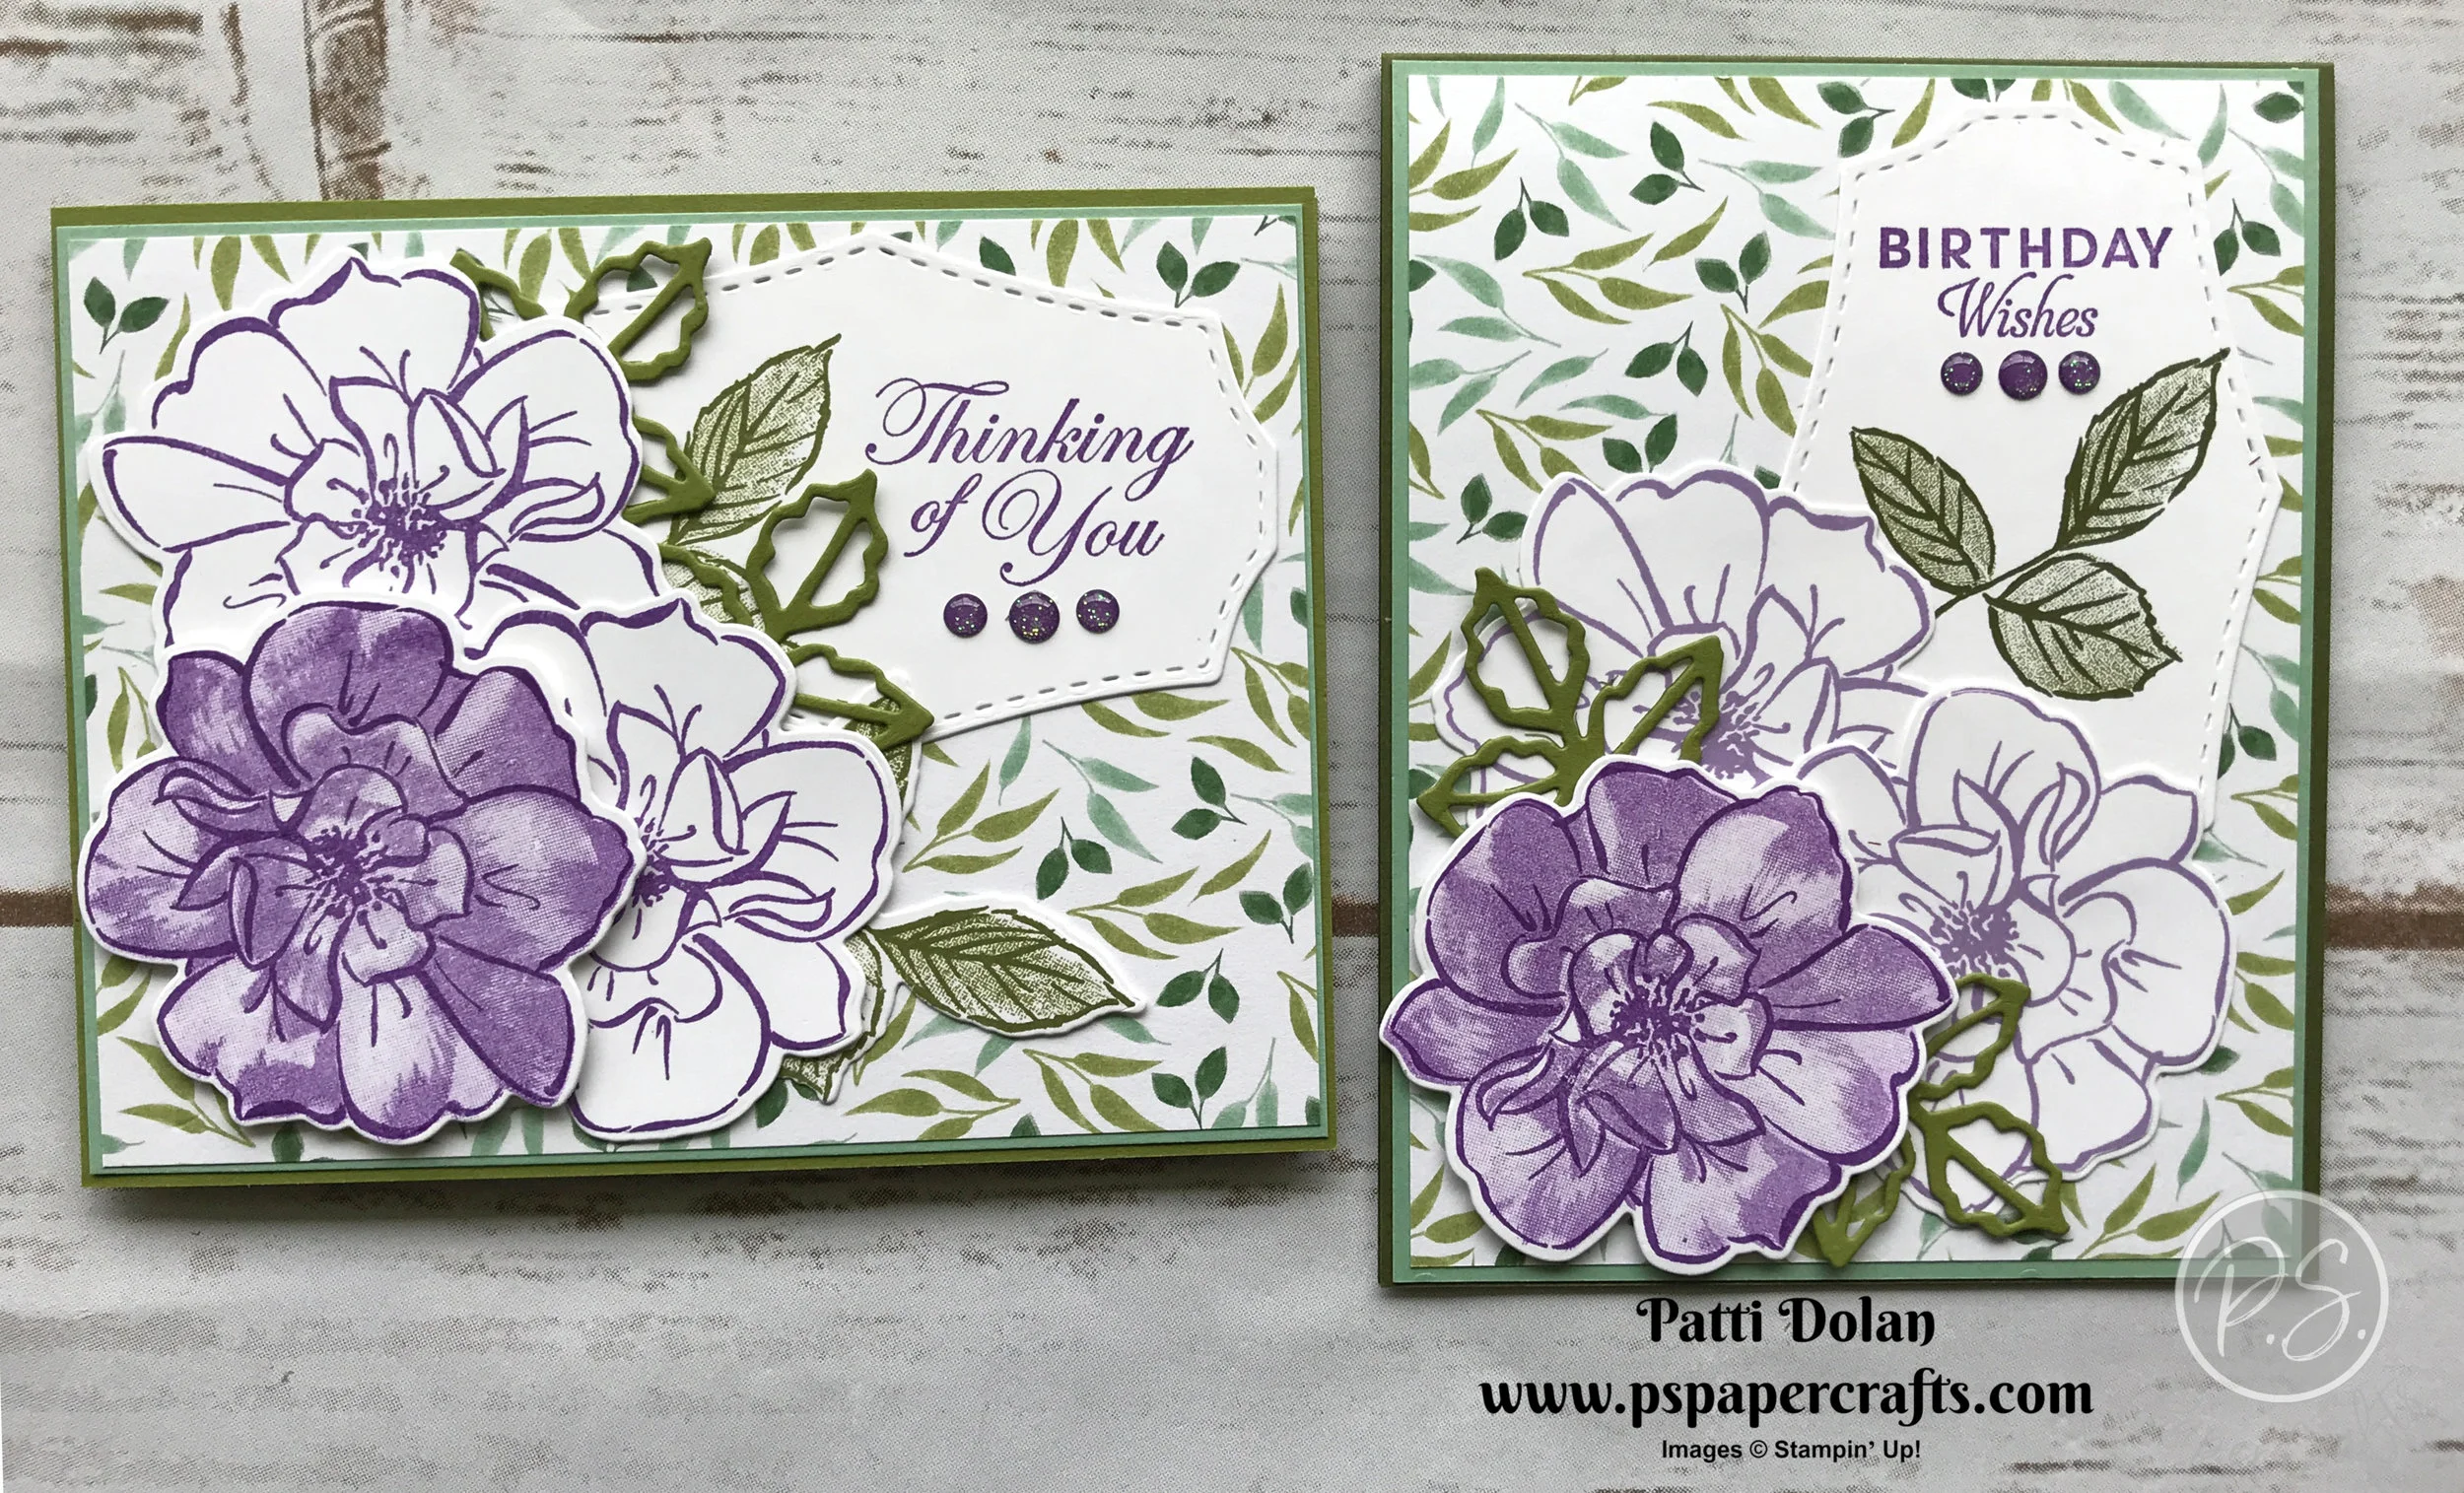
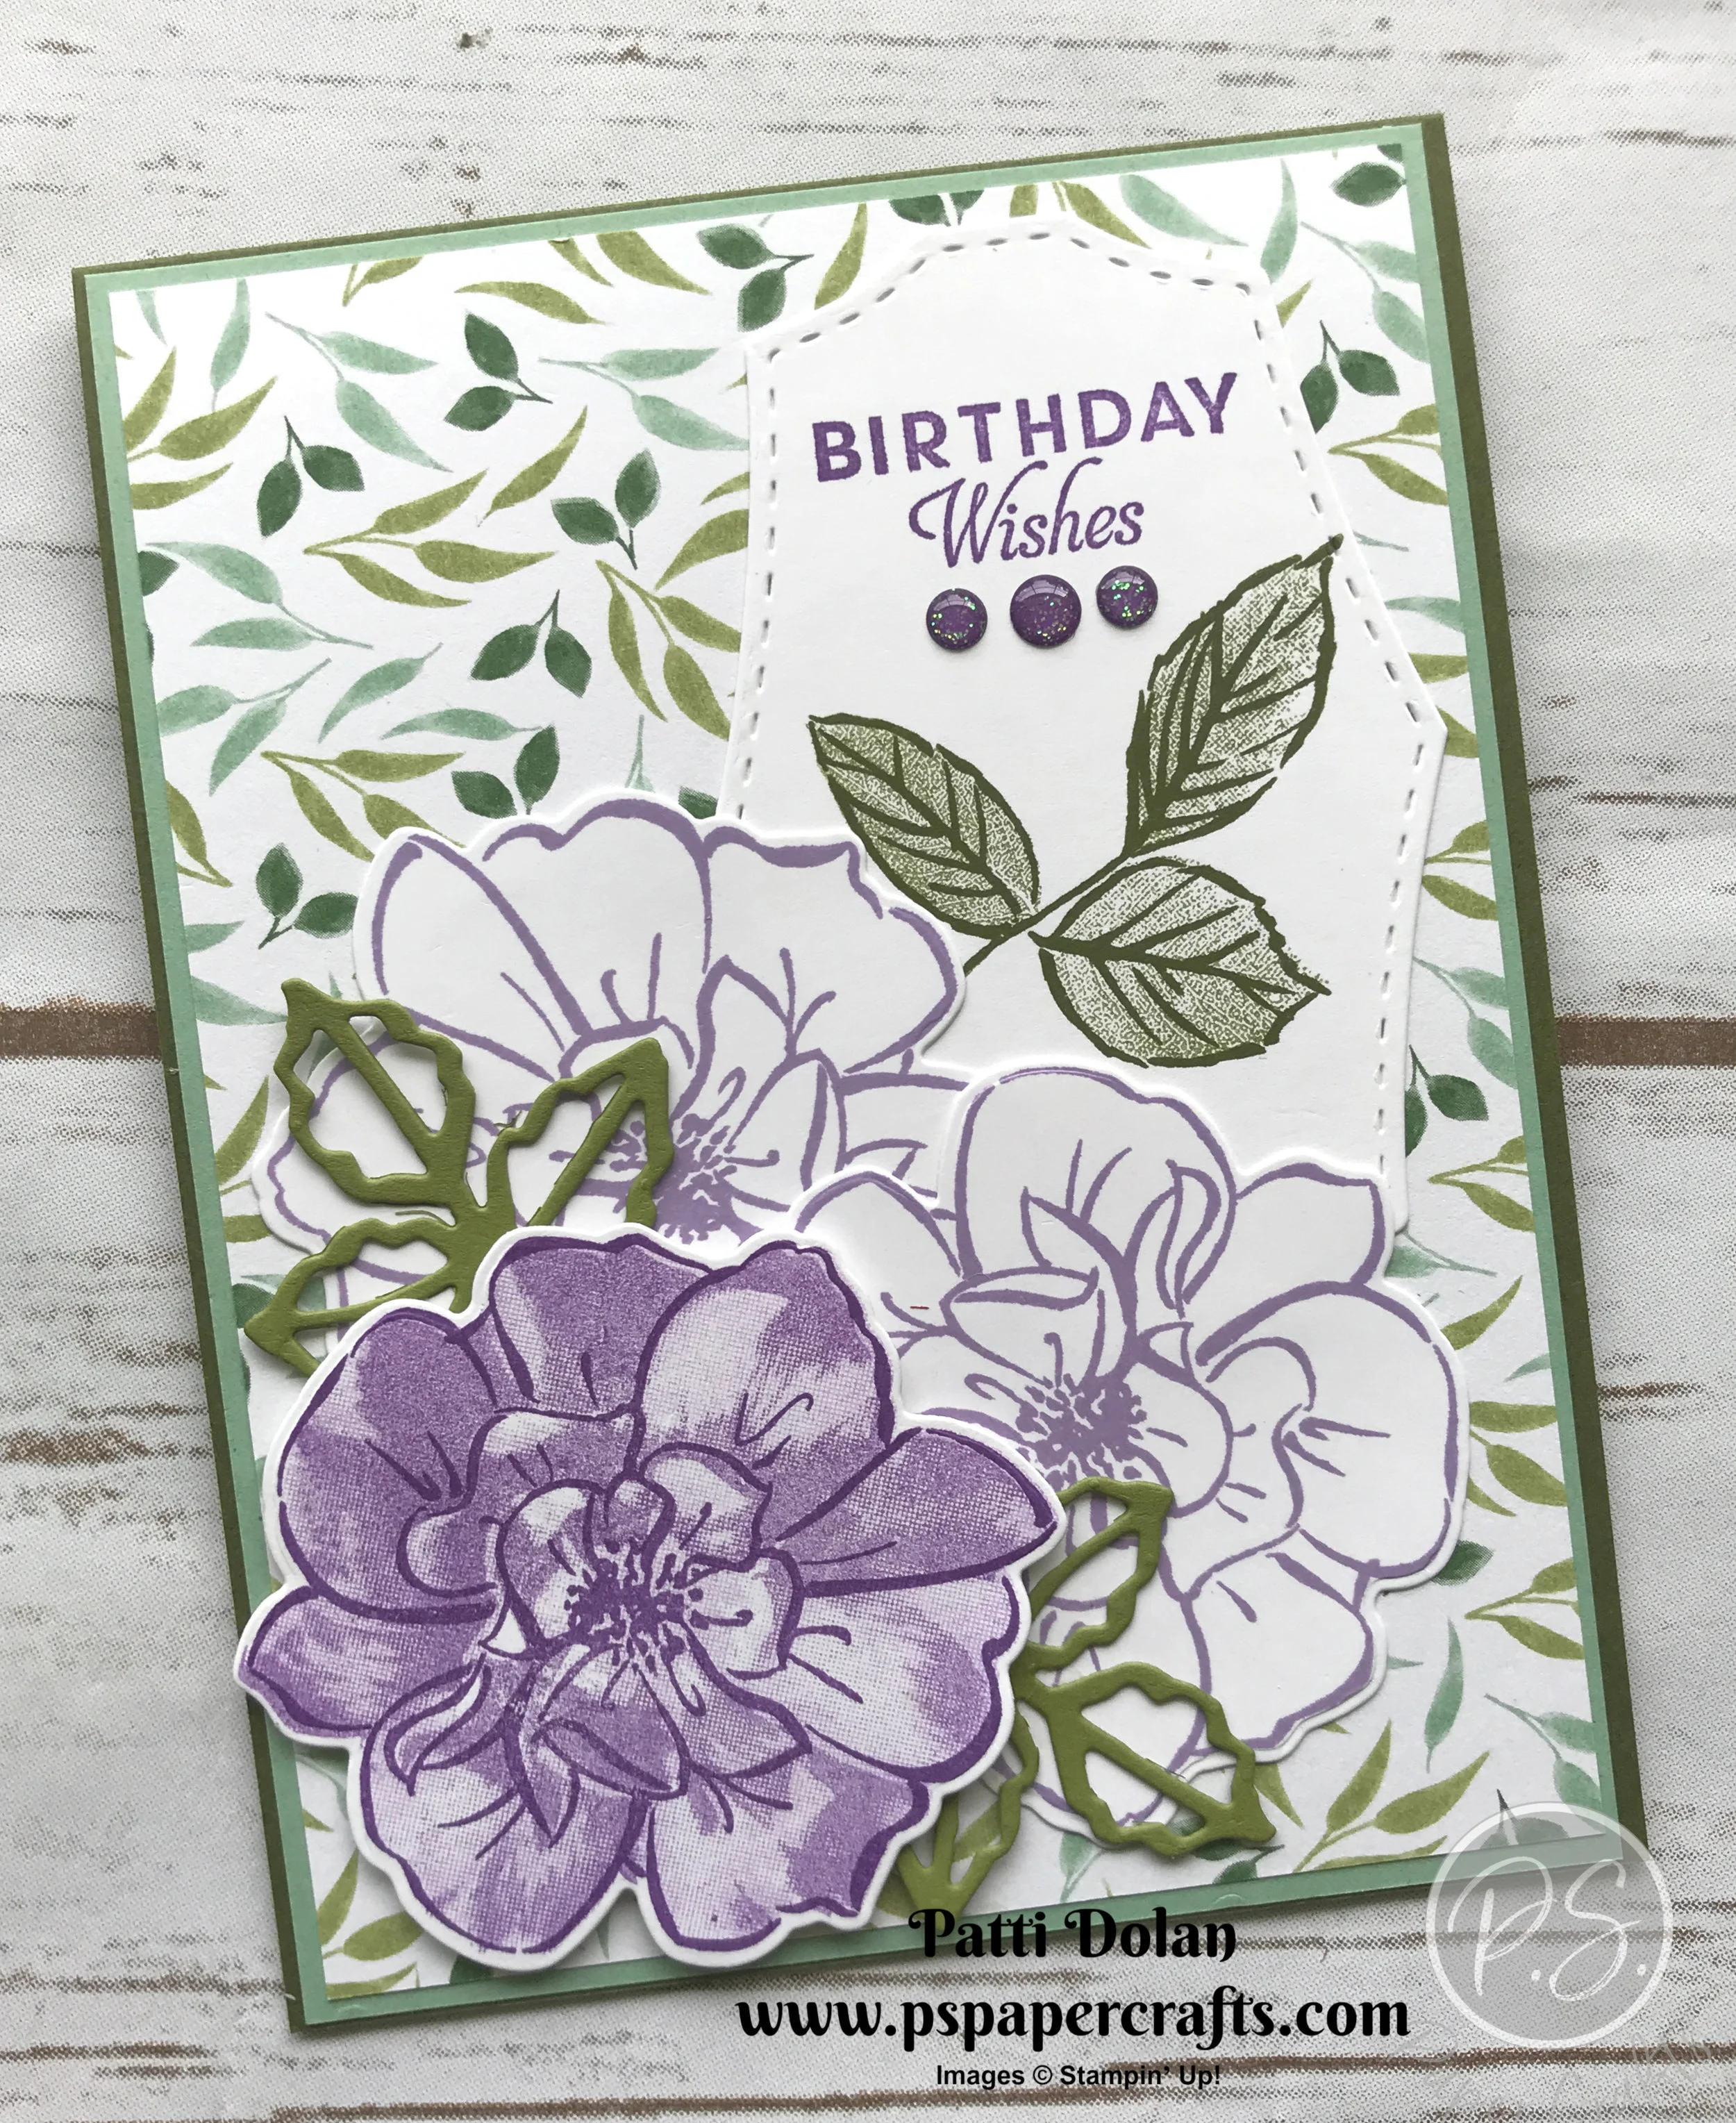
  • Garden Green Card Base - 5 1/2 x 8 1/2, scored at 4 1/4

  • Mint Macaron Layer - 4 1/2 x 3

  • Country Lane Designer Series Paper - 4 1/2 x 3

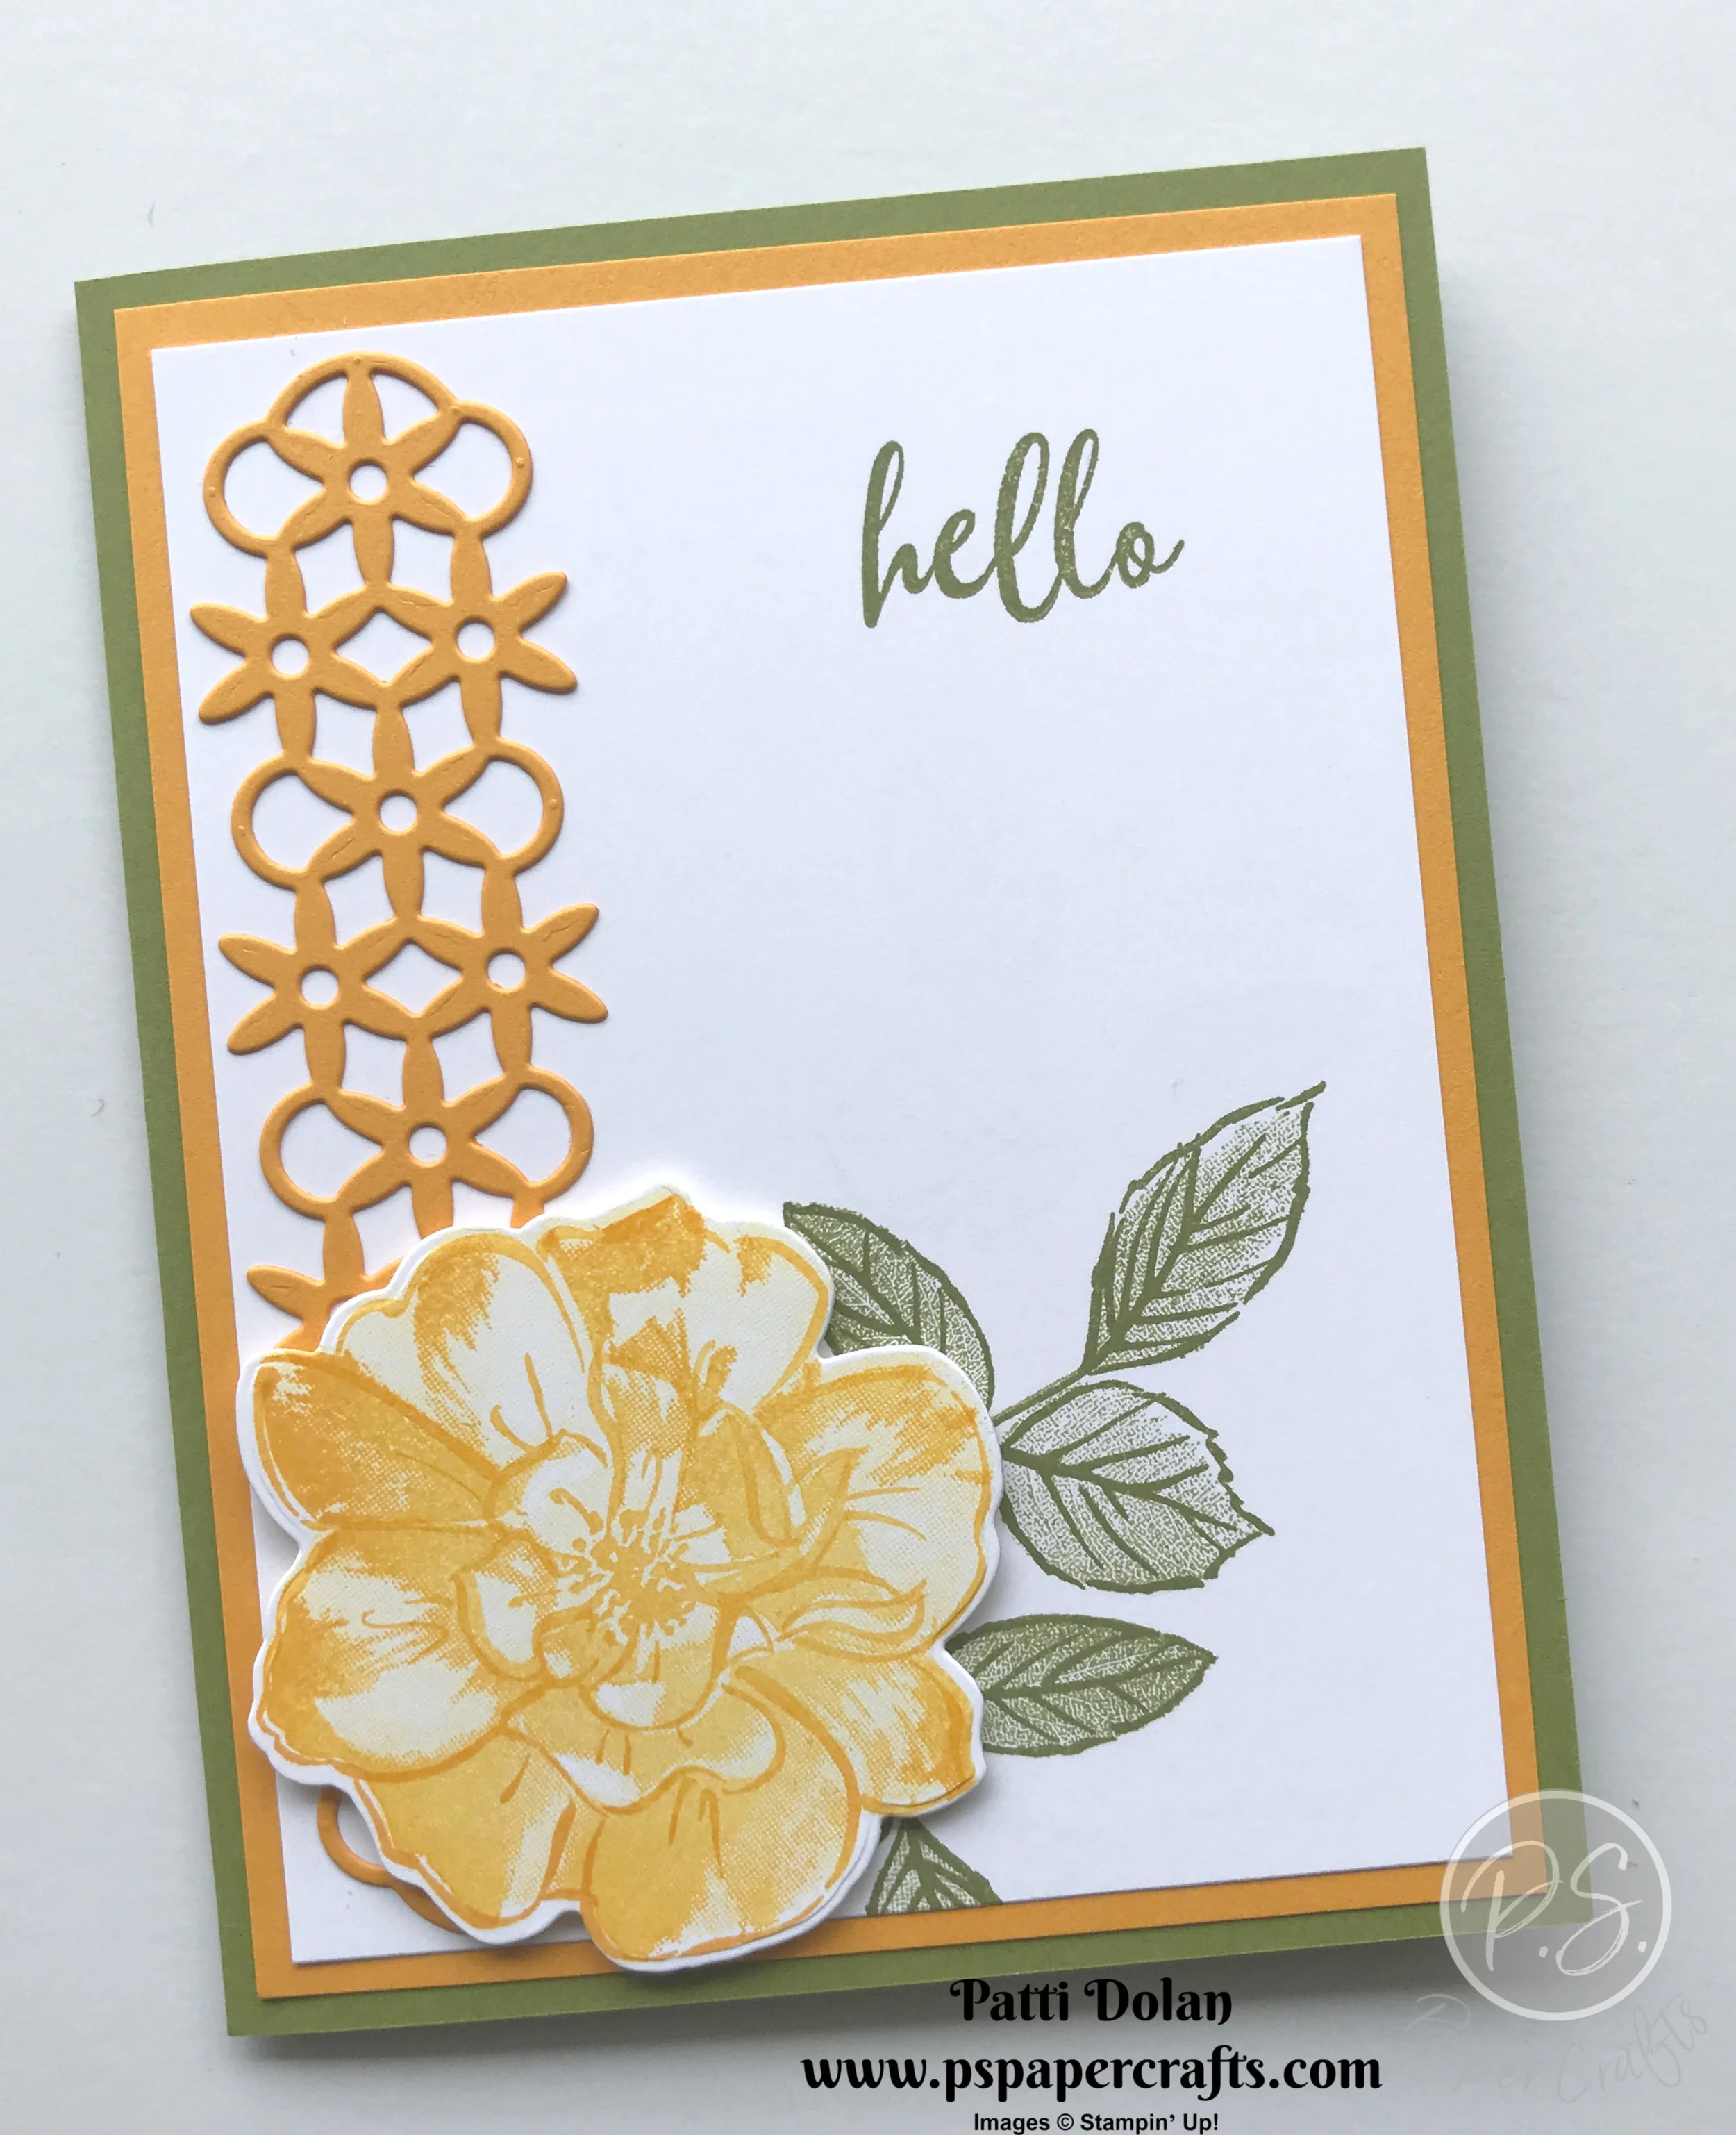
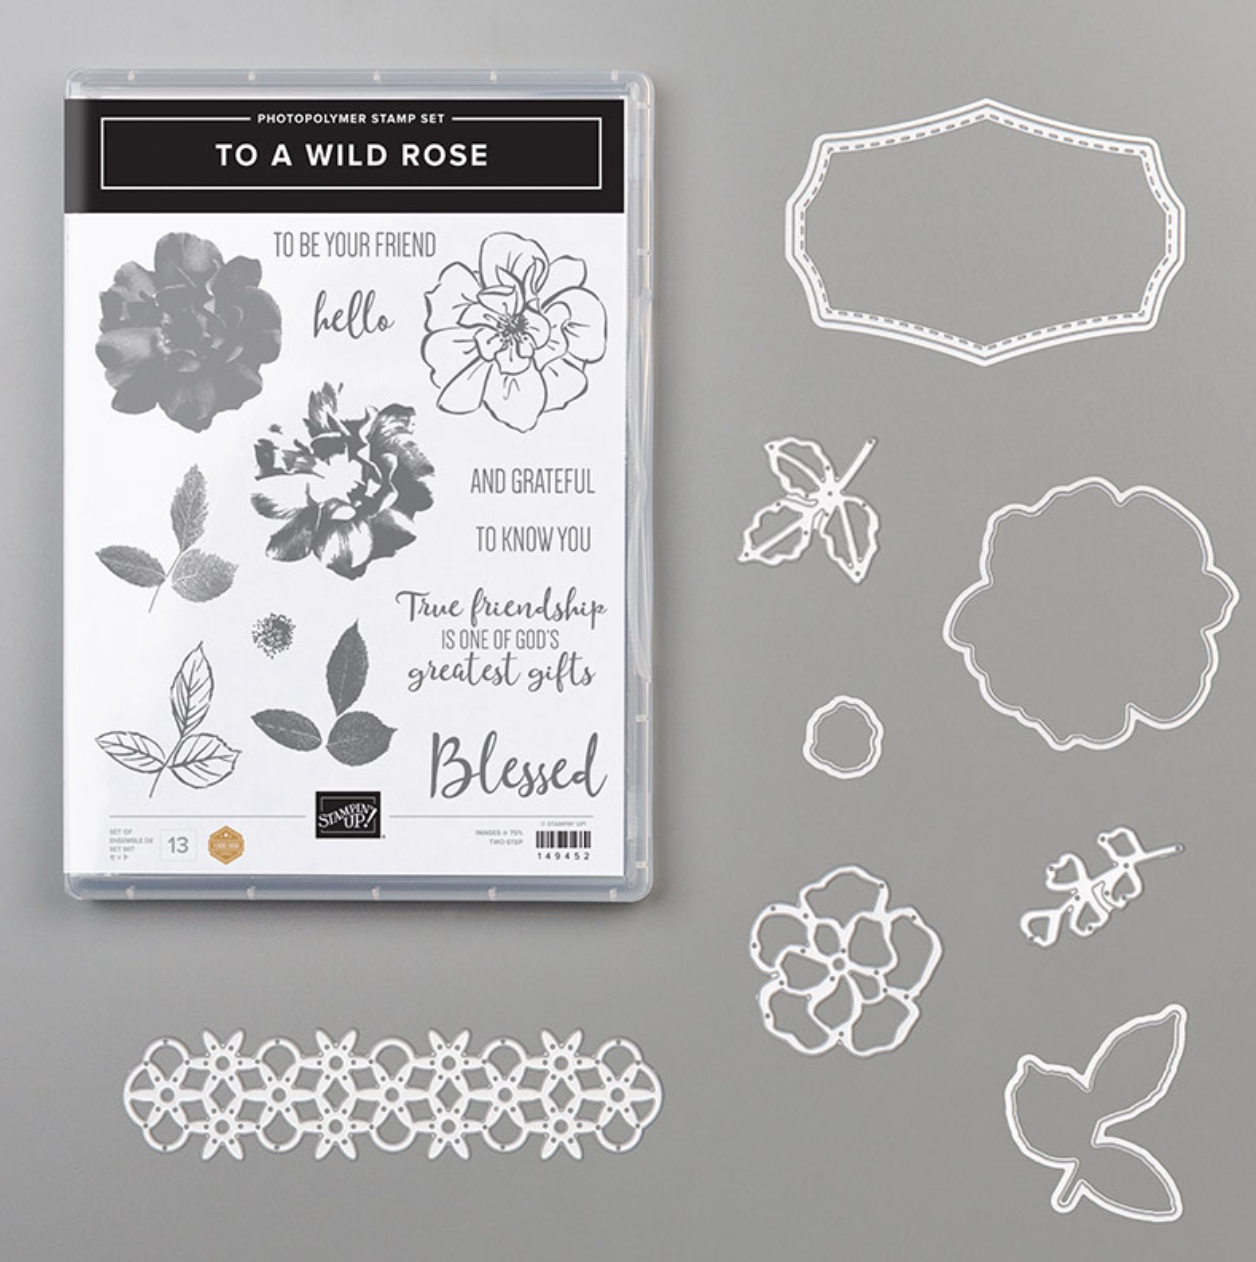
  • Scrap of Whisper White - Stamp flower images with Grapefruit Grove Ink. Stamp outline and detailed images direct, stamp fill after stamping off on scrap paper one time to get lighter shade. Cut with coordinating die.

  • Scrap of Garden Green - Cut 2 leaves from die and cut border for sentiment from Arts & Crafts die.

  • Scrap of Whisper White - 1/2 for sentiment, length should be as long as sentiment. I used the sentiment from the Butterfly Wishes Stamp Set. Adhere sentiment to border and cut border to fit sentiment.

  • Adhere layers Mint Macaron and Country Lane DSP offsetting as shown. Wrap Linen Thread around twice and tie bow. Adhere layer to card base. Using Dimensionals adhere flower. Adhere sentiment using Liquid Glue or Snail.

 
Card Sketch - To A Wild Rose2.jpg
 

On the inside I stamped just the flower outline image with Grapefruit Grove Ink.

 
Card Sketch - To A Wild Rose Inside.jpg
 

Would you like to join my In Color Club? Check here:

If you want any of the products I used on this project, just click on the item below or the Shop Now button and it will bring you to my Online Store. Please use the current Host Code when you go to checkout your order. You can also click directly on an item to order. 

Patti's 2019-2021 In Color Club

Introducing the Stampin’ Up! 2019-2021 In Colors

Screen Shot 2019-06-07 at 9.03.44 PM.png

Now that you've had a chance to look through the new catalog and make your Wish List, you may be wondering how you're going to get all the new goodies you want.  Well, you can join my In Color Club to help spread out the cost of all the In Color products.   

Each month you will receive one In Color (package of cardstock, Ink Pad, Ink Refill, Ribbon, 6x6 Designer Series Paper, Faceted Dots and Buttons). The first month you will receive Rococo Rose, then the following month Purple Posy, and so on.  After 5 months, you will have the entire collection. 

The cost is $38 per month for local pickup or $45 per month if shipped.  You can pay by check, cash or PayPal. 

Sign up by June 15 and you will start receiving your first month in July.

In Color Club.png

Thinking Of You - To A Wild Rose

I love the images with these stamps from the To A Wild Rose Stamp Set, they are so realistic.

 
To A Wild Rose Cards.jpg
 

Watch the video for the instructions for these cards and some tips I’ll share.


Measurements

  • Old Olive or Mossy Meadow Card Base - 4 1/4 x 11, score at 5 1/2

  • Mint Macaron Layer - 5 7/8 x 4 1/8

  • Garden Lane Designer Series Paper Layer - 5 1/4 x 4

  • Whisper White scraps for flowers, leaves and sentiment label

  • Old Olive scraps for leaves

The Thinking of You card is side folding and the sentiment is from the Good Morning Magnolia Stamp Set.

 
To A Wild Rose Thinking of You2.jpg
 

The Birthday card is top folding and the sentiment is from the Butterfly Wishes Stamp Set.

 
To A Wild Rose Birthday2.jpg
 

If you want any of the products I used on this project, just click on the item below or the Shop Now button and it will bring you to my Online Store. Please use the current Host Code when you go to checkout your order. You can also click directly on an item to order. 

To A Wild Rose - hello

 
To A Wild Rose Hello3.jpg
 

To A Wild Rose is a photorealistic 2-step Stamp Set.

What does that mean??? You’ll see the Distinktive icon next to these types of stamps in the catalog. They are created from a photograph of an actual flower, leaves, etc. so they are more realistic with shading and highlighted areas. It’s also considered a 2-step stamp set; it’s actually a 3-step. 2-step means you can layer one stamped image on top of another to add detail and shading.

You can purchase this in a Bundle to save 10%

 
Screen Shot 2019-06-06 at 2.10.47 PM.png
 

Tips & Instructions

  • Old Olive Card Base - 5 1/2 x 8 1/2, scored at 4 1/4

  • Mango Melody Layer - 5 1/4 x 4

  • Whisper White Layer - 5 x 3 3/4

  • Scrap of Mango Melody - cut with flower border die.

  • Scrap of Whisper White - Stamp flower images with Mango Melody Ink. First stamp the outline, then stamp the detailed image but stamp on scrap paper before stamping over the outline image. Stamp the filler image even lighter by stamping on scrap paper 2 times before stamping on flower image. Cut out with coordinating die.

  • Lay border and flower on Whisper White Layer to determine placement of leaves. You can lightly draw around outer edge of flower image with pencil if you want. Stamp leaf outline with Old Olive Ink and then stamp the second image by stamping on scrap and then over leaf outline. I didn’t stamp the 3rd image for the leaf.

  • Stamp sentiment with Old Olive Ink.

  • Adhere layers to card base. Adhere border and then adhere flower using Dimensionals.

 
To A Wild Rose Hello2.jpg
 

Isn’t the sentiment on the inside pretty. I love the font and the actual sentiment. The leaves were stamped the same as on the card front.

 
To A Wild Rose Hello Inside.jpg
 

If you want any of the products I used on this project, just click on the item below or the Shop Now button and it will bring you to my Online Store. Please use the current Host Code when you go to checkout your order. You can also click directly on an item to order. 

Pretty Perennial Essence

This Perennial Essence Suite is just gorgeous!!!

 
Perennial Essence Cards.jpg
 

In the video below I’ll show you all the papers in this Designer Series Paper package as well as how to make these cards.

Tips & Instructions

  • Mossy Meadow Card Base - 5 1/2 x 8 1/2, scored at 4 1/4

  • Crushed Curry Layer - 5 1/4 x 4

  • Whisper White Layer - 5 x 3 3/4, emboss with Layered Leaves Embossing Folder

  • So Saffron Vellum Layer - 4 x 2

  • Perennial Essence Designer Series Paper - 3 x 3

  • Scrap Whisper White - Stamp 4 flowers with Crushed Curry Ink and punch with Perennial Flower Punch. Adhere one flower on top of another with glue dots, offsetting to make 2 flowers.

  • Mossy Meadow strip 3 1/2 x 7/8, use Banner Triple Punch to make banner on one end

  • Whisper White strip 3 1/4 x 3/4, stamp sentiment in Mossy Meadow and use Banner Triple Punch to make banner on one end

  • Scrap Old Olive Vellum to punch 2 leaves with Leaf Punch

  • Assemble layers and add Perennial Essence Floral Centers to center of flowers

Here’s another look. The Stamp Set for the flowers and sentiment is the Floral Essence Stamp Set.

 
Perennial Essence Card Blissful2.jpg
 

The sentiment on this card is from the Itty Bitty Birthday Stamp Set.

 
Perennial Essence Card Birthday2.jpg
 

If you want any of the products I used on this project, just click on the item below or the Shop Now button and it will bring you to my Online Store. Please use the current Host Code when you go to checkout your order. You can also click directly on an item to order. 

You can order the Perennial Essence Suite with one item number. I have that listed first. Or, you can order individual products.

Beautiful Perennial Essence Designer Series Paper

Wait until you see this gorgeous Perennial Essence Designer Series Paper! It’s like looking at an Impressionism Art Book.

 
Perennial Essence Card2.jpg
 

You get 2 sheets of each pattern and the are double-sided. I think I could just frame these designs and call it a day. BTW, I still have some openings for my Designer Series Paper and Ribbon Shares. You can get a bit of each of the new papers and ribbons. Let me know if you want to join in.

 
Screen Shot 2019-06-03 at 8.29.28 PM.png

Tips & Instructions

  • Blackberry Bliss Card Base - 5 1/2 x 8 1/2, scored at 4 1/4

  • Crushed Curry Layer - 5 1/4 x 4

  • Perennial Essence Designer Series Paper Layer - 5 1/8 x 3 7/8

  • Whisper White scrap - Cut label with Wild Rose Die

  • Stamp sentiment and scroll images on label using Blackberry Bliss Ink

  • Adhere Designer Series Paper to Crushed Curry Layer

  • Wrap Petal Pink ribbon around and then wrap 2 strands of Bakers Twine around adhering to the back. Adhere layer to card base.

  • Adhere Label over ribbon with Dimensionals

  • Tie bow with 2 strands of Bakers Twine and adhere with Mini Glue Dots

The fonts and sentiments on the Woven Heirloom Stamp Set are so pretty. I will be using this set often.

 
Screen Shot 2019-06-03 at 8.28.40 PM.png
 

I love how the Blackberry Bliss and Crushed Curry Cardstock coordinates so well with this Designer Series Paper.

 
Perennial Essence Card.jpg
 

If you want any of the products I used on this project, just click on the item below or the Shop Now button and it will bring you to my Online Store. Please use the current Host Code when you go to checkout your order. You can also click directly on an item to order. 

New Catalog Is Live!!!

Yay!!! The new Stampin’ Up! Annual Catalog is now LIVE!!!

 
New Catalog Live.png
 

I’m so excited to share this new catalog with you. It’s full of beautiful Stamp Sets, new In Colors, gorgeous Designer Series Paper, Ribbons and so much more. You can click the SHOP NOW button on the right to head over to my online store to start shopping.

Don’t have a catalog? Let me know and I’ll send you one. In the meantime, you can click on the catalog icon on the right to see an online version.

In case you didn’t know….

I have a couple of programs currently going on:

  • Any order qualifies for a free pdf file with instructions, pictures and supply lists for 8 exclusive projects from Stampin’ Up! Demonstrators. Each month is a different theme. June’s theme is the 2019-2021 In Colors

  • Join Patti’s Loyalty Rewards Program - you get a point for every $50 you spend. Collect 10 points and you receive a FREE Stamp Set. Click the Loyalty Rewards button at the top of this page to see the details.

Happy Shopping!

Sketch Saturday - Above The Clouds

It’s time for another sketch. I used one that I found on Pinterest. It’s a fun one!

 
Above The Clouds Sketch2.jpg
 

The sketch was designed by Patsy Waggoner.

 
Screen Shot 2019-06-01 at 12.20.42 PM.png
 

I used the Above The Clouds Bundle. It’s in the new 2019-2020 Annual Catalog. The Stamp Set has a coordinating Punch in this Bundle. It’s a great set and you can stamp the outline of the hot air balloons and then the inside in a different color; lots of options.

 
Screen Shot 2019-06-01 at 1.02.45 PM.png
 

Tips & Instructions

  • Coastal Cabana Card Base (Top Folding) - 4 1/4 x 11, scored at 5 1/2

  • Follow Your Art Designer Series Paper Layer - 4 x 4

  • Whisper White Layer - 3 x 2 3/4

  • Pretty Peacock Strip - 4 1/4 x 1/2

  • Banner Strips (Coastal Cabana, Pretty Peacock, Grapefruit Grove) 3/4 wide, punch with Banner Triple Punch on one end

  • Whisper White Scraps - Stamp balloon with Black Memento and Grapefruit Grove, punch out with coordinating punch. Stamp basket with Early Espresso and color with Crumb Cake.

  • Adhere Designer Series Paper to card base. Adhere Pretty Peacock strip over top of DSP layer.

  • Stamp clouds with Coastal Cabana Ink (stamp on scrap first to get lighter color) and sentiment with Pretty Peacock Ink on Whisper White layer. Adhere Balloon and basket with Dimensionals.

  • Adhere Pretty Peacock banner to card

  • Adhere Coastal Cabana and Grapefruit Grove banners to back of Whisper White Layer and adhere to card base with Dimensionals over Pretty Peacock Banner

 
Above The Clouds Sketch.jpg
 

On the inside I stamped the sentiment with Pretty Peacock Ink and the smaller balloons with Black Memento Ink. I colored the balloons with Coastal Cabana and Grapefruit Grove Stampin’ Write Markers and the basket with Crumb Cake.

 
Above the clouds sketch inside.jpg
 

If you want any of the products I used on this project, just click on the item below or the Shop Now button and it will bring you to my Online Store. Please use the current Host Code when you go to checkout your order. You can also click directly on an item to order. 

5 Easy Cards using Magnolia Lane Memories & More

Aren’t these cards beautiful? They were so easy to make with the Magnolia Lane Memories & More Card Pack and coordinating Cards & Envelopes.

 
Magnolia Lane Memories & More All2.jpg
 

The Memories & More Card Pack includes 50 total double-sided cards (2 each of 25 designs) in 3" x 4" and 4" x 6" sizes; 6 4" x 6" single-sided printed vellum specialty cards; 4 sticker sheets.

 
Magnolia Lane Memories & More Card Pack.jpg
 

The Large Specialty Cards and Envelopes coordinate perfectly with the Memories & More Card Pack. You get 20 card bases (6 1/4 x 4 1/4 - Kraft with white foil accents), 20 matching envelopes and 20 printed envelope liners.

 
Magnolia Lane Memories & More Envelopes.jpg
 

Here’s a closer look at each card.

 
Magnolia Lane Memories & More Thank You.jpg
 
 
Magnolia Lane Memories & More Happy Birthday.jpg
 
 
Magnolia Lane Memories & More You & Me.jpg
 
 
Magnolia Lane Memories & More Hello.jpg
 
 
Magnolia Lane Memories & More Thinking of You.jpg
 

You can start ordering these products when the new Annual Catalog launches on June 4, 2019!!!

If you want any of the products I used on this project, just click on the item below or the Shop Now button and it will bring you to my Online Store. Please use the current Host Code when you go to checkout your order. You can also click directly on an item to order. 

Petal Palette Meets Magnolia Lane

Old Meets New - the Petal Palette Bundle is retiring and the Magnolia Lane DSP is in the new catalog!

 
Petal Palette Thank You Card.jpg
 

I’ll be sorry to see the Petal Palette Bundle retire so I thought I would make a card but use some of the new product with it. When I saw the Magnolia Lane Designer Series Paper, I thought about making a card like this. Isn’t it beautiful!!! The paper makes the card.

 
Petal Palette Bundle.jpg
 

I used Mossy Meadow and So Saffron Cardstock to coordinate with the Magnolia Lane Designer Series Paper. If you want to see these papers, you can watch my video from yesterday’s Blog where I show you each and every sheet and boy is it gorgeous.

I am doing a Paper Share and if you want to join in, take a look at the May 26 post. These are some of the papers you will receive in your share.

These are the papers you’ll need:

 
Petal Palette Thank You.jpg
 

Tips & Instructions

  • Mossy Meadow Card Base - 5 1/2 x 8 1/2, scored at 4 1/4

  • Magnolia Lane Designer Series Paper Layer - 5 3/8 x 4 1/8

  • Mossy Meadow Strip - 4 3/4 x 1 3/4 - punch end with Banner Triple Punch

  • So Saffron Strip - 4 1/2 x 1 1/2 - punch with Banner Triple Punch

  • Mossy Meadow - cut branches with die and then cut to smaller pieces

  • Pear Pizzazz - cut stems/leaves with die and cut some off the bottom

  • Whisper White - cut with 4th smallest Stitched Nested Labels, stamp sentiment with Black Ink

  • Whisper White - stamp and cut out bird with die

  • Adhere Designer Series Paper to card base, adhere So Saffron banner to Mossy Meadow banner. Adhere banner to card.

  • Lay greenery and lay label to figure out placement. Adhere greenery and then adhere label using Dimensionals

  • Adhere bird and add 3 pearls below sentiment

 
Petal Palette Thank You Card3.jpg
 

The inside was stamped with beautiful leaf image with Mossy Meadow Ink. I stamped off first (stamped on scrap then on the cardstock). This gives it a lighter image. This is one of my favorite images to use on card insides and envelope flaps.

 
Petal Palette Thank You Card Inside.jpg
 

The Petal Palette Bundle will retire on June 3, 2019 and the Magnolia Lane Designer Series Paper will be available for purchase starting June 4, 2019. So if you want the Petal Palette Bundle, you need to order soon.

If you want any of the products I used on this project, just click on the item below or the Shop Now button and it will bring you to my Online Store. Please use the current Host Code when you go to checkout your order. You can also click directly on an item to order. 

Magnolia Lane Suite - So Pretty!!!

 
Magnolia Lane envelope.jpg
 

These cards were made with the Magnolia Lane Memories & More Large Specialty Cards & Envelopes!

Boy that’s a mouthful! These cards are so beautiful. You get 20 cards, 20 envelopes and 20 envelope liners all ready to start creating. You can coordinate with the Memories & More cards and I’ll show that in a later post but today, I used the Good Morning Magnolia Bundle.

 
Good Morning Magnolia Bundle.jpg
 

Watch the video to see all the beautiful Magnolia Lane Designer Series Paper as well as other products in the suite in my video below. I’ll also walk you through how I made these cards.

Tips & Instructions

  • Magnolia Lane Memories & More Specialty Card

  • Cut 2 flower background pieces with Very Vanilla Cardstock

  • Cut 2 detailed flower pieces with So Saffron Cardstock

  • Cut leaves with Mossy Meadow Cardstock

  • Adhere detailed flowers pieces to background pieces and adhere to card with Dimensionals

  • Adhere leaves behind flowers

  • Stamp Sentiment with Tuxedo Black Memento Ink on Very Vanilla and punch with Story Label Punch

  • Lay sentiment where you want it to get placement for leaf images. Stamp 2 leaves with Mossy Meadow. Adhere sentiment with Dimensionals

  • Using 2 strands of Mossy Meadow Linen Thread tie bow and adhere with Mini Glue Dot

Magnolia Lane Card3.jpg

If you want any of the products I used on this project, just click on the item below or the Shop Now button and it will bring you to my Online Store. The Magnolia Lane products will be available starting June 4, 2019.  Please use the current Host Code when you go to checkout your order. You can also click directly on an item to order. 

Gorgeous Good Morning Magnolia

Ok, I’ve seen all these cards on Pinterest using this Suite and thought they were pretty, but actually using it, WOW!!!!

 
Good Morning Magnolia Card2.jpg
 

The Magnolia Lane Suite is in the new 2019-2020 Annual Catalog. The stamp set has beautiful images and sentiments with coordinating dies.

 
Good Morning Magnolia Bundle.jpg
 

The Magnolia Lane Designer Series Paper is just gorgeous! I’ll have a video up tomorrow with another card and will show you all the Designer Series Papers in this suite.

Did you see that I’m going a Paper Share? These are some of the papers you would receive if you want to join the paper share. Check the May 26 blog post for all the details.

Tips & Techniques

  • Mossy Meadow Card Base - 5 1/2 x 8 1/2, scored at 4 1/4

  • Mossy Meadow Layer - 5 1/4 x 4

  • Magnolia Lane Designer Series Paper Layer - 5 x 2 1/2 and one at 5 x 1 1/4

  • Stamp large magnolia image and sentiment on Whisper White Cardstock using Tuxedo Black Memento Ink

  • Cut magnolia image using coordinating die and sentiment using Rectangle Stitched Die

  • Color magnolia with Stampin’ Blends - leaves with Dark and Light Mossy Meadow, flower with Light Petal Pink, flower center with Dark Daffodil Delight and stem with Dark Crumb Cake. I used the Dark Mossy Meadow on the veins of the leaf images and the Light Mossy Meadow on the rest of the leaf images and then blended. I colored the entire flower with Light Petal Pink and then added layers of Petal Pink in the center of the flower. I did this a number of times to get a darker shade.

  • Adhere Designer Series Paper to 5 1/4 x 4 Mossy Meadow Layer

  • Wrap Mossy Meadow Linen Thread around 3 times and adhere to the back. Using 3 strands of the Linen Thread, make bow .

  • Adhere Flower and Sentiment using Dimensionals and bow using a Mini Glue Dot

 
Good Morning Magnolia Card.jpg
 

I stamped the scroll border image with Mossy Meadow Ink on the top an bottom on the inside.

 
Good Morning Magnolia Inside .png
 

If you want any of the products I used on this project, just click on the item below or the Shop Now button and it will bring you to my Online Store.  Note: The Good Morning Magnolia Suite products will be available for purchase starting June 4, 2019. Please use the current Host Code when you go to checkout your order. You can also click directly on an item to order. 

Paper & Ribbon Share - Reserve Yours Now!

Paper & Ribbon Share.jpg

I'm hosting a Paper & Ribbon Share from the new Stampin' Up! Annual Catalog. 


What is a Paper & Ribbon Share you may ask? 

You get a taste of all the new Designer Series Papers and all the new Ribbons that are in the new 2019-2020 Annual Catalog.  This is a great way to see and feel these new products without purchasing them all in full packages.  I'm always amazed when I pull out some Designer Series Paper and find something I didn't think I would use.   

Here's how it works: 

  • You choose either a Paper Share or a Ribbon Share or Both

  • I order all the products and cut them to share each package.  The papers are cut to 6x6 and the ribbons 2 yards of each new ribbon. 

  • You can send me a check or use PayPal but I will need to have the payment by June 3, 2019 so I can place the orders. 

  • Paper Share is $47, plus $8.00 for shipping 

  • Ribbon Share is $34, plus $8.00 for shipping 

  • Both Paper Share & Ribbon Share is $81 plus $8.00 for shipping (only pay one shipping charge)

Here's what you get:

Your Paper Share of 162 pieces includes 6×6 sheets:

  • Woven Threads – 12 pieces

  • Magnolia Lane – 12 pieces

  • Garden Lane – 12 pieces

  • Follow Your Art – 12 pieces

  • Bird Ballad – 12 pieces

  • Dinoroar – 12 pieces

  • Perennial Essence – 12 pieces

  • See a Silhouette – 12 pieces

  • Come Sail Away – 12 pieces

  • Pressed Petals – 24 pieces**

  • Mosaic Mood – 12 pieces

  • Noble Peacock – 12 pieces

  • Noble Peacock Foil – 6 pieces

** note: 1 of the designs in the Pressed Petals does not lend itself well to being cut to 6×6, so some of the designs will be cut off


Your Ribbon share of 34 yards of 17 new Ribbons/Trims/Threads

  • Magnolia Lane Linen Ribbon - 2 yards

  • Magnolia Lane Mossy Meadow Linen Thread - 2 yards

  • 3/8" Scalloped Lace Trim, Vanilla - 2 yards

  • 5/8" Organdy Striped Ribbon, Petal Pink - 2 yards

  • 3/8" Reversible Ribbon, Old Olive / Pretty Peacock - 2 yards

  • 1/2" Scalloped Linen Ribbon, Pretty Peacock - 2 yards

  • 1/2" Scalloped Linen Ribbon, Purple Posy - 2 yards

  • 1/2" Scalloped Linen Ribbon, Rococo Rose - 2 yards

  • 1/2" Scalloped Linen Ribbon, Seaside Spray - 2 yards

  • 1/2" Scalloped Linen Ribbon, Terracotta Tile - 2 yards

  • 3/8" Denim Ribbon - 2 yards

  • 1/4" Textile Ribbon, Mint Macaron - 2 yards

  • 5/8" Woven Threads Trim, Sahara Sand - 2 yards

  • 1/2" Gathered Ribbon, Rococo Rose - 2 yards

  • 3/8" Crinkled Seam Binding Ribbon, Crushed Curry - 2 yards

  • 3/8" TriColor Ribbon, Gorgeous Grape/Highland Heather/Purple Posy - 2 yards

  • Bakers Twine, Night of Navy/Sahara Sand - 2 yards

Schedule:

  • June 3: deadline to pay (I will send you a PayPal Invoice to be paid by June 3 or check cleared by June 3)

  • June 4: I will order all the paper

  • June 13 to 20: I will cut, label, bag and package all paper shares

  • June 21: I will start shipping paper shares (assuming there are no backorders)

You won't want to miss this. 

Email me today patti@pspapercrafts.com to let me know you're in. 

I will need to know the following:

  • Name, email and address

  • Which share you want - paper, ribbon or both

  • How you will pay (check or PayPal)  I will need your PayPal email address

  • How you want to receive it - mail or pick-up


Sketch Saturday - It Starts With Art

Today’s card features the It Starts With Art Stamp Set. This is in the new Annual Catalog. What a fun set this is and it has coordinating Dies!

 
It Starts With Art Case 323 Card2.jpg
 

The sketch I used is from Splitcoaststampers Weekly CAS(E) this sketch challenge. You can click on the link and see the other submissions.

 
Screen Shot 2019-05-25 at 2.40.09 PM.png
 

I just love all those art images. Lots of coloring which is so calming to do. I used Stampin’ Blends on all the images. The Sentiments in this set are great.

 
It Starts With Art Case 323 Bundle.jpg
 

Tips & Techniques

  • Basic Black Card Base - 5 1/2 x 8 1/2, scored at 4 1/4

  • Whisper White Layer - 5 1/4 x 4

  • Stamp images and sentiment using Tuxedo Black Memento Ink

 
It Starts With Art Case 323 Layer.jpg
 
  • Color images with Stampin’ Blends. Use whatever colors you like. I used the following: Light & Dark Balmy Blue, Light Smoky Slate, Light & Dark Highland Heather, Light & Dark Flirty Flamingo, Light & Dark Granny Apple Green, Dark Pineapple Punch, Light & Dark Petal Pink (I meant to use Calypso Coral), Light Daffodil Delight, Dark Mint Macaron, Light Crumb Cake.

 
It Starts With Art Case 323 Blends.jpg
 
  • Adhere layer to card base.

 
It Starts With Art Case 323 Card.jpg
 

I stamped the sentiment and some of the sequin images on the inside.

 
It Starts With Art Case 323 Inside.jpg
 

If you want any of the products I used on this project, just click on the item below or the Shop Now button and it will bring you to my Online Store. Note: the stamp set will be available to order starting June 4, 2019 when the new catalog launches.  Please use the current Host Code when you go to checkout your order. You can also click directly on an item to order. 

Lilypad Lake - Crossover Gate Fold Card

I never made a Gate Fold Card before and I found it was so easy. I CASEd (Copy And Share Everything) from Susan Campfield. I think they came out great!

 
Lilypad Lake Gate Fold Both.jpg
 

The Stamp Set and Dies are from the Lilypad Lake Bundle. It’s really a great set and you can save 10% if you purchase it before the new catalog comes out on June 4, 2019. They will be un-bundled in the new catalog.

Tips & Techniques

  • Pretty Peacock Card Base - 4 1/4 x 11, scored at 2 3/4 and then again at 8 1/4 - fold on score lines

  • Whisper White Layer - 2 pieces - 1 3/4 x 5

  • Seaside Spray Layer - 2 pieces - 1 1/2 x 4 3/4

  • Inside Layer - 5 1/4 x 4

  • Whisper White scrap for bird, lily pads and sentiment

  • Daffodil Delight scrap for sun

  • Stamp water image on one piece of Seaside Spray with Seaside Spray Ink. You will have to stamp twice to get all the way across. The bird will cover the seam

  • Lightly sponge second piece of Seaside Spray with Seaside Spray Ink.

  • Stamp bird, lily pad and sentiment with black ink and cut out with coordinating dies.

  • Cut sun out with Daffodil Delight Cardstock using die.

  • Color lily pads with Dark Granny Apple Green and Dark Flirty Flamingo Stampin’ Blends Markers.

  • Adhere bird over seam of the water and sentiment. Adhere lily pads with Dimensionals

  • Adhere Seaside Spray layers to Whisper White Layers

  • Stamp birds with Pretty Peacock Ink and adhere sun.

  • Adhere bottom layer to right side of card front and top layer to left side of card front.

 
Lilypad Lake Gate Fold Card.jpg
 
 
Lilypad Lake Gate Fold Card Opening.jpg
 

On the inside I stamped the lily pad and more of the birds.

 
Lilypad Lake Gate Fold Inside.jpg
 

If you want any of the products I used on this project, just click on the item below or the Shop Now button and it will bring you to my Online Store. Please use the current Host Code when you go to checkout your order. You can also click directly on an item to order. 

Lilypad Lake - Be Calm

I almost forgot I had this set! Silly me, it has some great sentiments and I love the sailboats.

 
Lily Pad Boat Card2.jpg
 

When I was going through the current catalog to see what was retiring, I realized I had this bundle but haven’t used it much. This stamp set and coordinating dies will be in the new catalog but not as a bundle. You can save 10% now if you order it as a bundle.

 
Lily Pad Boat Bundle.jpg
 

I sponged the background layer with a Sponge Brayer and some Balmy Blue Ink. It’s easy to do but you want to start off the paper and go very lightly. Repeat until you get the look you want.

 
Lily Pad Boat - Sponging Collage.png
 

Tips & Techniques

  • Pacific Point Card Base - 5 1/2 x 8 1/2, scored at 4 1/4

  • Daffodil Delight Layer - 5 1/4 x 4

  • Whisper White Layer - 5 x 3 3/4

  • Sponge the Whisper White Layer with Sponge Brayer and Balmy Blue Ink

  • Cut water piece of Pacific Point Cardstock with water die

  • Adhere water piece to sponged layer using Liquid Glue

  • Stamp sailboats on scrap of Whisper White with Black Ink and color boat with Dark Night Of Navy Stampin’ Blends Marker and stripes on sail with Dark Real Red Stampin’ Blends Marker.

  • Cut sailboats with coordinating die and adhere at top of water with Dimensionals

  • Sponge small piece of Whisper White with Daffodil Delight Ink and cut with sun die. Adhere with Dimensionals.

  • Stamp sentiment with Black Ink

  • Adhere sponged layer to Daffodil Delight Layer and adhere to card base.

 
Lily Pad Boat Card.jpg
 

On the inside I stamped the water image with Pacific Point Ink and then the sailboats with black ink and colored them the same as the card front. The sentiment was stamped with black ink. This is a great sentiment to have around for thinking of you cards.

 
Lily Pad Boat Inside.jpg
 

If you want any of the products I used on this project, just click on the item below or the Shop Now button and it will bring you to my Online Store. Please use the current Host Code when you go to checkout your order. You can also click directly on an item to order. 

Rooted In Nature Masculine Cards

More Masculine Cards using the Rooted In Nature Bundle!

I love this tree image and its so easy to color and cut out with the coordinating die. I’ll show you how on the video below.

 
Rooted In Nature Cards Both.jpg
 

Tips & Techniques

  • Basic Black Card Base - 5 1/2 x 8 1/2, scored at 4 1/4

  • Strips of Pear Pizzazz, Old Olive & Garden Green - 5 1/4 x 1 3/8

  • Basic Black Layer for tree 3 1/2 x 2 1/2

  • Basic Black Layer for sentiment 1 5/8 x 1 3/8

  • Whisper White Layer for sentiment 1 1/2 x 1 1/4

  • Scrap Whisper White for tree image

  • Stamp tree image using Garden Green Ink. Color the trunk and branches with an Early Espresso Stampin’ Write Marker. Cut tree out with coordinating die.

  • Stamp sentiment with Tuxedo Black Memento Ink and adhere to small Basic Black layer.

  • Lay out the green strips lightest to darkest. Once you have them arranged, adhere the Pear Pizzazz strip first. Once in place, adhere the other two strips.

  • Adhere Basic Black layer and then adhere the tree using Dimensionals.

  • Adhere sentiment using Dimensionals.

Here’s the one I made on the video. It’s for Father’s Day! The sentiment is from the Geared Up Garage Stamp Set from the Occasions Catalog.

 
Rooted In Nature Cards3.jpg
 

This one is great to encourage someone. I left the inside blank so I can use it for just the right person at the right time. It’s great to have lots of cards on hand.

 
Rooted In Nature Cards.jpg
 

If you want to save 10% on the Rooted In Nature Bundle, you must order by June 3, 2019. Once the new catalog comes out on June 4, the products will no longer be bundled at a discount.

If you want any of the products I used on this project, just click on the item below or the Shop Now button and it will bring you to my Online Store. Please use the current Host Code when you go to checkout your order. You can also click directly on an item to order. 

Simple Masculine Card

The Rooted In Nature Stamp Set is great for guy Cards!

You can use it to make a Father’s Day Card or Birthday Card or whatever else you need. I love nature so this is a great set and it has coordinating dies which you can save 10% on if you get it before the new catalog comes out on June 4. This set will be in the new catalog, just not as a bundle.

 
Rooted In Nature - You Are Wonderful2.jpg
 

This was so easy to make. I used a new In Color for the card base and the sentiment. It’s called Pretty Peacock. You can use Tranquil Tide as well. Tranquil Tide will be retiring on June 3rd.

Tips & Techniques

  • Pretty Peacock Card Base - 5 1/2 x 8 1/2, scored at 4 1/4

  • Layer of Mint Macaron - 3rd largest Rectangle Stitched Die

  • Layer of Whisper White - 4th largest Rectangle Stitched Die

  • Layer of Whisper White for Sentiment - Smallest of this group of Rectangle Stitched Die

  • Using Stampin’ Write Markers, color on the stamp - the tree top with Mint Macaron and the trunk with Soft Suede. Breath on the stamp before stamping on cardstock to moisten it.

 
Rooted In Nature - You Are Wonderful Markers.jpg
 
  • Adhere Whisper White tree layer to Mint Macaron Layer.

  • Using Dimensionals adhere layers to card base.

  • Stamp sentiment with Pretty Peacock Ink and layer over main image. I used Dimensionals on the bottom right part to lift it and Liquid glue on part that would be on the main image.

  • Add 3 Clear Epoxy Droplets to right side

 
Rooted In Nature - You Are Wonderful.jpg
 

On the inside I stamped the tree the same way I stamped it on the card front. If you want to add a Father’s Day or Birthday sentiment, go for it.

 
Rooted In Nature - You Are Wonderful Inside.jpg
 

If you want any of the products I used on this project, just click on the item below or the Shop Now button and it will bring you to my Online Store. Please use the current Host Code when you go to checkout your order. You can also click directly on an item to order. 

Sketch Saturday - You Are My True North

Today’s card features the Sailing Home Bundle!

I’m following a sketch from the Splitcoaststampers Weekly Sketch challenge using the Sailing Home Bundle which is a great bundle for guy cards! I love the sentiment - “You Are My True North”.

 
Sailing Home Sketch Card.jpg
 

Here’s the sketch that I followed CAS(E) this Sketch #322

 
Screen Shot 2019-05-18 at 12.28.06 PM.png
 

Tips & Techniques

  • Night of Navy Card Base - 5 1/2 x 8 1/2, scored at 4 1/4

  • Balmy Blue Layer - 5 x 3 3/4

  • Scrap of Night Of Navy - cut rope using die

  • Scrap of Whisper White - Stamp lighthouse with Night Of Navy Ink and cut out with die

  • Scrap of Sahara Sand - cut steering wheel with die

  • Stamp sentiment on side of Balmy Bay layer using Night Of Navy Ink

  • Adhere rope piece, lighthouse and steering wheel (I used a glue dot for the wheel)

  • Stamp bird images

  • Adhere Balmy Blue later to card base

 
Sailing Home Sketch Card2.jpg
 

On the inside I stamped the lighthouse going off the paper and then added the birds toward the top. I used Night Of Navy Ink.

 
Sailing Home Sketch Card inside.jpg
 

If you want any of the products I used on this project, just click on the item below or the Shop Now button and it will bring you to my Online Store.  The Sailing Home Bundle will be available for purchase beginning June 4, 2019. Please use the current Host Code when you go to checkout your order. You can also click directly on an item to order. 

Bird Ballad Laser-Cut Card

Check out these Laser Cut-Cut Cards!

You get a set of 12 delicate Laser-Cut Cards and envelopes in a beautiful Tin.

 
Lazer Cut Cards & Tin.jpg
 

These are the cards I made with some of the new In-Colors. The one on the left is made with Pretty Peacock and the one on the right with Seaside Spray. Which do you like better?

 
Bird Ballad Lazer Cut Card Both.jpg
 

I’ll walk you through the steps to make these cards on the video below.

Tips & Techniques

  • Laser-Cut Card Base

  • Layer to back card front (Pretty Peacock or Seaside Spray) - Just shy of 5 1/2 x 4 1/4

  • Pretty Peacock or Seaside Spray Circle - 2 1/2

  • Very Vanilla Circle - 2 1/4

  • Scrap of Very Vanilla for Bird

  • Stamp Bird on scrap and sentiment and flowers on Very Vanilla circle with Black Memento Ink (I used the “Thinking Of You” sentiment from the Good Morning Magnolia Stamp Set)

  • Color with Stampin’ Blends

  • Adhere layer behind card front using Liquid Glue (go very lightly)

  • Adhere Very Vanilla Circle to larger circle and Adhere to card front using Dimensionals

  • Fussy cut bird and adhere with Dimensionals (I just put one near the tail)

  • Add Wink of Stella and Rhinestones to flowers

 
Bird Ballad Lazer Cut Card Peacock2.jpg
 
 
Bird Ballad Lazer Cut Card Seaside Spray2.jpg
 

I CASEd (Copy And Share Everything) the card below from the catalog. It’s so pretty!

 
Bird Ballad Lazer Cut Card Feathers.png
 

Tips & Techniques

  • Daffodil Delight Card Base - 4 x 8 1/2, scored at 4 (makes a 4 x 4 card)

  • Bird Ballad Designer Series Paper Layer - 3 7/8 x 3 7/8

  • Vellum Layer - 3 3/4 x 3 3/4

  • Cut doily from Laser-Cut card front

  • Strip Calypso Coral - 2 3/4 x 7/8 - punch flag on right end with Banner Triple Punch

  • Strip Pool Party - 3 x 3/7 - Emboss with Stitched Nested Labels Dies (straight die)

  • Stamp sentiment with Versamark, cover with embossing powder and melt with heat tool.

  • Adhere Pool Party strip behind Calypso Coral strip and then adhere to doily. Use adhesive behind the doily in the area where the strips are to adhere to vellum and to DSP layer. This will hide the glue. It’s ok to have the doily and Vellum loose at the top.

  • Cut feathers from Bird Ballad DSP and adhere over Calypso Coral strip

  • Cut two strands of Linen Thread and thread through feather trinket and tie bow. Adhere to card with Mini Glue Dots

 
Bird Ballad Lazer Cut Card Feathers2.jpg
 

If you want any of the products I used on these cards, just click on the item below or the Shop Now button and it will bring you to my Online Store. The Bird Ballad Suite items will be available for purchase starting June 4, 2019. Please use the current Host Code when you go to checkout your order. You can also click directly on an item to order.