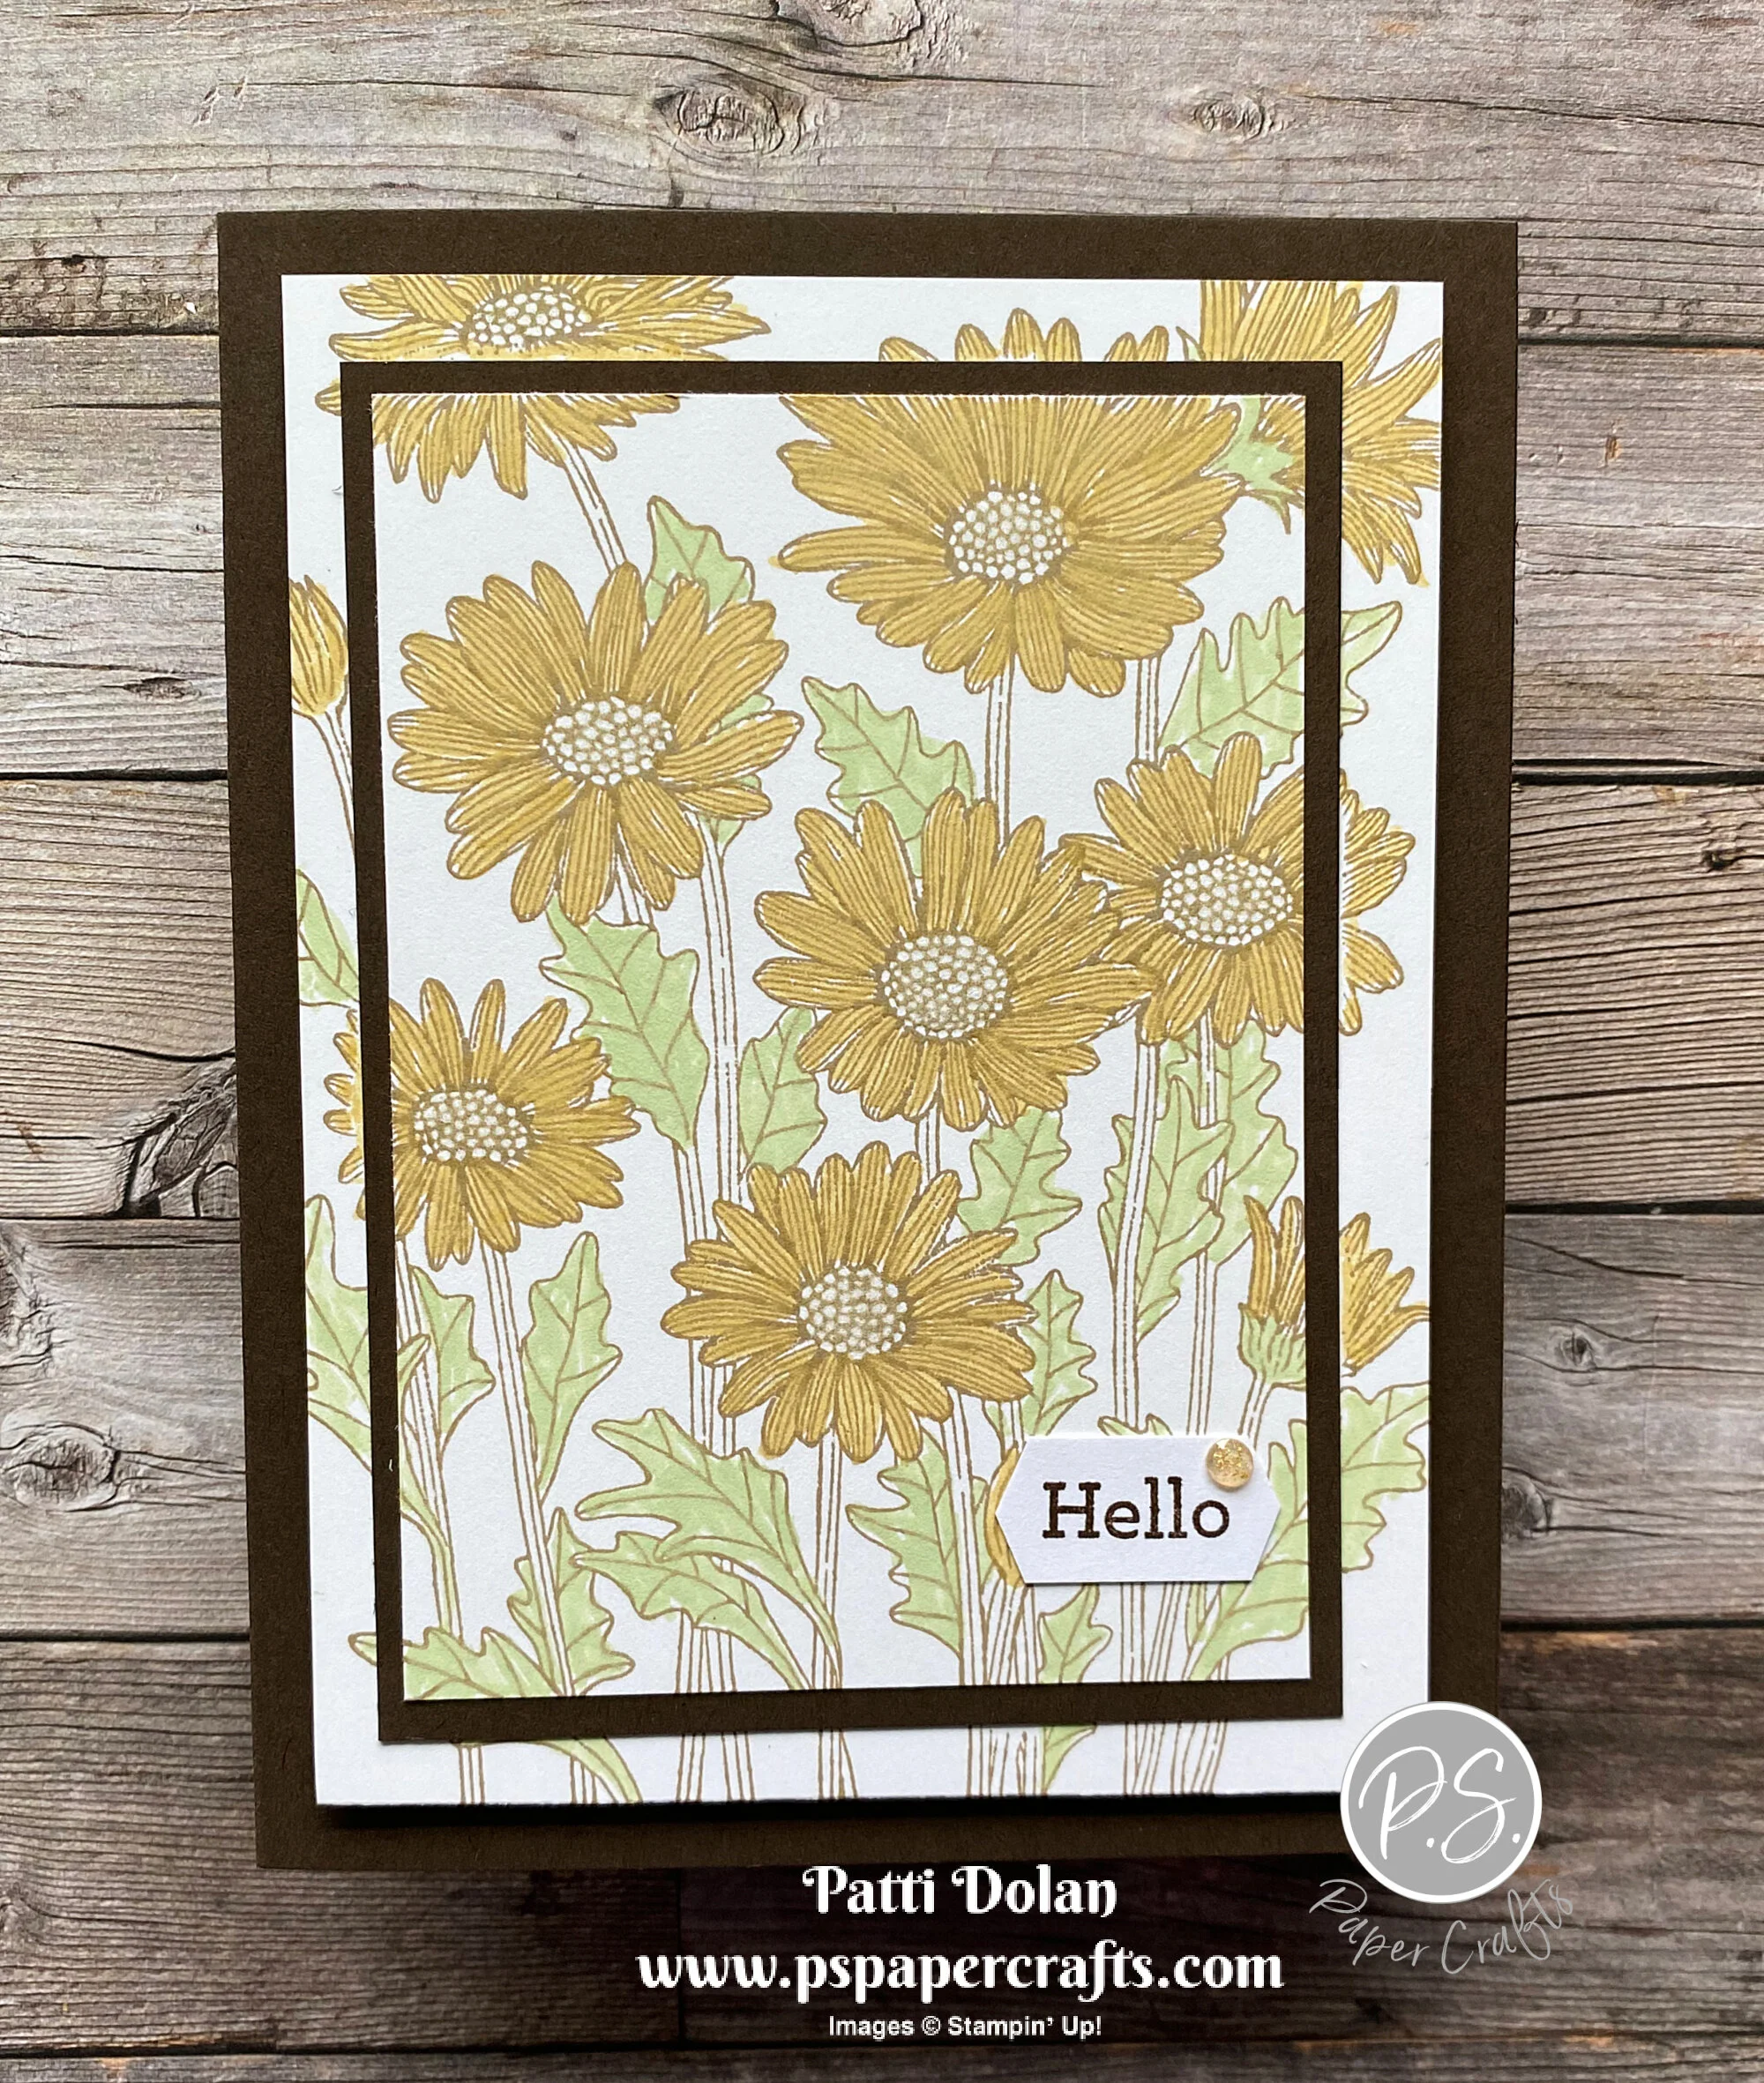
I used the Daisy Garden Stamp to create this Double Layer Card. I was planning to make a Triple Layer Card but liked the way this looked so went with it.

The Daisy Garden Stamp is one large background Stamp. I used the Stamparatus which allowed me to stamp a couple of times to get good coverage.

Tips & Instructions
Early Espresso Card Base - 5 1/2 x 8 1/2, score at 4 1/4
Early Espresso Layer - 4 1/2 x 3 1/4
Basic White Layers - one at 5 x 3 3/4 and one at 4 1/4 x 3. Adhere layers together with a tiny bit of an adhesive where you can easily separate the layers after stamping and coloring. I used Stampin’ Seal. Stamp the daisies image with Crumb Cake Ink.
You’ll see a gap between the layers and that’s ok. The Early Espresso Layer will hide the gap. Color leaves with a Soft Sea Foam and the petals with So Saffron Stampin’ Write Markers.
Color flower centers with Wink Of Stella.
Separate the white layers and adhere the Early Espresso Layer between. Adhere the layers to the card base using Dimensionals.
Stamp sentiment on 1/2 strip of Basic White Cardstock and punch both ends with the Banner Pick A Punch. Adhere to card.
Add a Genial Gem to the sentiment.