Have you used the Tailored Tag Punch to create a background layer for a card? It’s easy and the results are so cool.

In my video I’ll show you how to create these cards using the Tailored Tag Punch. I even used it to punch the sentiment label.
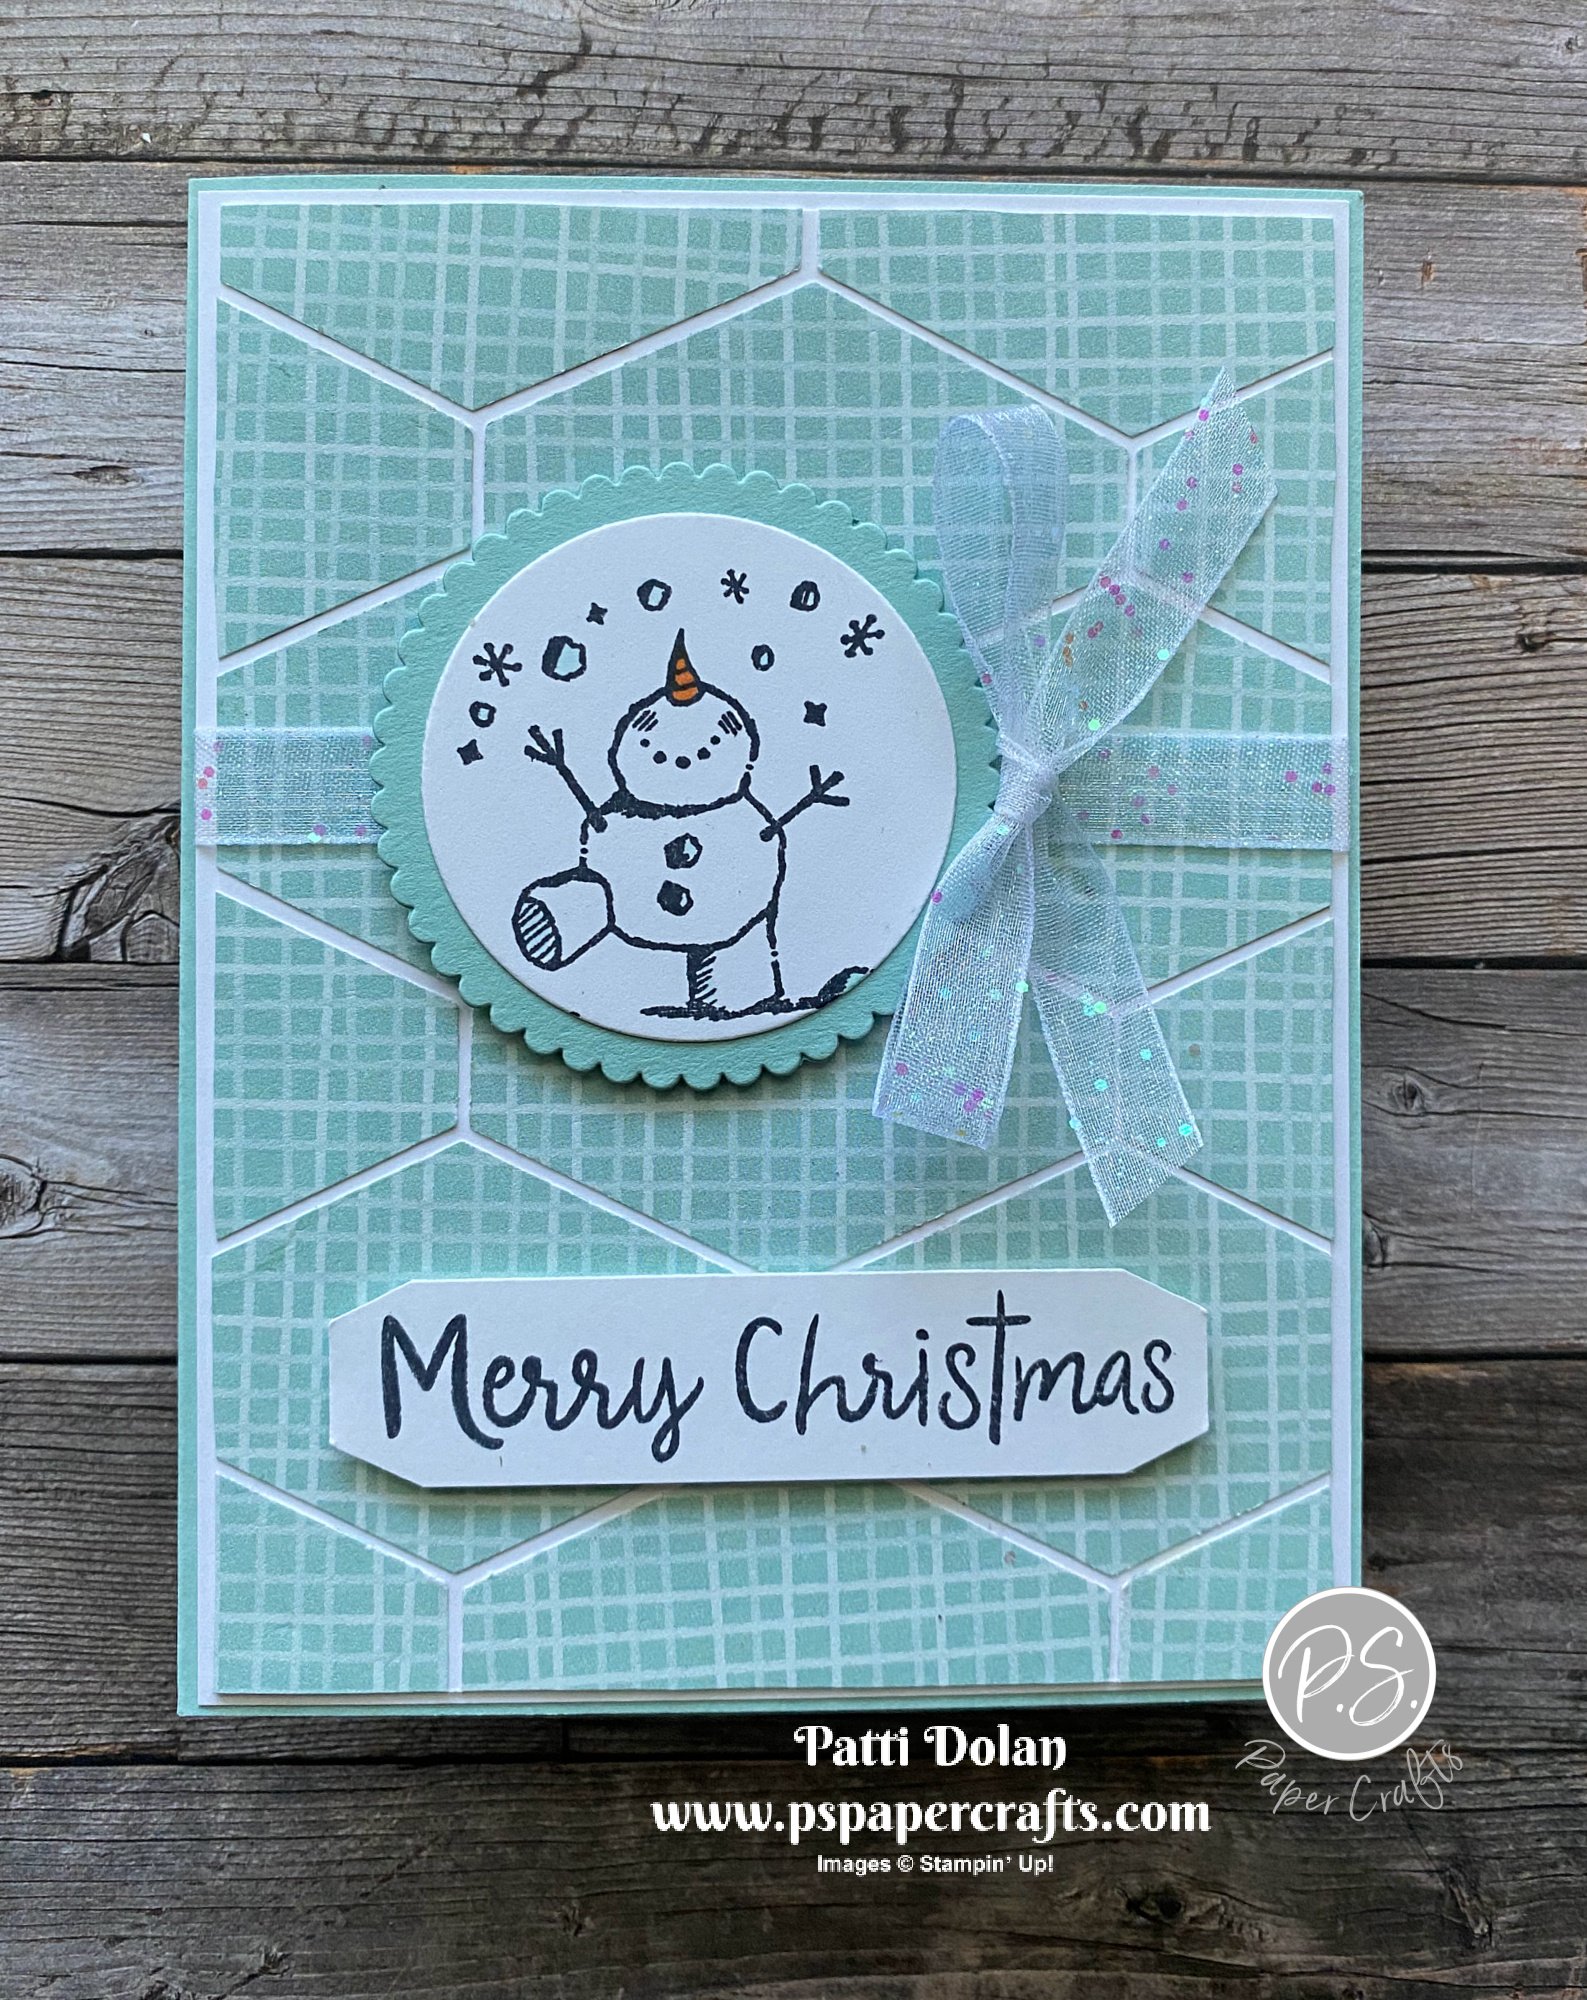
Tips & Instructions
Pool Party Card Base - 5 1/2 x 8 1/2, score at 4 1/4
Basic White Layer - 5 3/8 x 4 1/8
Basic White Layer 5 1/4 x 4, use this to adhere the pieces you punch.
Sweet Stockings Designer Series Paper - punch about 12 pieces using the Tailored Tag Punch and adhere them to the smaller white layer. Cut the pieces that hang over the edges, cutting from the back. Adhere layer to the larger white layer.
Wrap piece of White Glittered Organdy Ribbon around the layer and adhere to back. Adhere layer to card base.
Basic White Cardstock - cut circle using the Layering Circle Dies. Stamp snowman with Black Memento Ink and color using Pool Party and Pumpkin Pie Stampin’ Blends. Adhere to scalloped circle cut from Pool Party Cardstock. Adhere together and adhere to card using Dimensionals.
Tie bow and adhere using a Glue Dot.
Stamp sentiment on 3/4” strip of Basic White Cardstock using Black Memento Ink. Punch each side by feeding the ends into the punch from the back. Adhere using Dimensionals.