Sketch Saturday - Friendly Flamingo

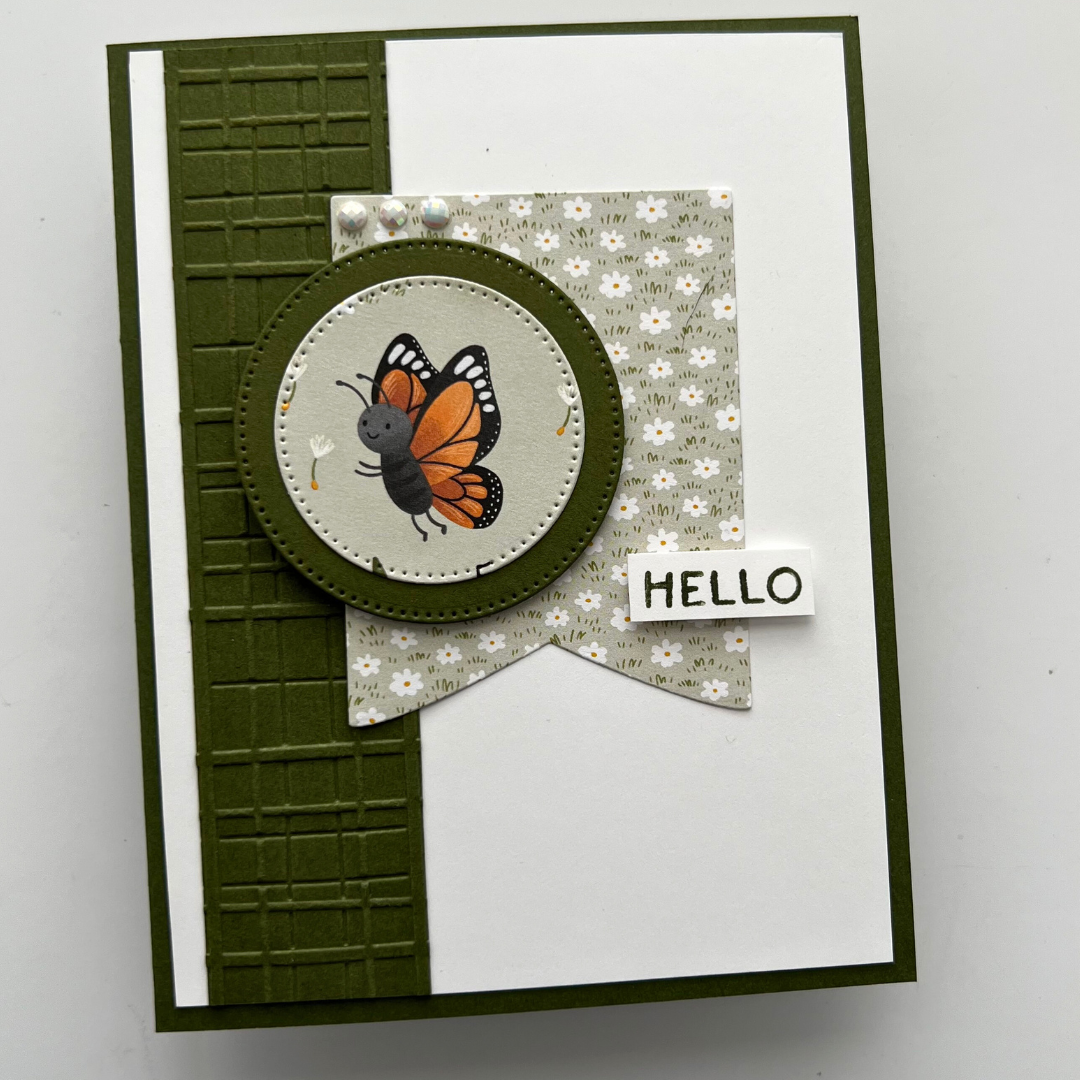
Here’s my card for this week’s sketch challenge. I used the Friendly Flamingo Stamp Set and coordinating dies. I love how tropical it looks!

 
Sketch Saturday - Friendly Flamingo Card1.jpeg
 

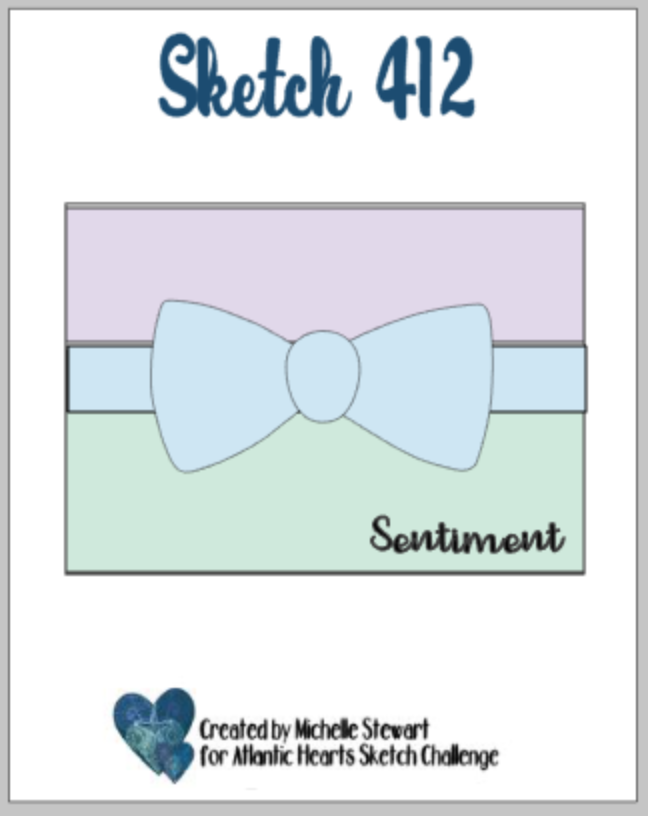
The sketch is from the Atlantic Hearts Sketch Challenge. My card from last week’s challenge was chosen as one of the top 3. I’m so excited!

 
Screen Shot 2021-04-09 at 10.26.12 PM.png
 

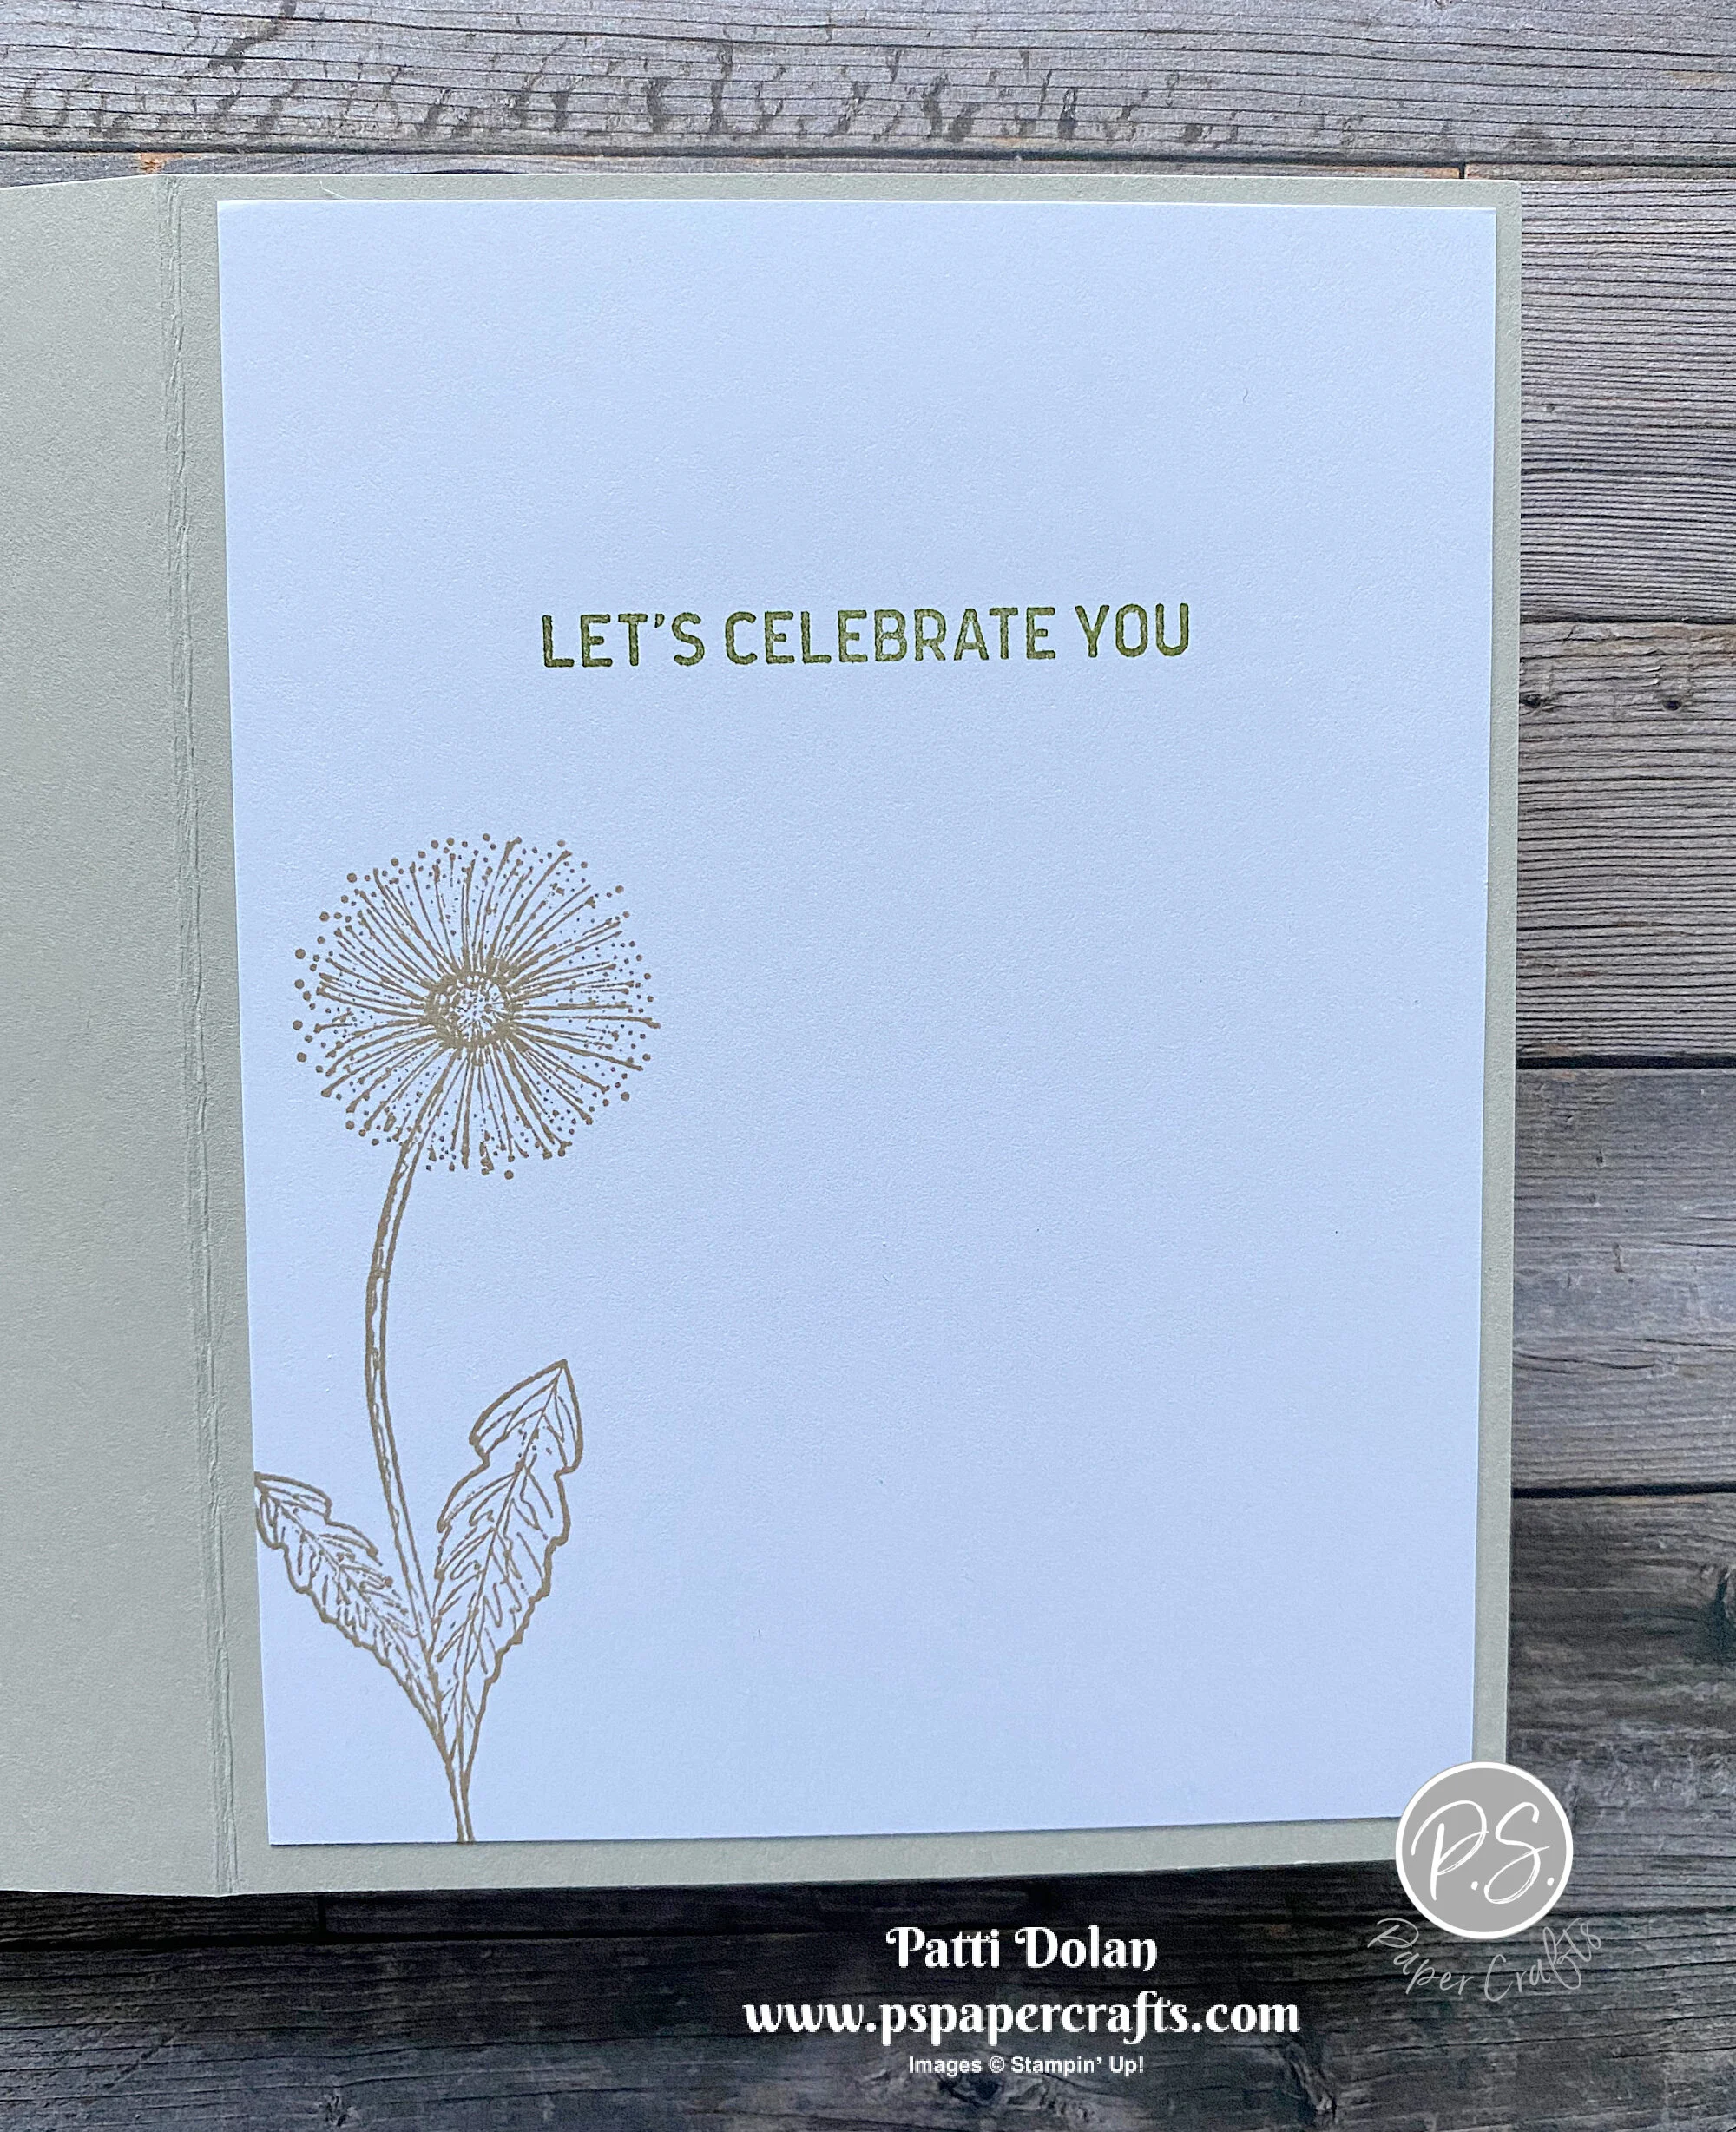
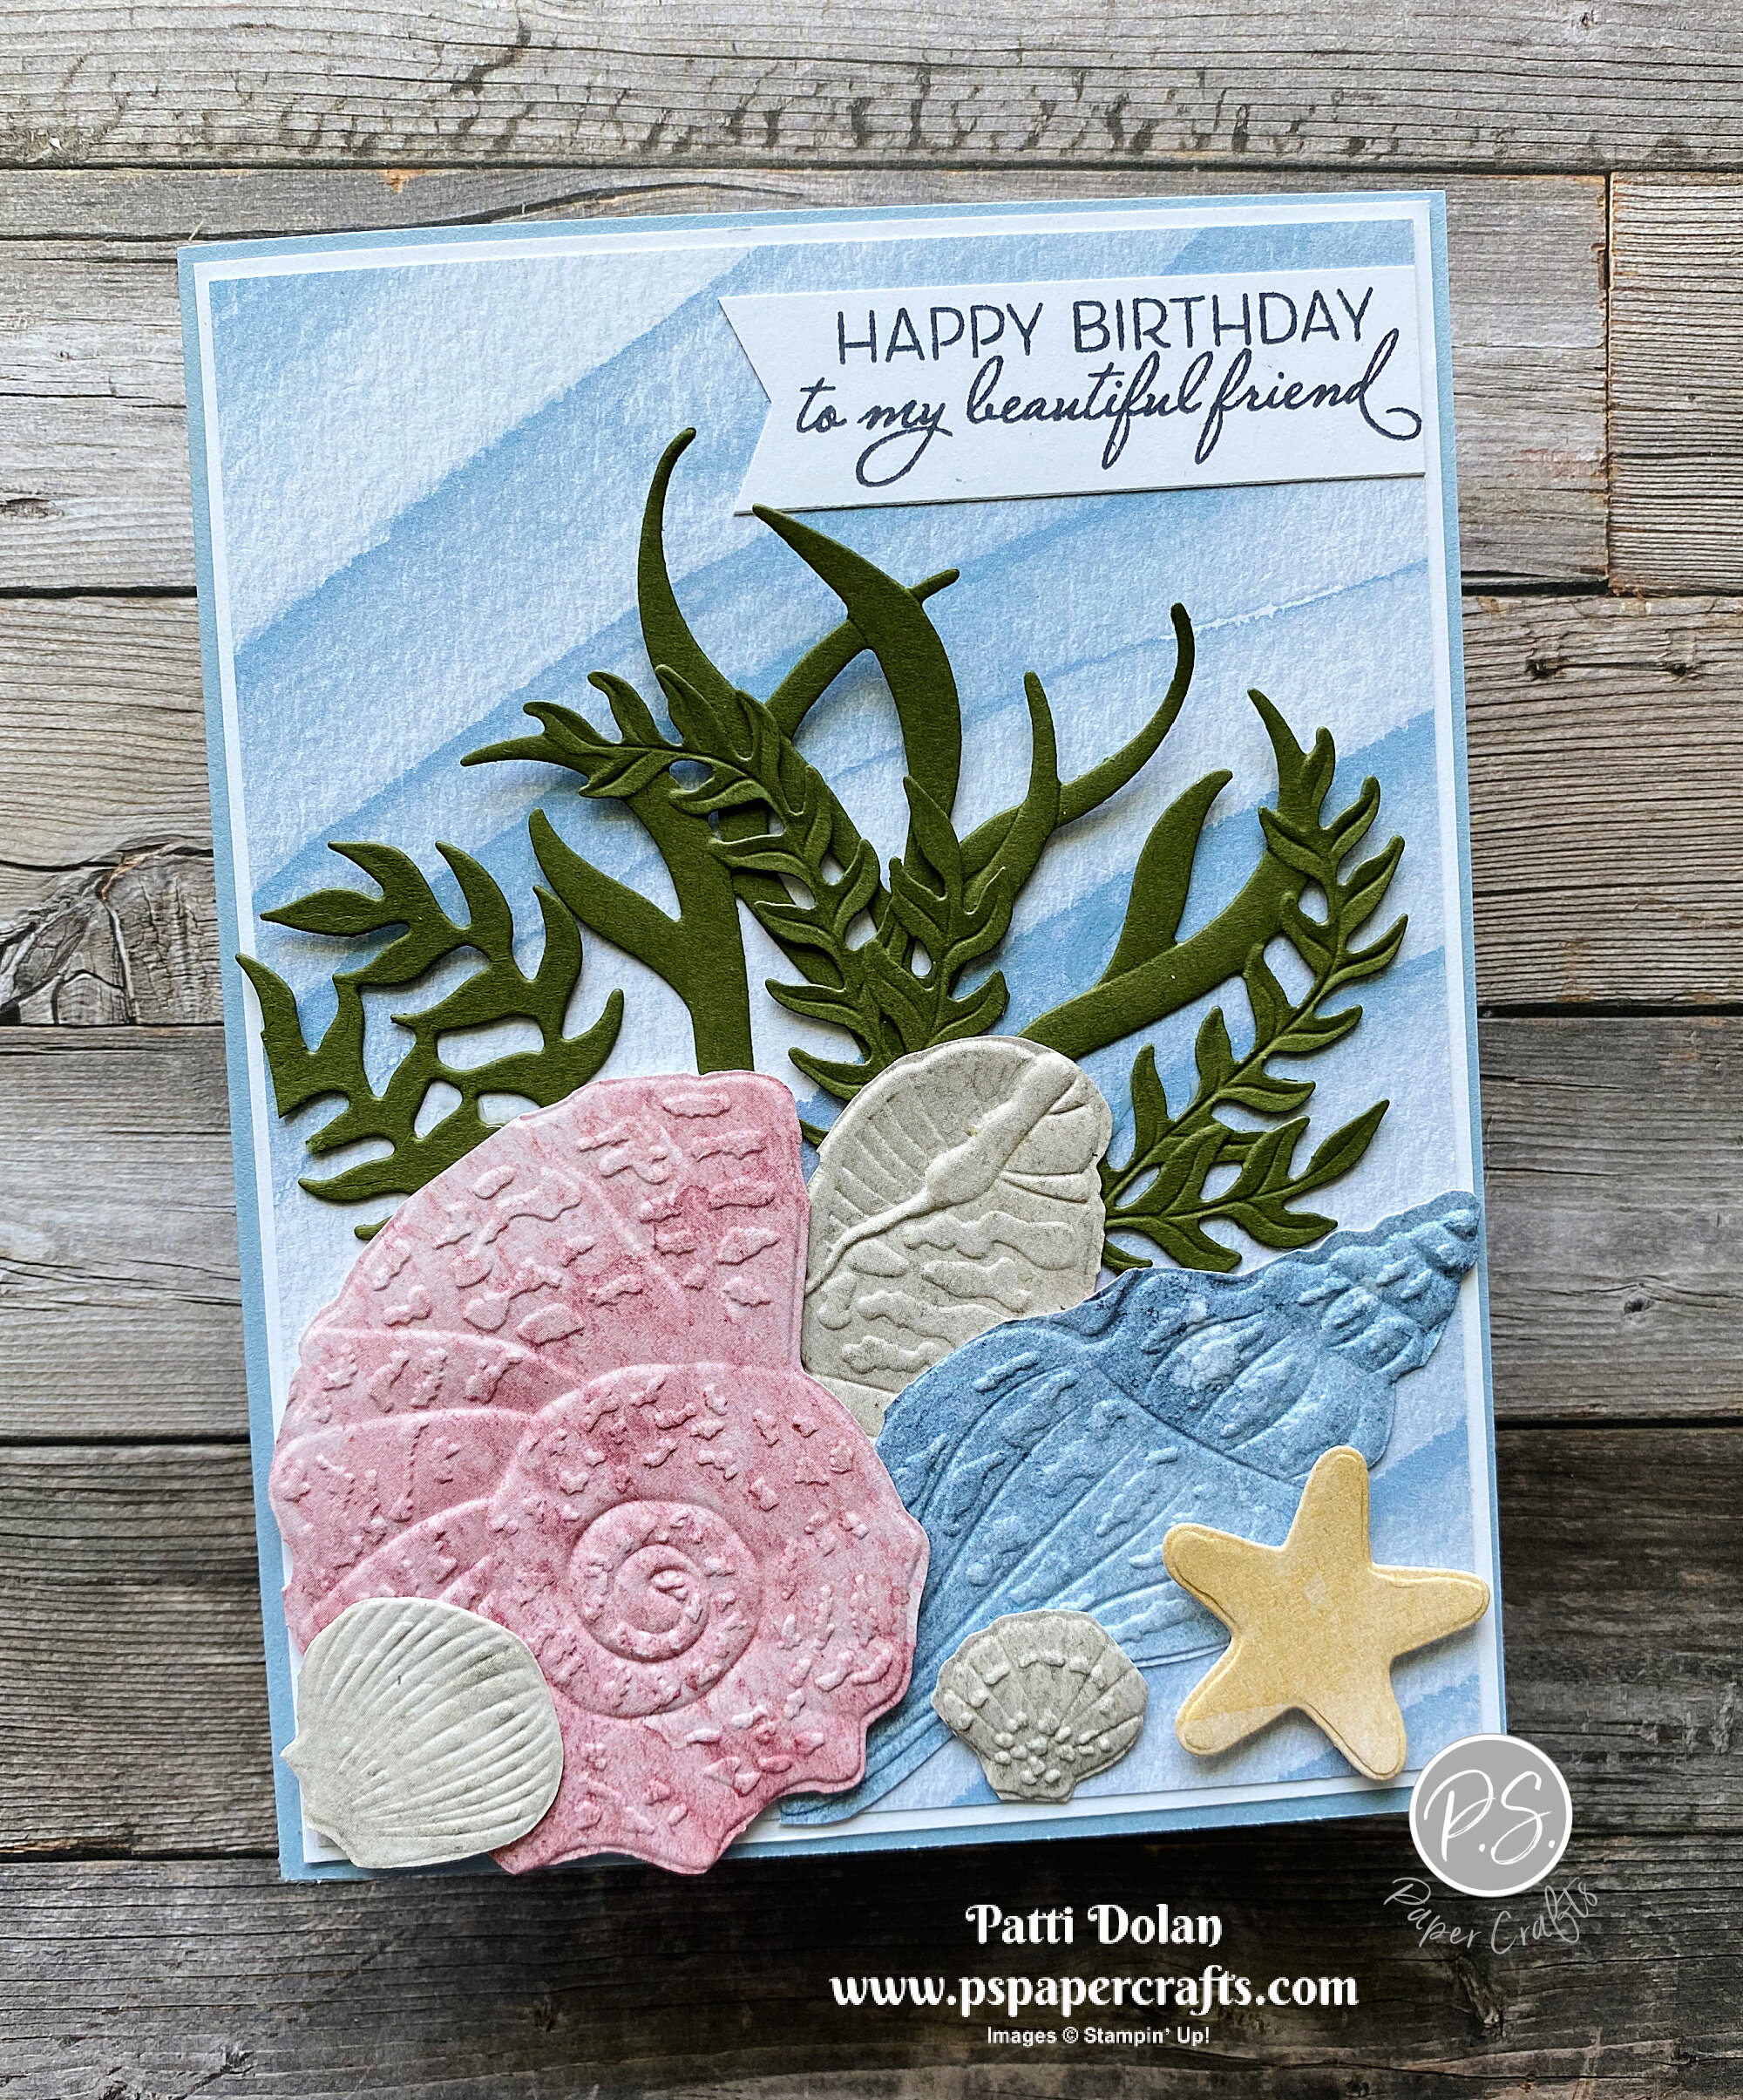
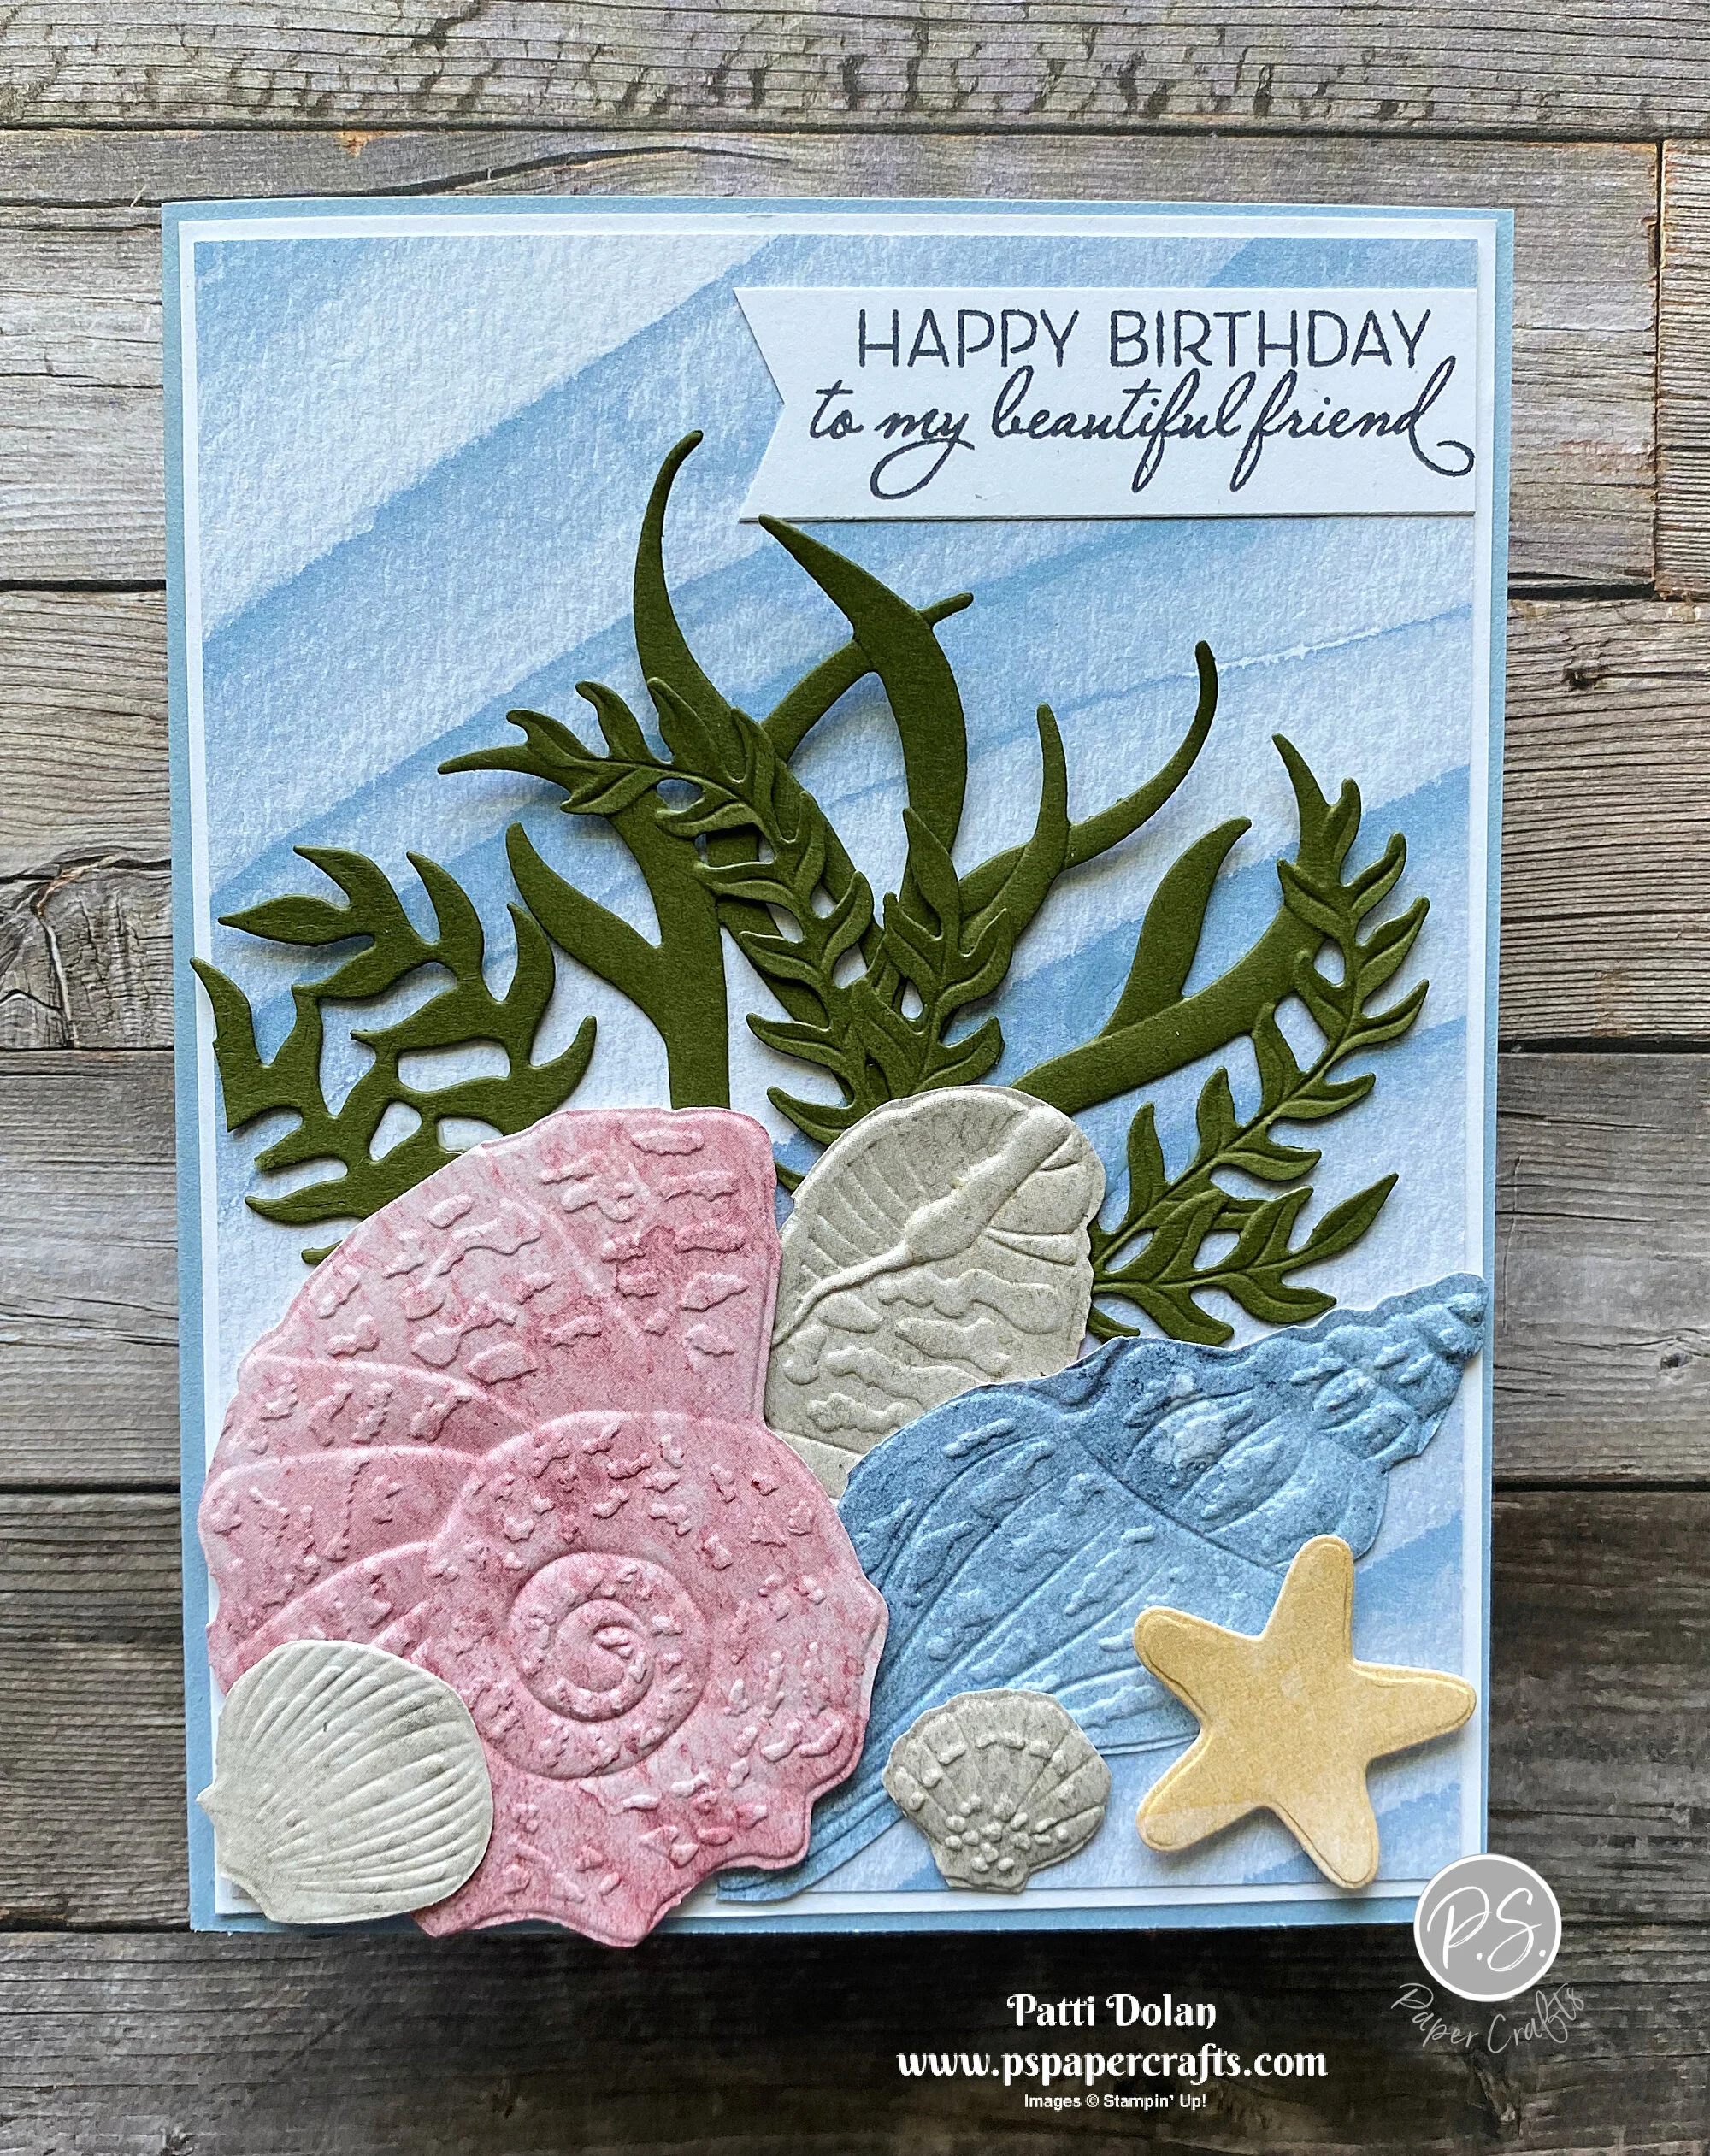
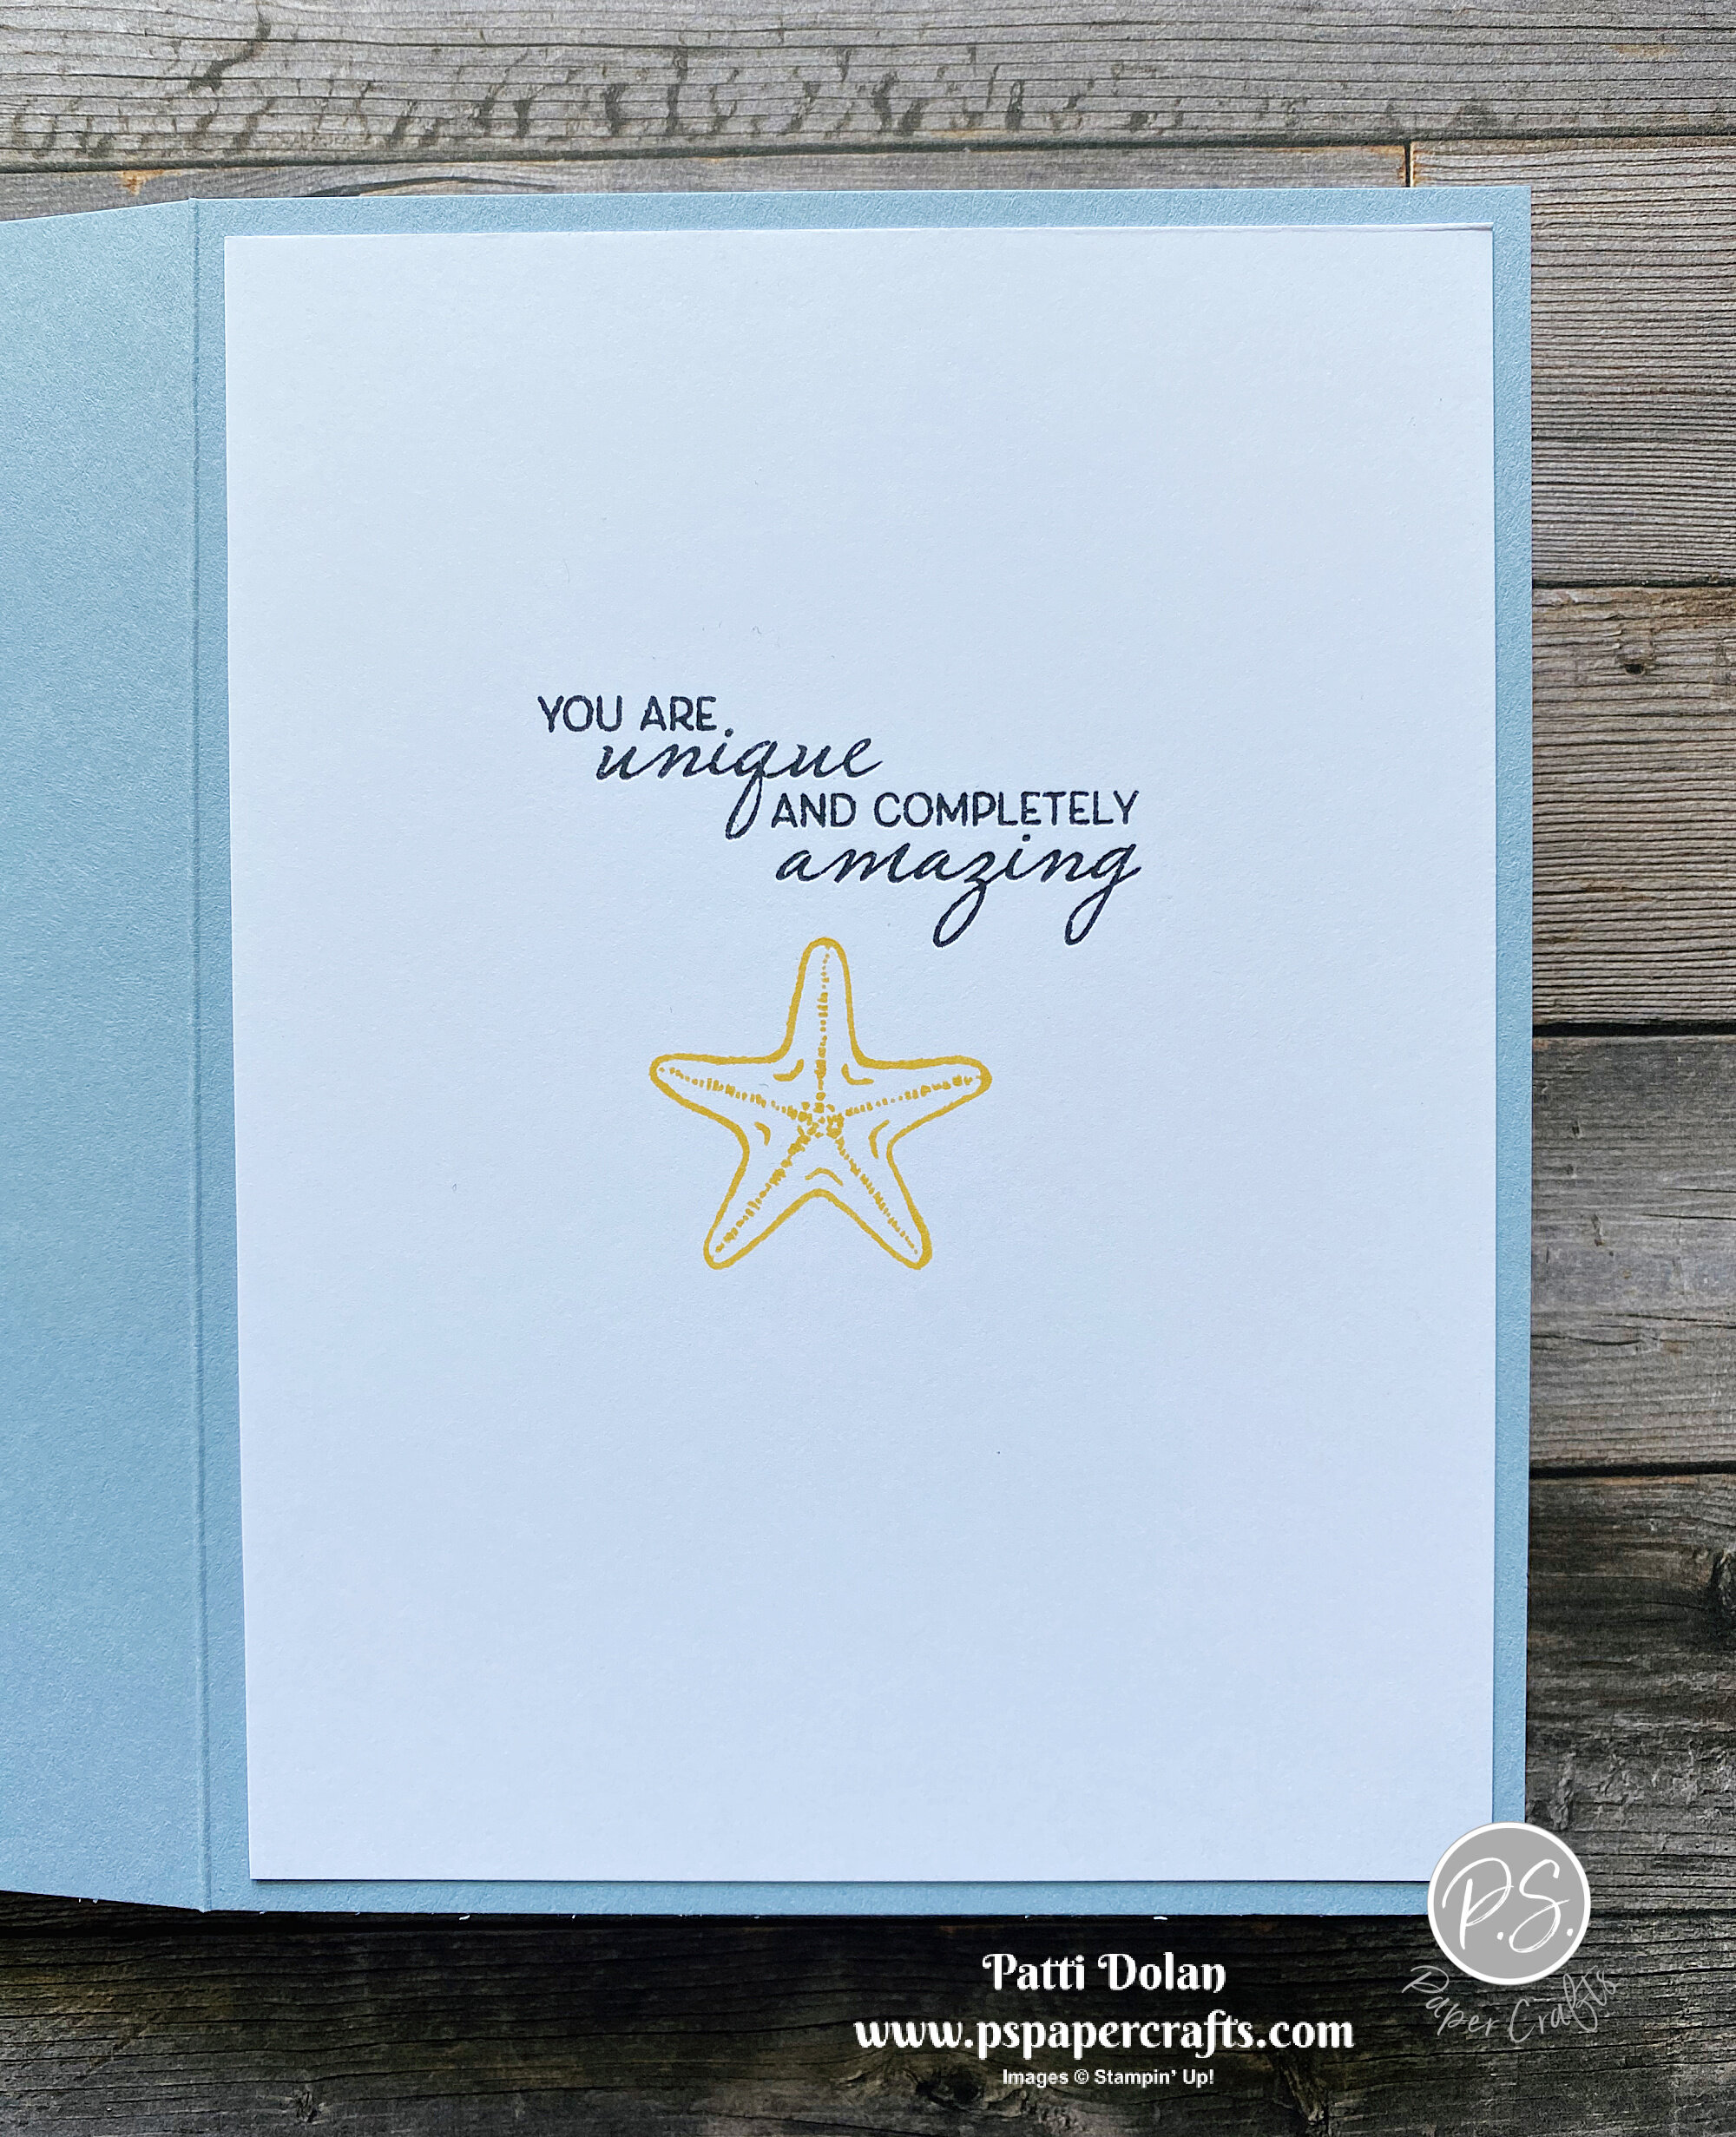
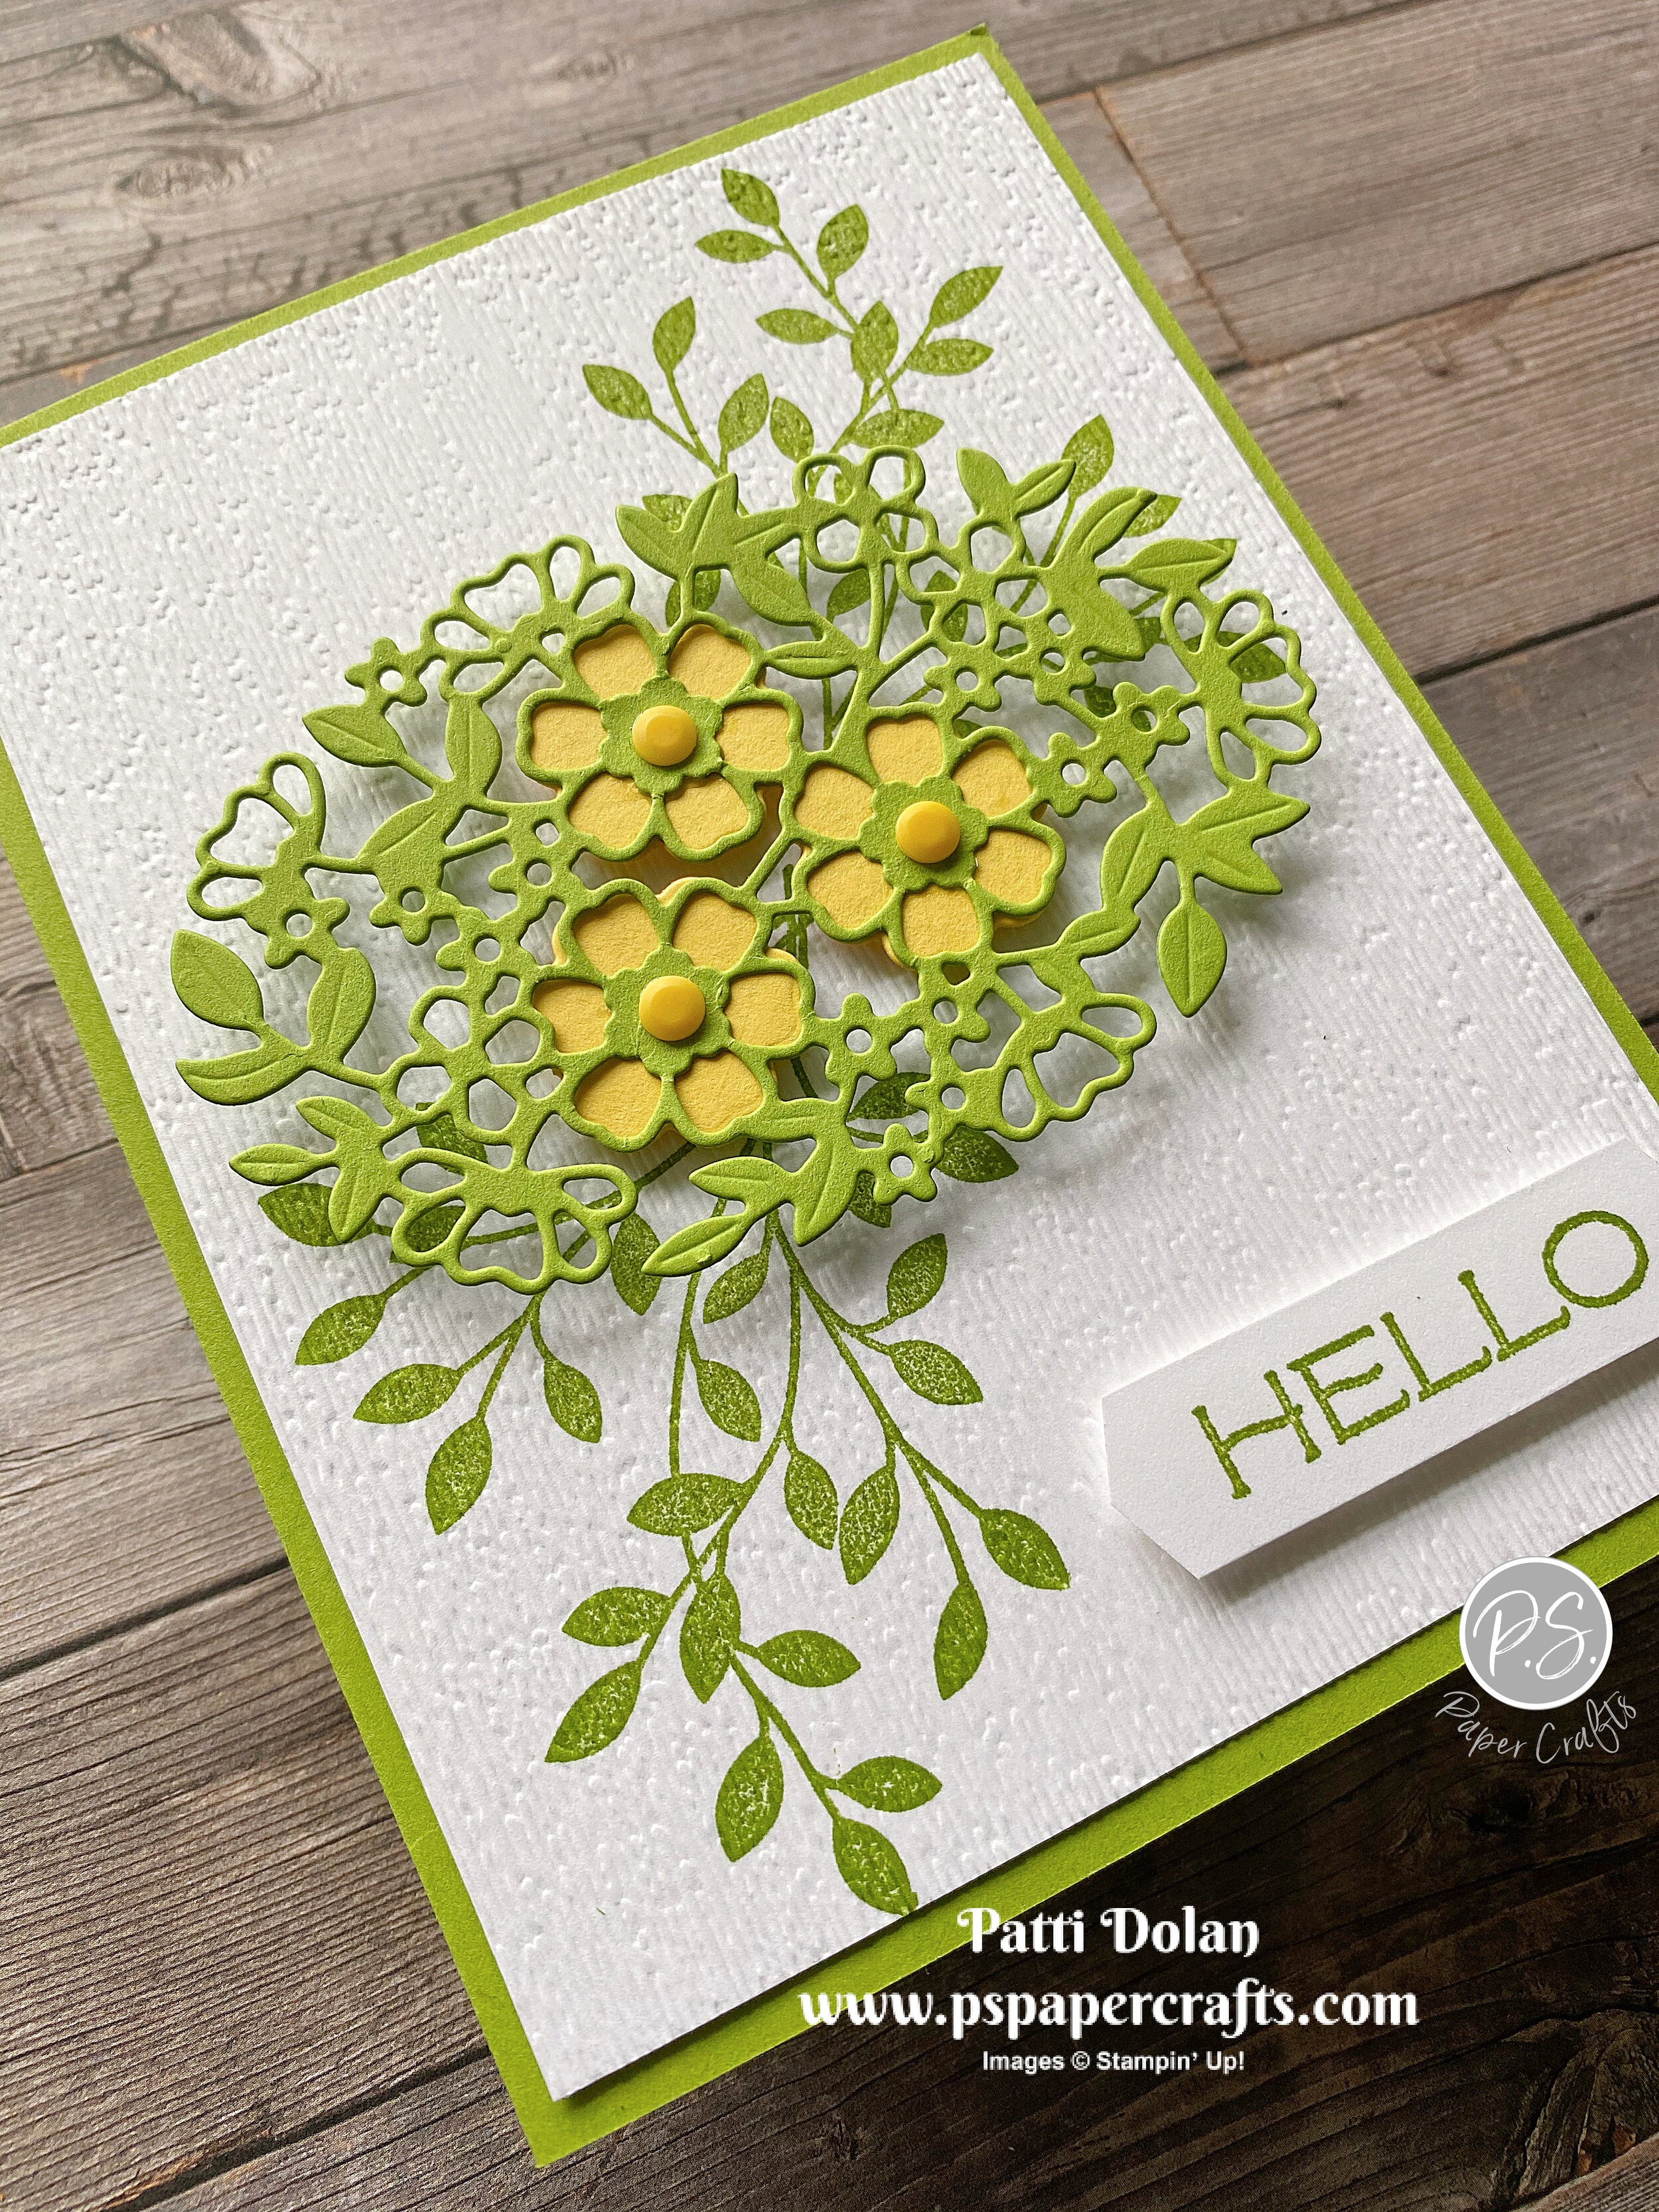
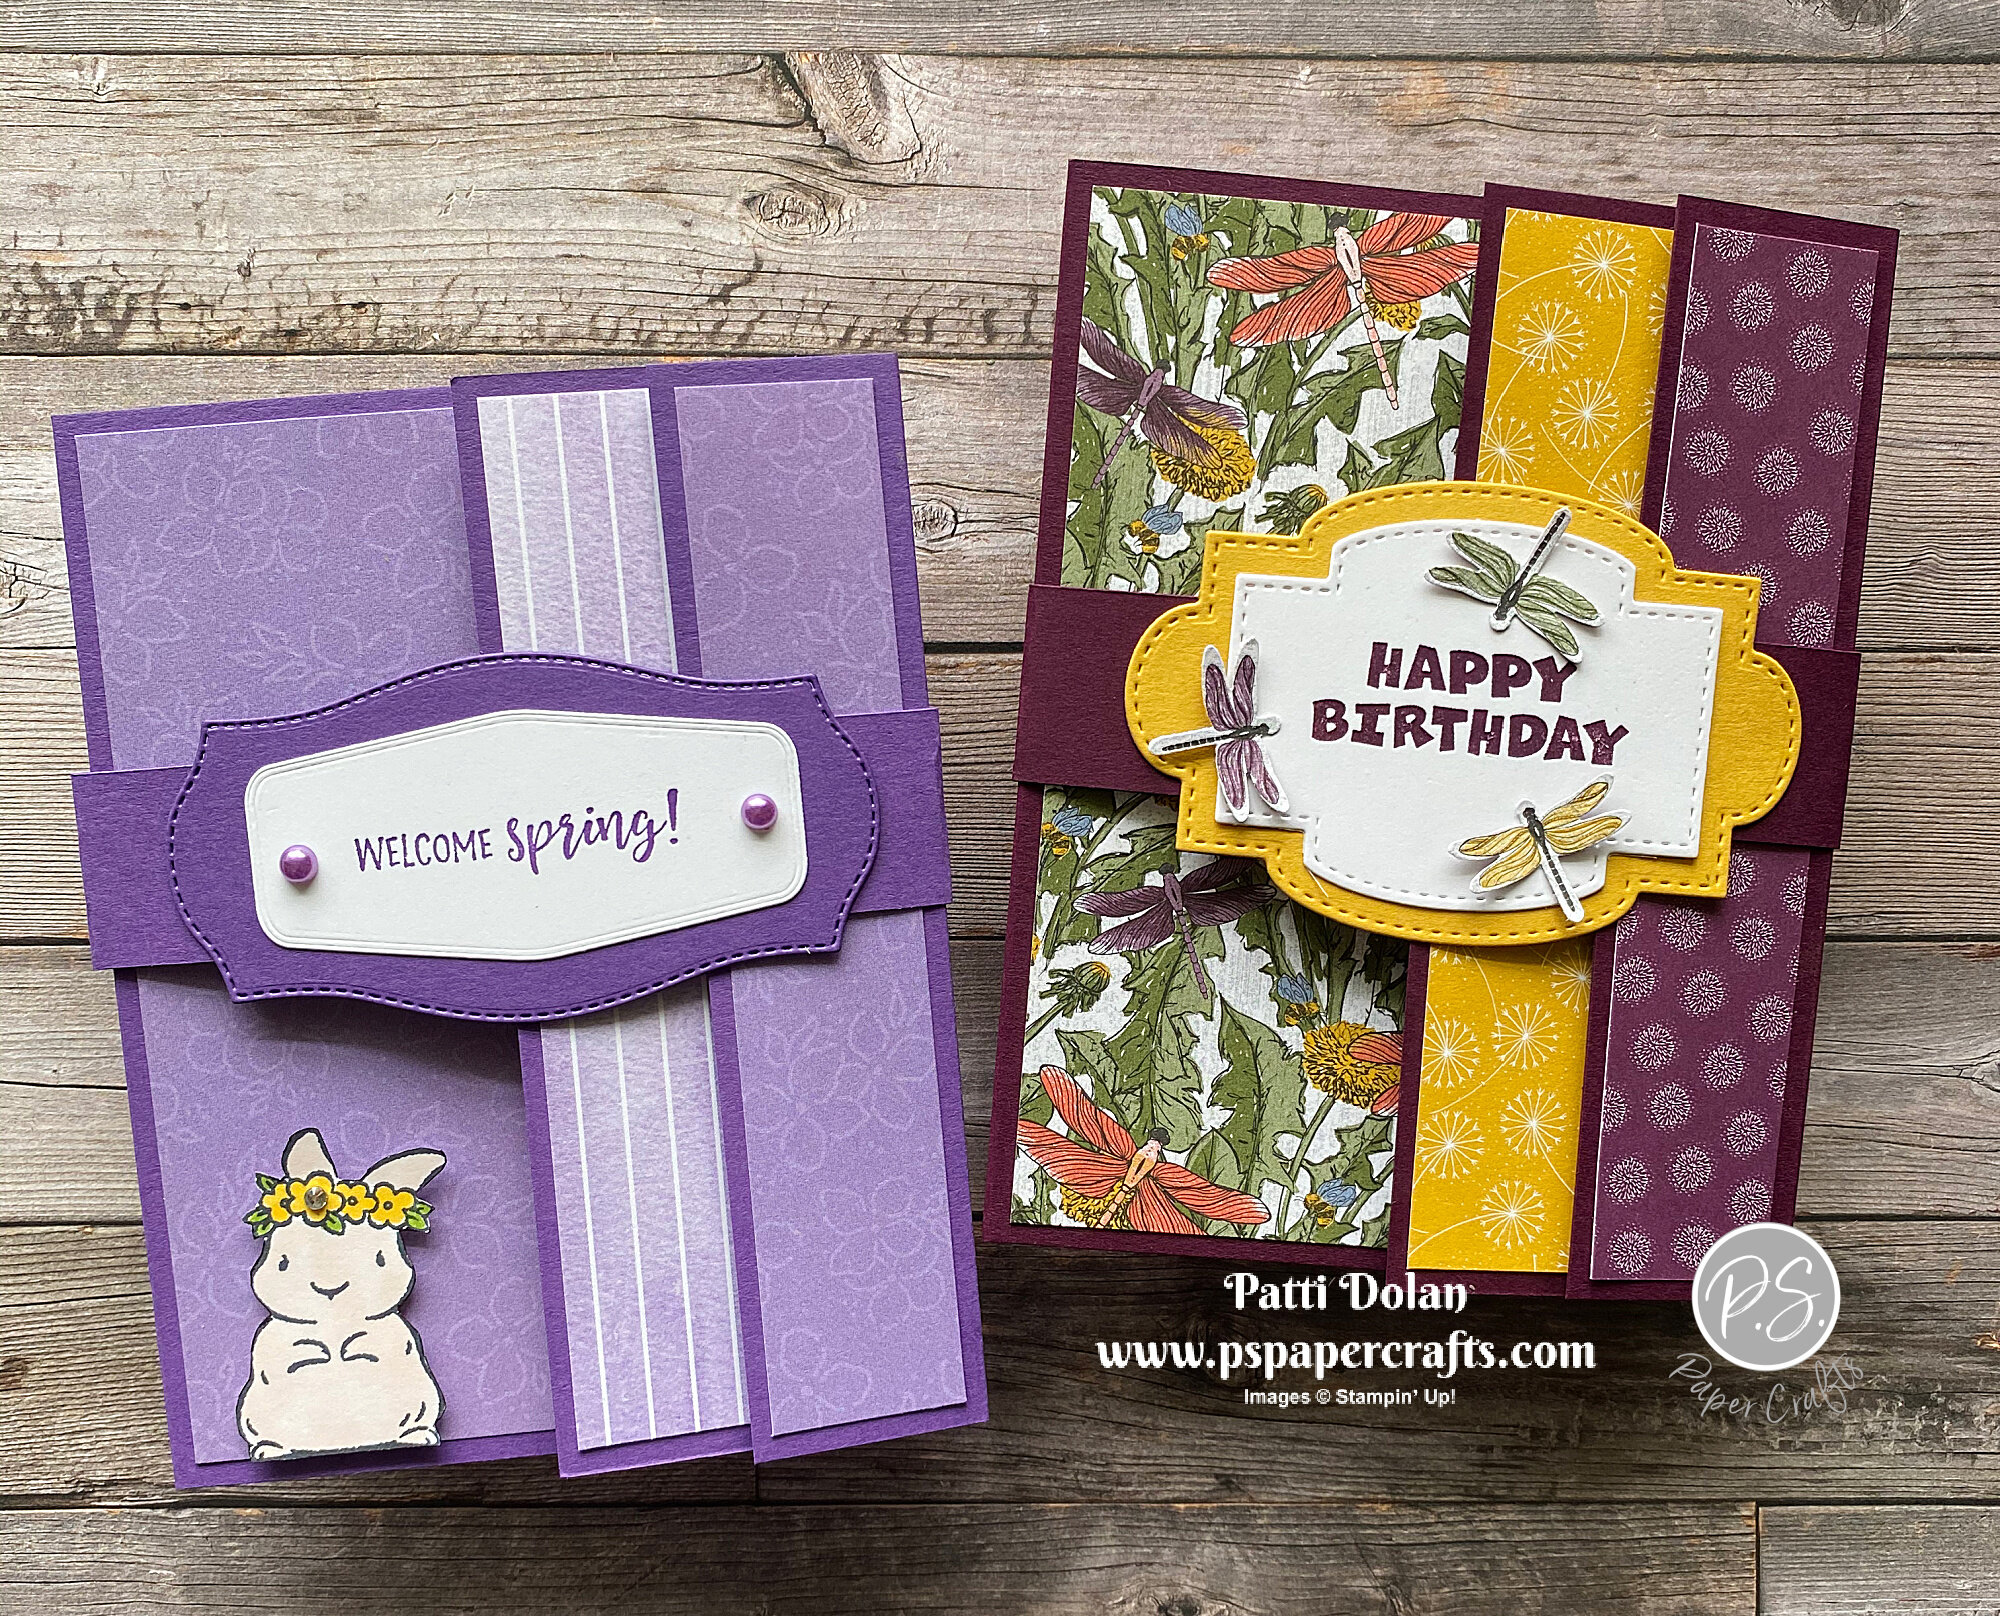
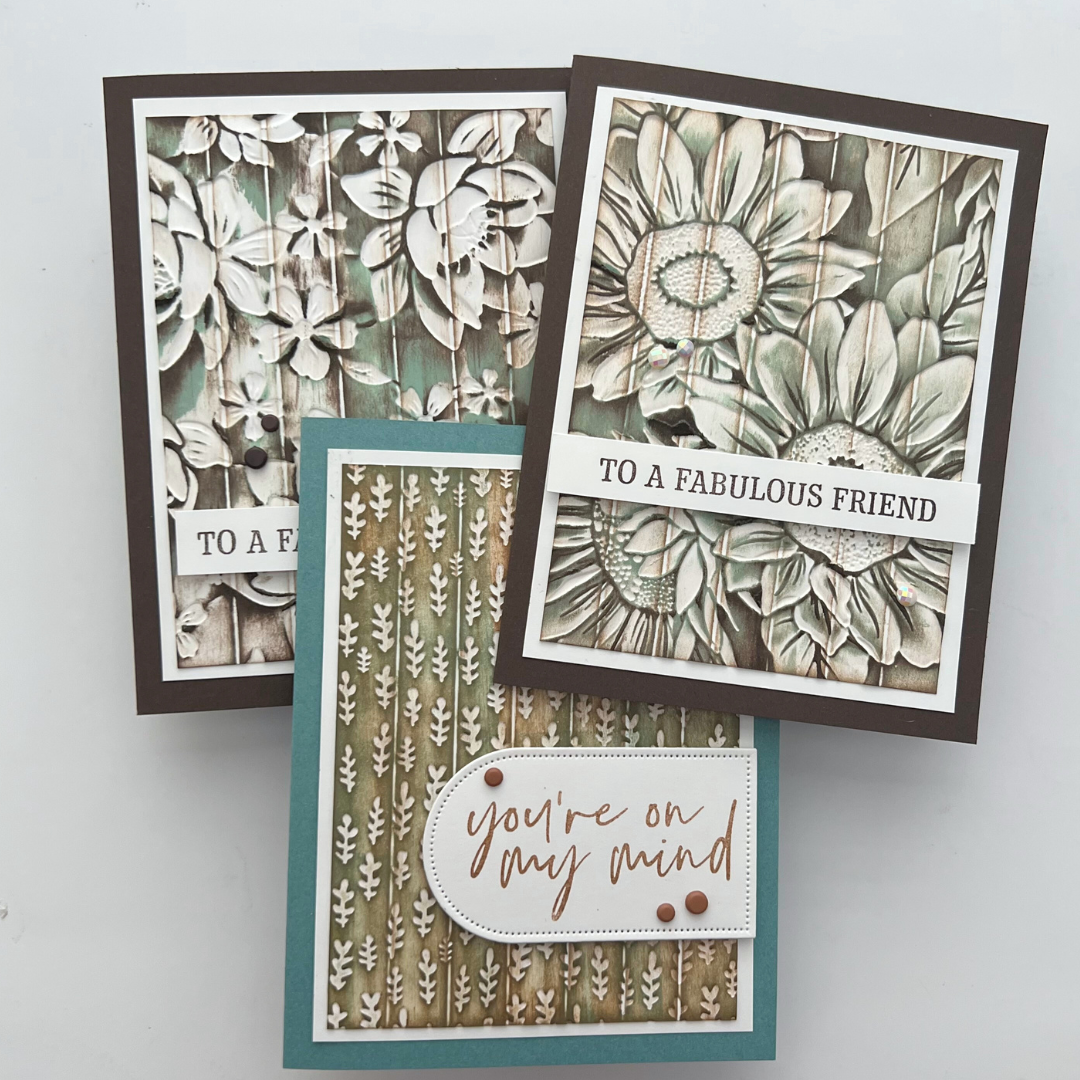
This stamp set has great sentiments for birthdays and I love the images. The paper is from the Forever Greenery Designer Series Papers which is one of my favorites and is on sale since it’s on the retiring list.

 
Sketch Saturday - Friendly Flamingo stamp set.jpeg
 

Tips & Instructions

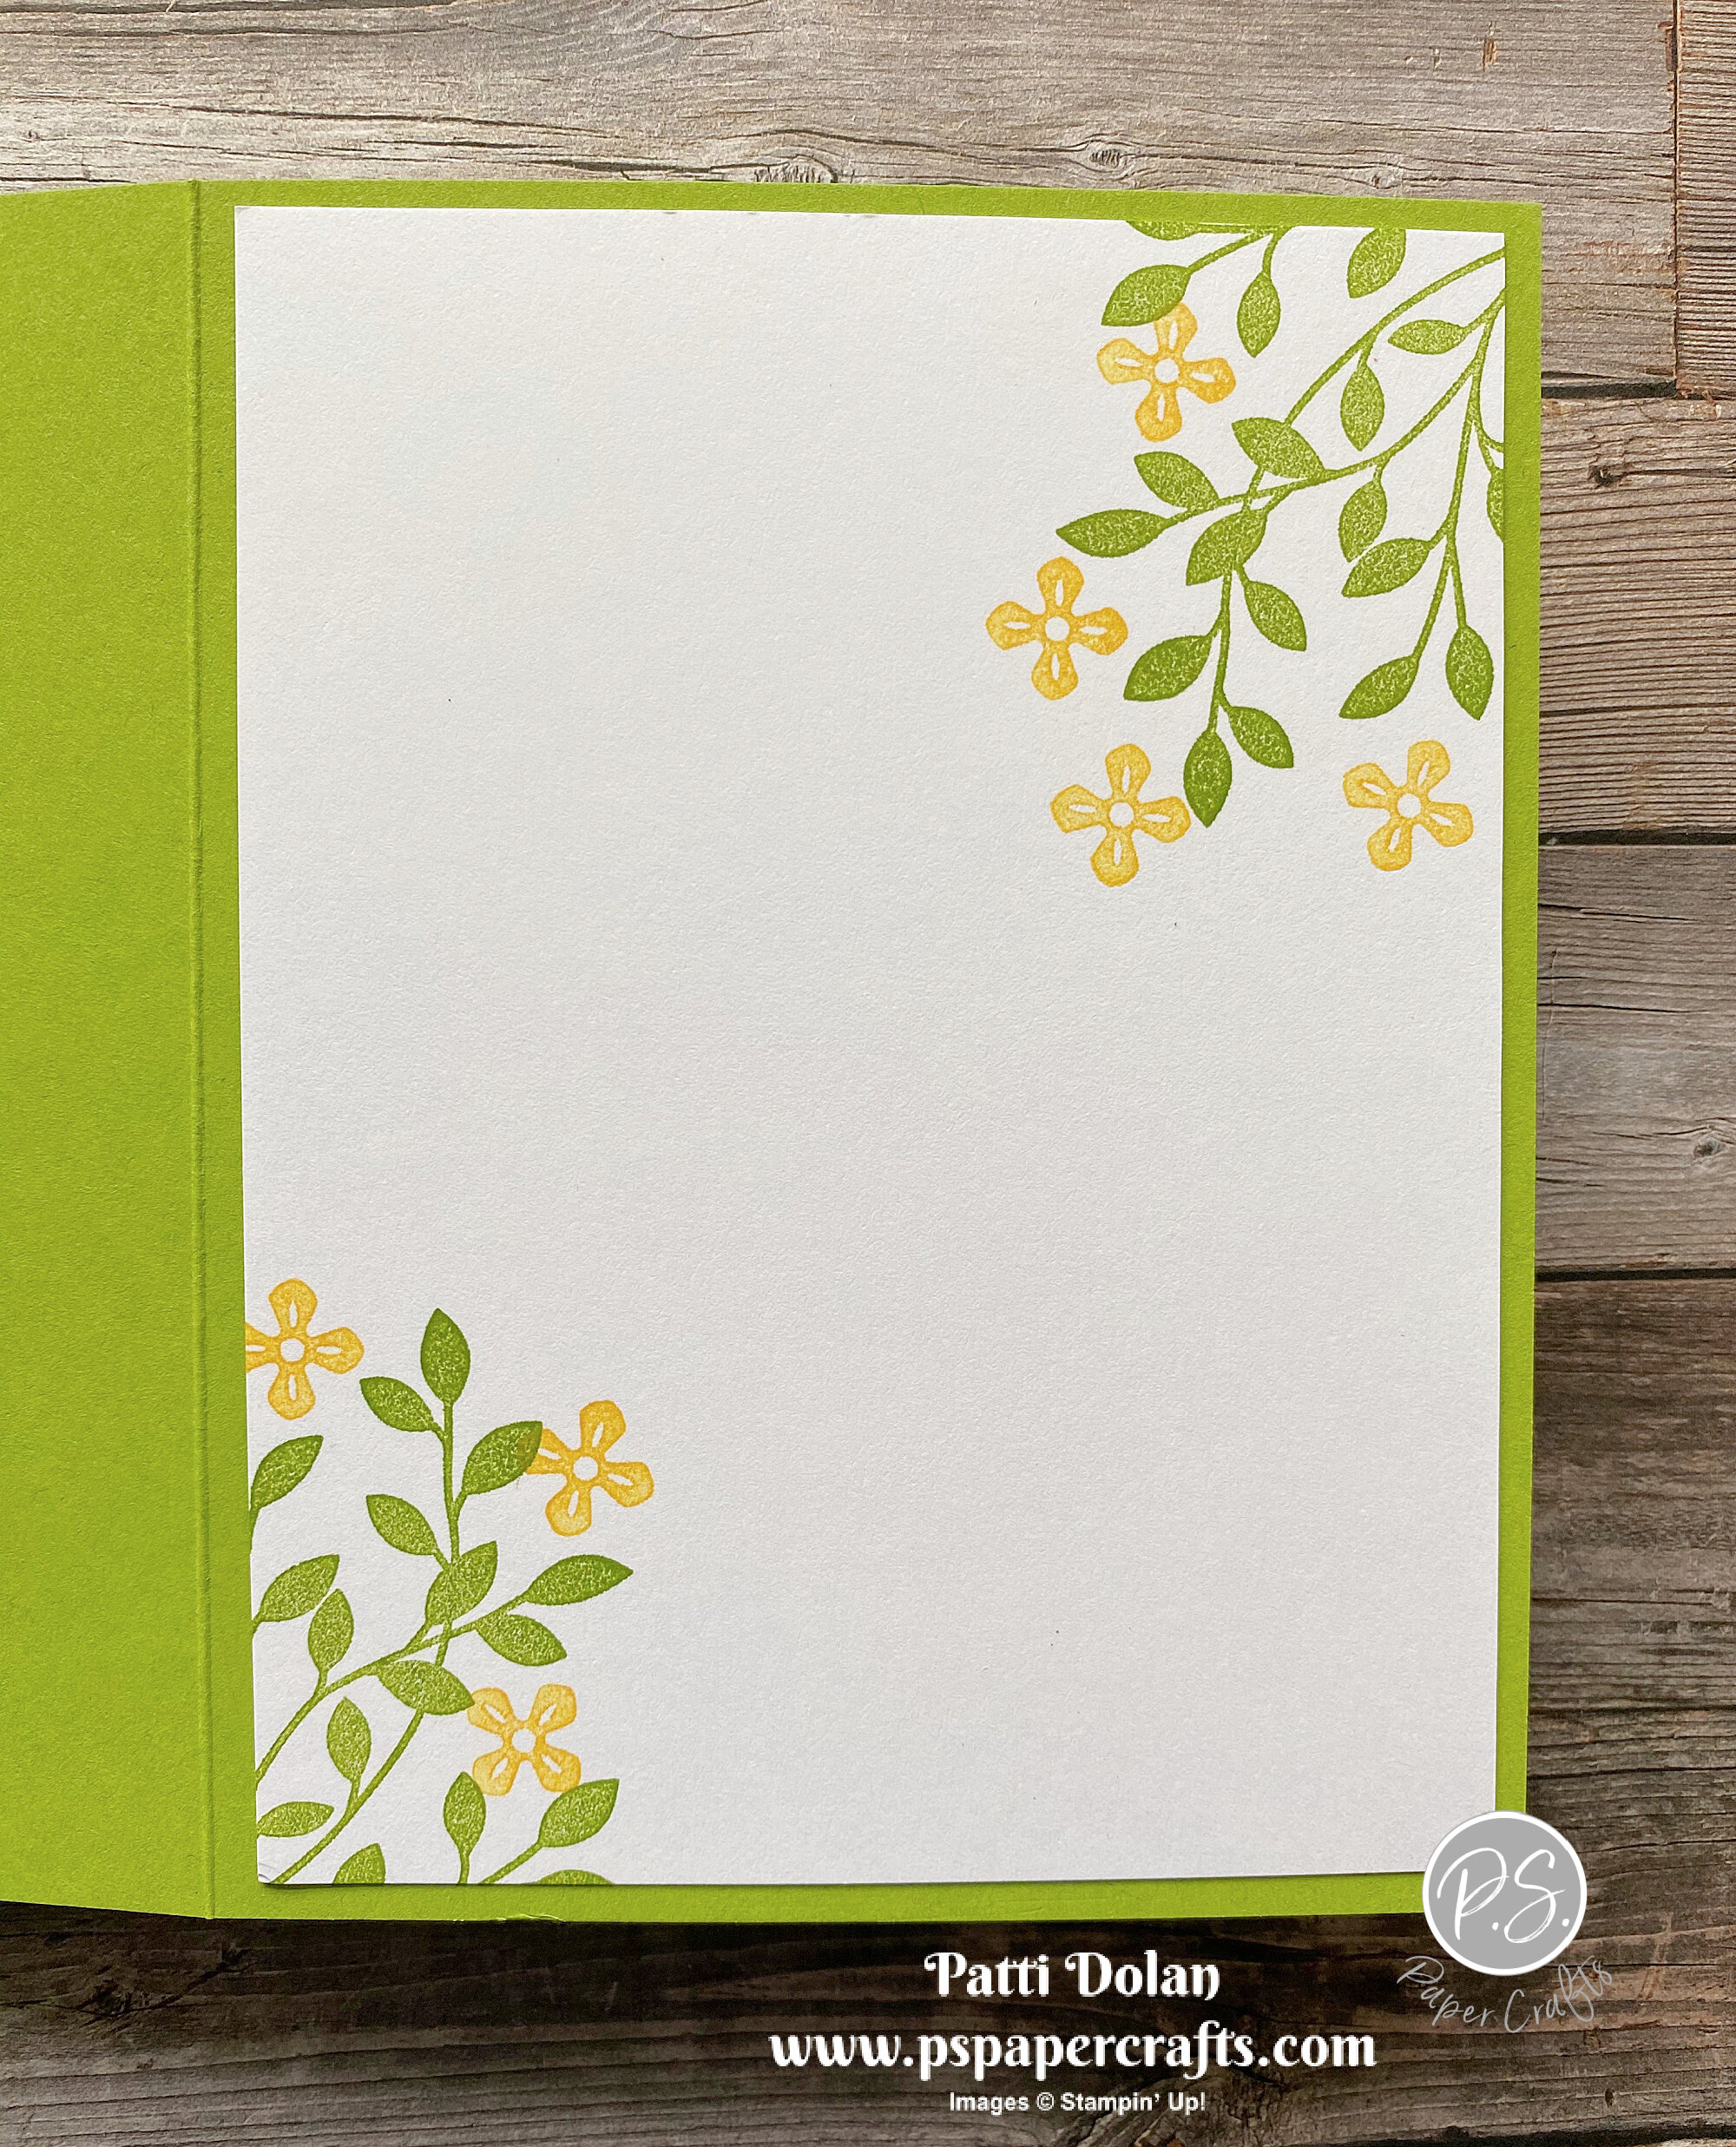
  • Garden Green Card Base - 5 1/2 x 8 1/2, score at 4 1/4

  • Basic White Layer 5 1/4 x 4, adhere to card base.

  • Forever Greenery Designer Series Paper - 5 1/8 x 3 7/8, adhere to card.

  • Basic White Strip - 4 x 1, emboss with Greenery Embossing Folder and adhere to card.

  • Basic White focal layer - 3 x 2, stamp sentiment with Gorgeous Grape Ink and greenery with Garden Green Ink.

  • Garden Green Layer 3 1/8 x 2 1/8, adhere behind stamped layer and adhere to card using Dimensionals.

  • Stamp 3 small flowers with Melon Mambo Ink and cut with coordinating dies. Adhere to top corner using a dimensional on the top one.

  • Add Rhinestones to flowers.

 
Sketch Saturday - Friendly Flamingo Card2.jpeg
 

The designer paper and embossing folder work so well together for this card.

 
Sketch Saturday - Friendly Flamingo closeup.jpeg
 

On the inside stamp sentiment with Gorgeous Grape Ink. Stamp the floral image with Garden Green Ink, stamping off first to get a lighter image. Then color the flowers using a Blender Pen and some Melon Mambo Ink.

 
Sketch Saturday - Friendly Flamingo inside.jpeg
 

Supply List

Love Patti.png
Shop Here
 

Welcoming Window Mother's Day Card 

Mother’s Day is right around the corner….time to get those cards made. I used the Welcoming Window Bundle to make this pretty card for my Mom.

 
Welcoming Window Mother's Day Card2.jpeg
 

In the video I’ll show you how to cut out the window and flowers using the Window Flower Box Dies that are in this bundle. The stamps for the greenery and flowers are so pretty to stamp; they line up so easily.


This is the stamp set and dies that you can purchase in a bundle to save 10%.

 
Screen Shot 2021-04-08 at 8.58.12 PM.png
 

Tips & Instructions

  • Early Espresso Card Base - 5 1/2 x 8 1/2, score at 4 1/4

  • Very Vanilla Layer - 5 1/4 x 4

  • Early Espresso Cardstock - cut window, shutters and shelf using Window Flower Box Dies.

  • Brass Foil Sheet - cut 4 hardware pieces.

  • Lay out the window on Very Vanilla Layer to determine placement for sentiment. Stamp sentiment with Poppy Parade Ink.

  • Stamp the middle-sized flower pot with Garden Green Ink, stamping off on a piece of scrap paper first to get a lighter layer.

  • Stamp greenery with Garden Green Ink at the top of the flower pot and stamp flowers with Poppy Parade Ink.

  • On scrap of Basic White, stamp two sets of greenery with Garden Green Ink. Stamp coordinating flowers with Poppy Parade Ink. Cut flowers using coordinating die.

  • Adhere window, shutters and shelf to layer. Adhere the brass hardware as showing in picture.

  • Adhere the flowers on window ledge using Dimensionals.

 
Welcoming Window Mother's Day Card1.jpeg
 

On the inside stamp the larger pot with Garden Green Ink stamping off first. Stamp greenery with Garden Green Ink and flowers with Poppy Parade Ink.

 
Welcoming Window Mother's Day Card inside.jpeg
 

Supply List

Love Patti.png
Shop Here
 

Flowering Cactus Prickly Card

Isn’t this a great sentiment? “Life can get kind of prickly” With all that we’ve been going through this year I can think of lots of people to send this card to.

 
Flowering Cactus Prickly Card.jpeg
 

I used the Flowering Cactus Medley to make the card. The Designer Series Papers are so pretty. It includes felt embellishments and linen thread to dress up your cards and the stamp set has great sentiments and images.

 
Screen Shot 2021-04-07 at 5.11.24 PM.png
 

Tips & Instructions

  • Calypso Coral Card Base - 5 1/2 x 8 1/2, score at 4 1/4

  • Mint Macaron Layer - 5 1/8 x 3 1/2

  • Basic White Layer - 4 3/4 x 3 1/8

  • Designer Series Paper - 4 1/2 x 3, cut to 1 1/2 strips and adhere to white layer spreading them apart slightly. Make sure you line up the strips so the pattern flows across the card.

  • Adhere layer with Designer Series Paper strips to Mint Macaron Layer.

  • Wrap 3 strands of the Calypso Coral Linen Thread around layer and adhere to back.

  • Stamp sentiment with Calypso Coral Ink on 1/2 strip of Basic White and adhere to card over the Linen Thread using Mini Dimensionals.

  • Tie bow with 3 strands of the Linen Thread and adhere using a Glue Dot.

  • Adhere felt flower to sentiment label. I used Liquid Glue to adhere it.

 
Flowering Cactus Prickly Card1.jpeg
 

On the inside stamp the cactuses with Mossy Meadow Ink. Stamp flowers with Highland Heather and Calypso Coral Inks. Stamp sentiment with Calypso Coral Ink.

 
Flowering Cactus Prickly Card inside.jpeg
 

Supply List

Love Patti.png
Shop Here
 

Embossed Dandelions Birthday Card

The Dandelions 3D Embossing Folder is so pretty. It’s much bigger than I expected and embosses an entire card layer.

 
Dandelions Birthday Card green2.jpeg
 

In my video I’ll show you how you can make a beautiful card using this embossing folder by adding some ink with a Sponge Dauber.


Tips & Instructions

  • Sahara Sand Card Base - 5 1/2 x 8 1/2, score at 4 1/4

  • Old Olive Layer - 5 1/4 x 4, emboss with Dandelions 3D Embossing Folder.

  • Using a Sponge Dauber, lightly sponge the dandelions with White Craft Ink.

  • Wrap Linen Thread around layer twice and adhere in the back.

  • Stamp sentiment (from Itty Bitty Birthdays) with Old Olive Ink on 1/2” strip of Sahara Sand Cardstock and punch each end using the Banners Pick A Punch. Adhere to card using Mini Dimensionals.

  • Tie bow with a piece of Linen Thread and adhere with a Glue Dot.

  • Add 3 Elegant Faceted Gems.

 
Dandelions Birthday Card green1.jpeg
 

On the inside stamp sentiment with Old Olive Ink and Dandelion with Sahara Sand Ink. The sentiment is from the Itty Bitty Birthday Stamp Set and the Dandelion is from the Garden Wishes Stamp Set.

 
Dandelions Birthday Card inside.jpeg
 

Here’s another version of this card. The embossed layer is Very Vanilla and was sponged with So Saffron Ink and Soft Sea Foam Ink.

 
Dandelions Birthday Card white.jpeg
 

Supply List

Love Patti.png
Shop Here
 

Friends Are Like Seashells Birthday Card

I have to tell you that cutting these seashells and embossing them with the Seashells 3D Embossing Folder is amazing. I didn’t even stamp them. The embossing folder gives them so much definition.

 
Friends Are Like Seashells Card2.jpeg
 

The large die in this Bundle cuts out one piece with all the shells and seaweed attached together. You can emboss it as one piece and then cut it apart.

 
Screen Shot 2021-04-05 at 9.34.50 PM.png
 

I cut small pieces of the Sand & Sea Designer Series Paper and used different pieces to cut each shell. You’ll have to run each shell through your die cutting machine separately.

 
Screen Shot 2021-04-05 at 9.35.37 PM.png
 

I then lined up the shell on the Seashells 3D Embossing Folder. I had to trim around the piece which was very easy to do. This is a picture of the folder from the catalog just to show you what it looks like.

 
Screen Shot 2021-04-05 at 9.35.15 PM.png
 

Tips & Instructions

  • Seaside Spray Card Base - 5 1/2 x 8 1/2, score at 4 1/4

  • Basic White Layer - 5 3/8 x 4, 1/8 adhere to card base.

  • Sand & Sea Designer Series Paper Layer - 5 1/4 x 4

  • Cut pieces of the designers series paper and cut out the shells so you have shells in different colors. You’ll have to run it through your die cutting machine for each one.

  • Before you trim them down, fit each shell into the coordinating shell on the embossing folder and emboss. I embossed each shell separately. Once done, you can trim it down.

  • Cut & emboss Mossy Meadow Cardstock to get the seaweed and trim off the excess.

  • Lay your pieces out on the Designer Series Paper layer and adhere. I used Multipurpose Liquid Glue and Dimensionals.

  • Stamp sentiment with Black Memento Ink on 3/4” strip of Basic White and cut to size. Punch one end with the Banners Pick A Punch.

 
Friends Are Like Seashells Card1.jpeg
 

On the inside stamp sentiment with Black Memento Ink. Stamp starfish with So Saffron Ink.

 
Friends Are Like Seashells inside.jpeg
 

Supply List

Love Patti.png
Shop Here
 

Sketch Saturday - Playful Pets

This week’s sketch challenge was, well a challenge! I didn’t have a window stamp set and had to figure out how to make my own. I’m happy with how it turned out.

 
Sketch Saturday - Playful Pets card1.jpeg
 

The sketch I used is from the Atlantic Hearts Sketch Challenge.

 
Screen Shot 2021-04-02 at 9.29.34 PM.png
 

These dogs are so cute. I cut them from a piece of the Playful Pets Designer Series Paper. Look at the attitude of the one on the left, too funny.

 
Sketch Saturday - Playful Pets closeup.jpeg
 

Tips & Instructions

  • Early Espresso Card Base - 5 1/2 x 8 1/2, score at 4 1/4

  • Basic White Layer - 5 1/4 x 4, emboss with the Brick & Mortar 3D Embossing folder. Lightly blend some Sahara Sand Ink on it using a Blender Brush. Adhere layer to card base.

  • Tasteful Textures Designer Series Paper Layer - 3 x 2 3/4

  • Playful Pets Designer Series Paper - cut two of the dogs to 1 1/4 squares.

  • Cut 2 additional 1 1/4 squares from Basic White Cardstock.

  • Lightly blend all 4 squares with Balmy Blue Ink using a Blender Brush. Try to blend around the dogs as much as possible.

  • Adhere the squares to the wood grain layer.

  • Add skinny strip (about 1/4 x 3) of the Designer Series Paper to the bottom of the window, letting it hand over each side. Add a very skinny strip to top of the window (about 1/16 x 2 3/4).

  • Adhere window to card using Dimensionals.

  • Stamp sentiment with Early Espresso Ink on a 1/2” strip of Basic White. Punch both ends using the Banners Pick A Punch. Adhere sentiment to card using Dimensionals.

 
Sketch Saturday - Playful Pets card2.jpeg
 

On the inside stamp sentiment with Early Espresso Ink and leafy image with Balmy Blue Ink, stamping a second and third time without re-inking. The sentiment and leafy image are from the Forever Fern Stamp Set.

 
Sketch Saturday - Playful Pets inside.jpeg
 

Supply List

Love Patti.png
Shop Here
 

Floating & Fluttering Thinking Of You Card

The Floating & Fluttering Stamp Set is so much fun! I am really loving all the different stamps in the set to color and add detail to each butterfly.

 
Floating & Fluttering Thinking Of You card2.jpeg
 

I’ll show you how I made this beautiful background layer using the butterfly stamp. The 3 butterflies and leaves are grouped together in one stamp.


You can stamp the butterfly grouping in one shot and cut it with the coordinating die. Then add the colors and details.

 
Screen Shot 2021-04-01 at 8.28.24 PM.png
 

Tips & Instructions

  • Gorgeous Grape Card Base - 5 1/2 x 8 1/2, score at 4 1/4

  • Basic White Layer - 5 1/4 x 4

  • Stamp the butterfly grouping with Black Memento Ink on the white layer to fill the entire layer.

  • Using the filler stamp, stamp the large butterfly with Gorgeous Grape Ink but stamp off first to take off the first layer of ink. Then stamp the detailed image with Gorgeous Grape Ink directly on the butterfly.

  • Repeat the above step with the small butterfly using Daffodil Delight and Pumpkin Pie direct, no stamping off.

  • Repeat the above step with the profile butterfly using Balmy Blue Ink, stamping off the filler stamp first and then stamping the detailed stamp directly.

  • Stamp the large leaves with Pear Pizzazz Ink and the small leaves with Mint Macaron Ink.

  • Basic White Strip - 4 x 1, emboss with the Tasteful Textiles 3D Embossing Folder and adhere to stamped layer, then adhere layer to card base.

  • Stamp sentiment on Basic White Cardstock with Gorgeous Grape Ink. Sentiment is from the Happy Thoughts Stamp Set. Stamp frame with Black Memento Ink and cut with coordinating die. Adhere to card using Dimensionals.

  • Stamp another grouping of butterflies on Basic White Cardstock with Black Memento Ink and stamp to color. Cut each butterfly with coordinating die.

  • Adhere one butterfly to sentiment.

  • Add some Opal Rounds to sentiment label.

 
Floating & Fluttering Thinking Of You card1.jpeg
 

Stamp sentiment on the inside with Gorgeous Grape Ink and adhere one or two butterflies as desired. Sentiment is from the Happy Thoughts Stamp Set.

 
Floating & Fluttering Thinking Of You inside.jpeg
 

Supply List

Love Patti.png
Shop Here
 

Brushed Blooms Friendship Card

I wasn’t sure about the Brushed Blooms Stamp Set when I first started to play with it but I really love the flower images and the brushstrokes are fun.

 
Brushed Blooms Friendship Card2.jpeg
 

Here’s what the set looks like. To create the background I stamped the brushstrokes with Misty Moonlight Ink on a piece of Tasteful Textures Designer Series Paper.

 
Brushed Blooms Friendship stamp.jpeg
 

The colors I chose are some of the current In Colors - Misty Moonlight, Just Jade and Magenta Madness, great color combo!

 
Brushed Blooms Friendship ink.jpeg
 

Tips & Instructions

  • Misty Moonlight Card Base - 5 1/2 x 8 1/2, score at 4 1/4

  • Basic White Layer - 5 1/4 x 4

  • Tasteful Textures Designer Series Paper - 5 x 3 3/4

  • Stamp the wide and narrow brushstrokes with Misty Moonlight Ink staggering them as shown in the picture. Adhere layers to card base.

  • Cut Misty Moonlight Cardstock with the large label Stitched So Sweetly Die.

  • Stamp sentiment with Magenta Madness Ink on Basic White and cut with the small label Stitched So Sweetly Die. Adhere labels together and adhere to card.

  • Basic White Cardstock - stamp flower with Magenta Madness Ink and 2 sets of leaves with Just Jade Ink and cut with coordinating die.

  • Adhere flower to card using Dimensional and adhere leaves behind the flower.

  • Add 3 Magenta Madness Enamel Dots.

 
Brushed Blooms Friendship Card1.jpeg
 

On the inside stamp large and small flowers with Magenta Madness Ink.

 
Brushed Blooms Friendship inside.jpeg
 

Supply List

Love Patti.png
Shop Here
 

Dutch Door Fun Fold Cards

I paired up the Timeless Tulip Stamp Set with a piece of the Hydrangea Hill Designer Series Paper to make these Dutch Door Fun Fold cards.

 
Dutch Door Fun Fold both.jpeg
 

In the video I’ll show you how to cut your card base to create this Dutch Door fold. The piece you cut off becomes the background layer for the focal piece.


Tips & Instructions

  • Old Olive Card Base - 5 1/2 x 8 1/2, score at 4 1/4. Cut at 2 3/4 up to the score line as shown in video, then cut along the score line to the cut line and remove that piece. The leftover piece will be used for the background layer for the stamped focal point.

  • Hydrangea Hill Designer - 4 x 2 1/2, adhere to bottom flap.

  • Basic White Layer - 4 x 2 1/2, stamp stems and leaves with Mossy Meadow Ink and stamp flowers with Gorgeous Grape and Daffodil Delight Inks. Stamp sentiment with Gorgeous Grape Ink.

  • Adhere stamped layer to Old Olive piece and then attach to front flap making sure you only put adhesive to bottom.

  • Add 3 Pastel Pearls to the top corner.

 
Dutch Door Fun Fold purple.jpeg
 

This card has the one tulip and the sentiment stamped in Poppy Parade and I used the Playing with Patterns Resin Dots for the embellishment.

 
Dutch Door Fun Fold red.jpeg
 

On the inside I stamped a Daffodil Delight small tulip with the one stem and leaves stamped with Mossy Meadow. You can stamp a sentiment but make sure it’s hidden behind the front layer.

 
Dutch Door Fun Fold inside.jpeg
 

Supply List

Love Patti.png
Shop Here
 

Simply Succulents Card using Sand & Sea Paper

I made this beautiful card using the Simply Succulents Bundle and the Sand & Sea Designer Series Paper. Isn’t it pretty?

 
Simply Succulents Card3.jpeg
 

You can use any paper with this large die from the Potted Succulent Dies in the bundle. I chose this pattern from the Sand & Sea paper because I love all the colors in it.

 
Simply Succulents Card1.jpeg
 

Just pick your paper and cut it with the large die. You won’t be able to see what the pattern was, but you will get lots of variation in the colors.

 
Simply Succulents Card - Die Cut.jpeg
 

Tips & Instructions

  • Sahara Sand Card Base - 5 1/2 x 8 1/2, score at 4 1/4

  • Sand & Sea Designer Series Paper - cut with large succulent die. Cut off excess to get just a tiny frame around the image.

  • Basic White Layer - 5 3/8 x 4, adhere die cut layer using Multipurpose Liquid Glue.

  • Wrap piece of Seaside Spray Metallic Ribbon around layer and adhere to back. Adhere to card base.

  • Stamp sentiment on Basic White scrap with Seaside Spray Ink and cut with smaller label die.

  • Cut Seaside Spray scrap with the larger label die. Adhere labels together and then adhere to card using Dimensionals.

 
Simply Succulents Card2.jpeg
 

I used this same pattern from the Sand & Sea paper pack to stamp some succulents and cut with coordinating dies. These will be used on the inside of the card.

 
Simply Succulents Card - Stamp.jpeg
 

Here’s what the inside looks like. Stamp the pot using Sahara Sand Ink. Cut the leafy piece from Sahara Sand Cardstock and adhere. Adhere the succulents that you stamped and cut using the Sand & Sea paper.

 
Simply Succulents Card inside.jpeg
 

Supply List

Love Patti.png
Shop Here
 

Sketch Saturday - Beautiful Friendship

For today’s sketch challenge I pulled out the Beautiful Friendship Stamp Set. I absolutely love this set.

 
Sketch Saturday - Beautiful Friendship Card1.jpeg
 

The sketch is from the Atlantic Hearts Sketch Challenge. The hardest part of this challenge was deciding which flower stamp set to use. I have soooo many!

 
Screen Shot 2021-03-27 at 2.45.19 PM.png
 

Don’t you love the images in this set. The Birthday sentiment is so nice. This card was easy to make; just Stamps, Ink and Paper.

 
Sketch Saturday - Beautiful Friendship stamp.jpeg
 

I used Melon Mambo, Daffodil Delight and Pear Pizzazz Inks. This is a great color combination.

 
Sketch Saturday - Beautiful Friendship inks.jpeg
 

Tips & Instructions

  • Melon Mambo Card Base - 5 1/2 x 8 1/2, score at 4 1/4

  • Basic White Layer - 5 1/4 x 4

  • Stamp the large floral image at the top and bottom of the layer with Melon Mambo Ink but stamp off first on a piece of scrap paper to take off a layer of ink. Fill in the sides with the smaller flowers.

  • Stamp flower centers with Daffodil Delight Ink.

  • Stamp some leaves with Pear Pizzazz Ink.

  • Stamp sentiment in center of layer with Melon Mambo Ink.

  • Adhere layer to card.

 
Sketch Saturday - Beautiful Friendship Card2.jpeg
 

On the inside stamp small flowers at top corner and large flower image on bottom corner with Melon Mambo Ink (stamping off first to get lighter color). Stamp sentiment with Melon Mambo Ink. The sentiment is from the Happiest Of Birthdays Stamp Set.

 
Sketch Saturday - Beautiful Friendship inside.jpeg
 

Supply List

Love Patti.png
Shop Here
 

Easy Fun Fold Birthday Card

This is a great Fun Fold card that I CASEd from Margaret Knight. I used the Ice Cream Corner Designer Series Paper which works perfectly for a birthday card for anyone.

 
Fun Fold Ice Cream Corner BIrthday Card2.jpeg
 

In the video below, I’ll walk you through all the steps to make this card. You can follow this design to make card for any occasion using different papers and stamp sets.


Tips & Instructions

  • Blackberry Bliss Card Base - 7 x 5 1/2, score at 2 3/4

  • Ice Cream Corner Designer Series Paper Layer - 5 1/4 x 2 1/2, adhere to front flap.

  • Ice Cream Corner Designer Series Paper Strip - 5 1/4 x 1 1/2, adhere to 5 1/4 x 4 Basic White layer.

  • Stamp inside Sentiment with Blackberry Bliss Ink.

  • Blackberry Bliss Cardstock - cut largest Stitched Nested Labels Dies, score at right edge as shown in video.

  • Adhere folded edge to back of Basic White Layer.

  • Basic White Cardstock - cut with second largest Stitched Nested Labels Dies and cut off right edge.

  • Stamp sentiment on white label with Blackberry Bliss Ink. Watch the video to see how to stamp the Happy and Birthday separately.

  • Punch cone and ice cream scoops from Designer Series Paper with Ice Cream Cone Builder Punch and adhere to label, then adhere label to card.

 
Fun Fold Ice Cream Corner BIrthday Card1.jpeg
 

This is what the inside looks like.

 
Fun Fold Ice Cream Corner BIrthday Card inside.jpeg
 

Supply List

Love Patti.png
Shop Here
 

Vine Design Hello Card

I wanted to make another card using the Vine Design Bundle. If you missed my video yesterday just go to the next post and you can see how to used this bundle.

 
Vine Design Hello Card2.jpeg
 

You get 3 large dies with vines and flowers and they are so delicate and pretty. I love that large leafy image. Those are great for insides and envelopes.

 
Screen Shot 2021-03-24 at 9.31.11 PM.png
 

I stamped the leaf images on the background layer and then embossed it with the Subtle 3D Embossing Folder to add some texture.

 
Vine Design Hello Card3.jpeg
 

Tips & Instructions

  • Granny Apple Green Card Base - 5 1/2 x 4, score at 4 1/4

  • Basic White Layer - 5 1/4 x 4, stamp leaf image at top and bottom corner with Granny Apple Green Ink. Emboss with the Subtle 3D Embossing Folder. and adhere to card base.

  • Cut oval shaped piece from Granny Apple Green Cardstock.

  • Cut 3 flowers from Daffodil Delight Cardstock and adhere behind oval piece.

  • Adhere to card using Dimensionals behind the 3 flowers.

  • Stamp sentiment on 3/4” strip of Basic White Cardstock with Granny Apple Green Ink. Punch each end with Banners Pick A Punch and adhere to card with Dimensionals.

  • Add Playing With Patterns Resin Dots to flower centers.

 
Vine Design Hello Card.jpeg
 

On the inside stamp the leaf images with Granny Apple Green Ink and some small flowers with Daffodil Delight Ink.

 
Vine Design Hello Card inside.jpeg
 

Supply List

Love Patti.png
Shop Here
 

How Did They Make That - Catalog CASE using Vine Design

Did you ever look through the catalog and wonder how did they make that? I saw this card and thought it was so pretty and wanted to figure out how to make it. I used the Vine Design Bundle to make them.

 
How'd They Make That - Catalog Case both.jpeg
 

I’ll show you a few tricks and then how I recovered from a BIG mistake. You can pretty much always fix your mistakes with paper crafting.


Tips & Instructions

  • Mint Macaron Card Base - 5 1/2 x 8 1/2, score at 4 1/4

  • Soft Sea Foam Cardstock - cut 2 of the rectangle vine pieces using the Flowering Vine Dies.

  • Calypso Coral Cardstock - cut 6 flowers using the Flowering Vine Dies.

  • So Saffron Cardstock - cut about 20 small flowers using the Flowering Vine Dies. You may need less depending on the size of the sentiment label you use.

  • Adhere the flowers behind the coordinating flower on the vine piece using a dot of glue on the flower center (see video for demonstration).

  • Adhere both vine pieces to card base.

  • Stamp sentiment on strip of Calypso Coral Cardstock with Versamark and emboss with White Embossing Powder. Cut using the label from Flowering Vines Dies.

  • Cut rectangle from So Saffron Cardstock using the Stitched Rectangle Dies. Adhere to the back of the sentiment label.

  • Adhere Just Jade Ribbon (used Scotch Tape) and adhere label using Dimensionals.

  • Add Pearls to flower centers and sentiment label.

 
How'd They Make That - Catalog Case Sympathy.jpeg
 

I don’t usually stamp a sentiment in a sympathy card so I have room to write a note. I stamped these leaf images using Mint Macaron Ink.

 
How'd They Make That - Catalog Case Sympathy inside.jpeg
 

I followed the same instructions but changed the labels. I used the Tasteful Labels Dies for this one and made it a birthday card.

 
How'd They Make That - Catalog Case Birthday.jpeg
 

On the inside, stamp the leaf images with Mint Macaron Ink. Stamp sentiment with Calypso Coral Ink. The sentiment is from the Happiest Of Birthdays Stamp Set.

 
How'd They Make That - Catalog Case Birthday inside.jpeg
 

Supply List

Love Patti.png
Shop Here
 

Sweet Friendship Card using the Dandy Laser-Cut Paper

This turned out to be such a simple but pretty card. I used the Dandy Laser-Cut Paper along with a piece of the Dandy Garden Designer Series Paper.

 
Dandy Laser-Cut Friend Card2.jpeg
 

These laser-cut pieces are so delicate and pretty much make your card for you. You get 2 sheets in a package. They add a touch of elegance to your project.

 
Screen Shot 2021-03-22 at 7.45.11 PM.png
 

Tips & Instructions

  • Bumblebee Card Base - 5 1/2 x 4

  • Adhere laser-cut piece to card base.

  • Dandy Garden Designer Series Paper - 4 x 2 1/2, adhere to laser-cut piece.

  • Add laser-cut flowers and dragonfly. I used tiny dots of liquid glue.

  • Basic White 3/4” strip - stamp sentiment with Black Memento Ink. Punch one end with the Banners Pick A Punch and adhere to card.

  • Add 3 gems to top corner.

  • Add Ladybug Trinket to sentiment label.

 
Dandy Laser-Cut Friend Card1.jpeg
 

On the inside stamp flowers with Bumblebee Ink.

 
Dandy Laser-Cut Friend inside.jpeg
 

Supply List

Love Patti.png
Shop Here
 

Sketch Saturday - Flowering Blooms

For today’s sketch challenge I used the Flowering Blooms Stamp Set with the coordinating dies to create a pretty spring bouquet.

 
Sketch Saturday - Flowering Blooms1.jpeg
 

The sketch is from the weekly Atlantic Hearts Sketch Challenge. Using a sketch is so helpful to get started designing a card.

 
Screen Shot 2021-03-20 at 12.21.51 PM.png
 

This stamps in this set are so beautiful. The way they are made, you just stamp the image and you’ll get all the different shades. It looks like you spent a lot of time to make them look this way.

 
Sketch Saturday - Flowering Blooms stamp.jpeg
 

I colored the stamps with Stampin’ Write Markers and then stamped them on the cardstock. This is a good way to get different colors on the image. Make sure you are using the water-based Stampin’ Write Markers and NOT the alcohol-based Stampin’ Blends

 
Sketch Saturday - Flowering Blooms markers.jpeg
 

Tips & Instructions

  • Pear Pizzazz Card Base - 4 1/4 x 11, score at 5 1/2 (Top Folding Card)

  • Basic White Layer - 5 x 3 3/4, emboss with Dainty Diamonds 3D Embossing Folder.

  • Wrap piece of Fine Art Ribbon around layer and adhere to the back. Adhere layer to card.

  • Stamp flowers on Basic White Cardstock. I used Stampin’ Write Markers to color the stamp, then breathed on it to moisten it, then stamped each image. The large flower was colored with Flirty Flamingo and Pear Pizzazz, the yellow flower with Daffodil Delight and Pear Pizzazz and the smallest with Pool Party and Soft Sea Foam. Color some extra leaves with Pear Pizzazz.

  • Cut the images using the coordinating dies and adhere the smaller flowers behind the large flower. You may have to snip off some of the ends. Adhere to card using Dimensionals.

  • Stamp sentiment (from the Oval Occasions Stamp Set) with Versamark and heat emboss with Gold Emboss Powder. Cut with coordinating oval from Double Oval Punch and adhere to card with Dimensionals.

  • Tie bow and adhere with Glue Dots. Add some Gold Glitter Enamel Dots to sentiment label.

 
Sketch Saturday - Flowering Blooms2.jpeg
 

On the inside stamp and emboss sentiments with Gold Emboss Powder. Color flower stamp with Daffodil Delight and Pear Pizzazz Stamin’ Write Markers and stamp on bottom corner.

 
Sketch Saturday - Flowering Blooms inside.jpeg
 

Supply List

Love Patti.png
Shop Here
 

Fun Fold - Triple Fold Cards

These are such cool fun fold cards that I CASEd from Mary Bush. They have a completely different look but were made following the same design.

 
Fun Fold Triple Fold Cards Both.jpeg
 

Watch the video to see how simple this Triple Fold Card is to make.


I made this sweet Easter/Spring Card using the Hydrangea Hill Designer Series Paper and Springtime Joy Stamp Set.

Tips & Instructions

  • Gorgeous Grape Card Base - 5 1/2 x 11, score at 1 3/4 and 5 1/2 and 9 3/4. Fold in half and then then fold both flaps to the left.

  • Hydrangea Hill Designer Series Paper - 5 1/4 x 3 1/2, 5 1/4 x 1 1/2 and 5 1/4 x 1. Adhere to card as shown in video.

  • Gorgeous Grape Strip - 11 x 1, wrap around card and adhere in front with strong adhesive.

  • Gorgeous Grape Cardstock - cut with Tasteful Labels Die

  • Basic White Cardstock - cut with Tasteful Labels Die. Stamp sentiment with Gorgeous Grape Ink on label and adhere label to Gorgeous Grape Label. Adhere to Belly Band.

  • Stamp bunny on Basic White Cardstock with Black Memento Ink. Color with Stampin’ Blends (Light Petal Pink, Dark Daffodil Delight, Dark Granny Apple Green). Fussy cut and adhere with Dimensionals.

  • Add Rhinestone to flower on bunny and Pastel Pearls to sentiment label.

 
Fun Fold Triple Fold - Easter.jpeg
 

On the inside stamp sentiment with Gorgeous Grape Ink. Stamp tulips across bottom and butterfly at top corner with Black Memento Ink. Color tulips and butterfly using Stampin’ Blends (Granny Apple Green, Daffodil Delight).

 
Fun Fold Triple Fold - Easter inside.jpeg
 

Follow the same steps from above using the Dandy Garden Designer Series Paper and Blackberry Bliss Cardstock. I used the Stitched So Sweetly Dies for the label and stamped the sentiment with Blackberry Bliss Ink. The sentiment is from the A Grand Kid Stamp Set. I punched the small dragonflies from the Designer Series Paper using the Dragonflies Punch.

 
Fun Fold Triple Fold Cards Dragonfly.jpeg
 

On the inside, stamp the sentiment with Blackberry Bliss Ink. Add a 4 x 1 strip of the Designer Series Paper across the bottom and a small dragonfly to the top corner.

 
Fun Fold Triple Fold Cards Dragonfly inside.jpeg
 

Supply List

Love Patti.png
Shop Here
 

Free As A Bird With Hydrangea Hill

Oh how I’m going to miss you Seaside Spray. This is one of the colors that will retire when the new catalog comes out in May. It’s one of my favorite colors.

 
Free As A Bird Hello Card2.jpeg
 

I used the Free As A Bird Stamp set and just cut out one of the birds on the branch with the Rectangular Postage Stamp Punch.

 
Free As A Bird Hello Card with stamp.jpeg
 

Tips & Instructions

  • Seaside Spray Card Base - 5 1/2 x 8 1/2, score at 4 1/4

  • Basic White Layer - 5 1/4 x 4

  • Hydrangea Hill Designer Series Paper Layer - 5 x 3 3/4, adhere to white layer.

  • Wrap Seaside Spray Metallic Ribbon around layers adhering to the back. Adhere layers to card base.

  • Cut Nested Label with Basic White Cardstock and cut off end. Stamp some leaves around with Granny Apple Green Ink. Adhere to card.

  • Stamp birds sitting on the brand on Basic White Cardstock with Black Memento Ink. I inked up just one end to get the one bird stamped.

  • Punch bird using the Rectangle Postage Stamp Punch.

  • Color image with Stampin’ Blends (Seaside Spray, Daffodil Delight, Crumb Cake, Pumpkin Pie and Granny Apple Green. Adhere to card using Dimensionals.

  • Stamp sentiment on scrap of Basic White and cut with Nested Labels Dies. Snip off end and adhere to card.

  • Tie bow with ribbon and adhere with Glue Dot.

  • Add some Pearls to centers of flowers.

 
Free As A Bird Hello Card1.jpeg
 

On the inside stamp with Black Memento Ink the bird image and just the tip of the birds on the branch image so you get the leaves and flowers. Color with Stampin Blends.

 
Free As A Bird Hello Card inside.jpeg
 

Supply List

Love Patti.png
Shop Here
 

Beautiful Butterfly Cards

I made these two cards using the pretty Butterfly Bijou Designer Series Paper. I cut two pieces into triangles and then placed them in alternating positions come up with these two different layouts.

 
Butterfly Cards Both.jpeg
 

I’ll show you how I made these cards on the video below. I cut and embossed those small butterflies to give them some additional texture to them.


Tips & Instructions

  • Bermuda Bay Card Base - 5 1/2 x 8 1/2, score at 4 1/4

  • Basic White Layer - 5 3/8 x 4 1/8

  • Butterfly Bijou Designer Series Paper - cut 2 pieces, one with butterflies and one with green design to 5 1/4 x 4. Cut each piece diagonally, rotate and cut the other side diagonally.

  • Lay triangles on Basic White Layer, alternating to create the pattern in the picture and adhere. Adhere layer to card base.

  • Using 2 1/4 Circle Punch, punch circle from Bermuda Bay Cardstock

  • Stamp sentiment on circle with VersaMark and heat emboss using White Embossing Powder.

  • Adhere circle to doily with Dimensionals and then adhere to card putting the adhesive behind the circle.

 
Butterfly Card - Birthday1.jpeg
 
  • Cut out 3 small butterflies from the Designer Series Paper and then emboss using the Tasteful Textile 3D embossing Folder. Adhere to card

  • Add Rhinestones to centers of the butterflies.

 
Butterfly Card - closeup.jpeg
 

To make a second card, use the leftover pieces. You can change up the sentiment to make it a Thinking Of You Card. The sentiments are from the Happy Thoughts Stamp Set.

 
Butterfly Card - Thinking Of You.jpeg
 

On the inside stamp the sentiment with Bermuda Bay Ink. Cut butterflies and emboss. Adhere to top and bottom corner.

 
Butterfly Card - inside.jpeg
 

Supply List

Love Patti.png
Shop Here
 

Elegant Birthday Card

When I saw this floral pattern on the Designer Series Paper from the Flowering Cactus Medley, I knew I had to use it to make a birthday card.

 
Elegant Birthday Card2.jpeg
 

This paper is so pretty and you can get it in the complete medley or just purchase the refill and get the paper, felt and twine. I’ll have both options listed in the supply list.

 
Screen Shot 2021-03-15 at 8.15.01 PM.png
 

I used the Detailed Bands Dies to cut this delicate layer for the sentiment. You can stamp the sentiment and cut it out with the oval die from this set and it fits perfectly on the background layer.

 
Screen Shot 2021-03-15 at 8.23.05 PM.png
 

Tips & Instructions

  • Gorgeous Grape Card Base - 5 1/2 x 8 1/2, score at 4 1/4

  • Basic White Layer - 5 1/4 x 4

  • Designer Series Paper Layer - 5 x 3 3/4

  • Cut large detailed band from a piece of Gorgeous Grape Cardstock.

  • Stamp sentiment on scrap of Basic White Cardstock using Gorgeous Grape Ink and cut with the oval die. Adhere to detailed layer.

  • Adhere sentiment to card. The band will hang over on each end; trim off excess .

  • Add some Pastel Pearls to sentiment.

 
Elegant Birthday Card1.jpeg
 

On the inside stamp sentiment with Gorgeous Grape Ink. Stamp the flower image 3 times across the bottom with Gorgeous Grape Ink but stamp off first to get a lighter shade. The sentiment is from the Band Together Stamp Set and the flowers are from the Flowering Cactus Medley.

 
Elegant Birthday Card inside.jpeg
 

Supply List

Love Patti.png
Shop Here