Hand-Drawn Blooms Birthday Card

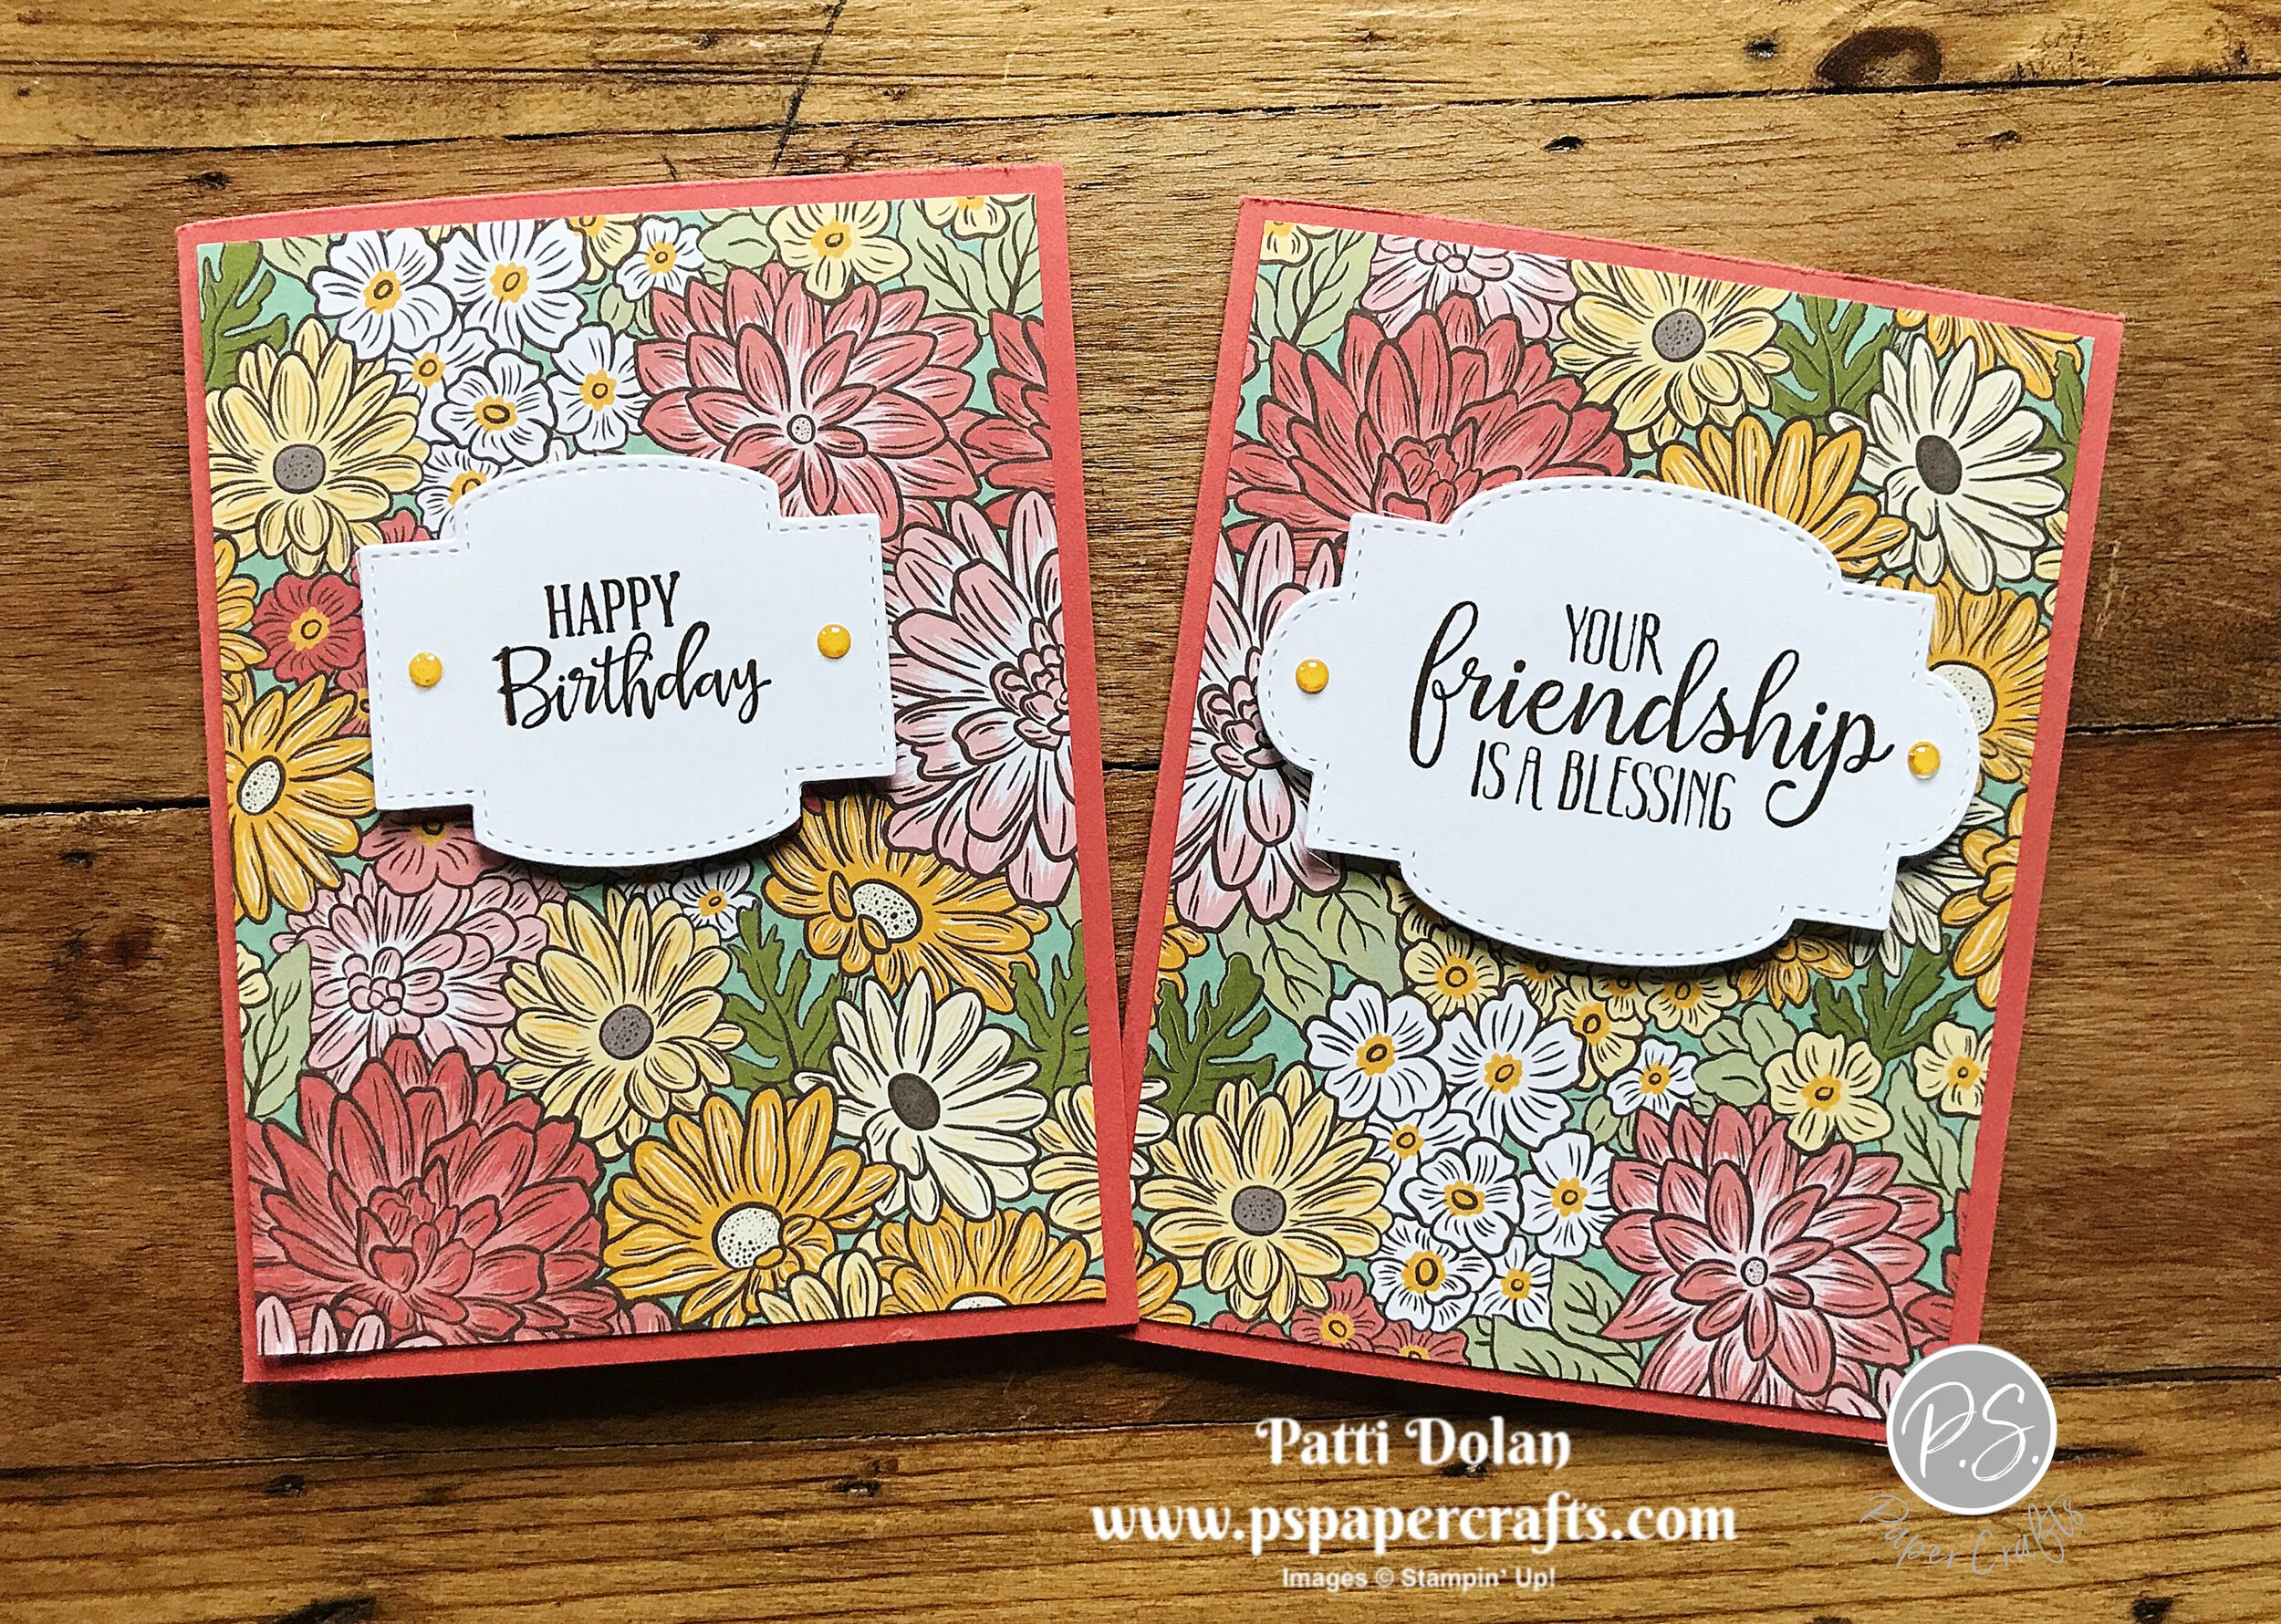
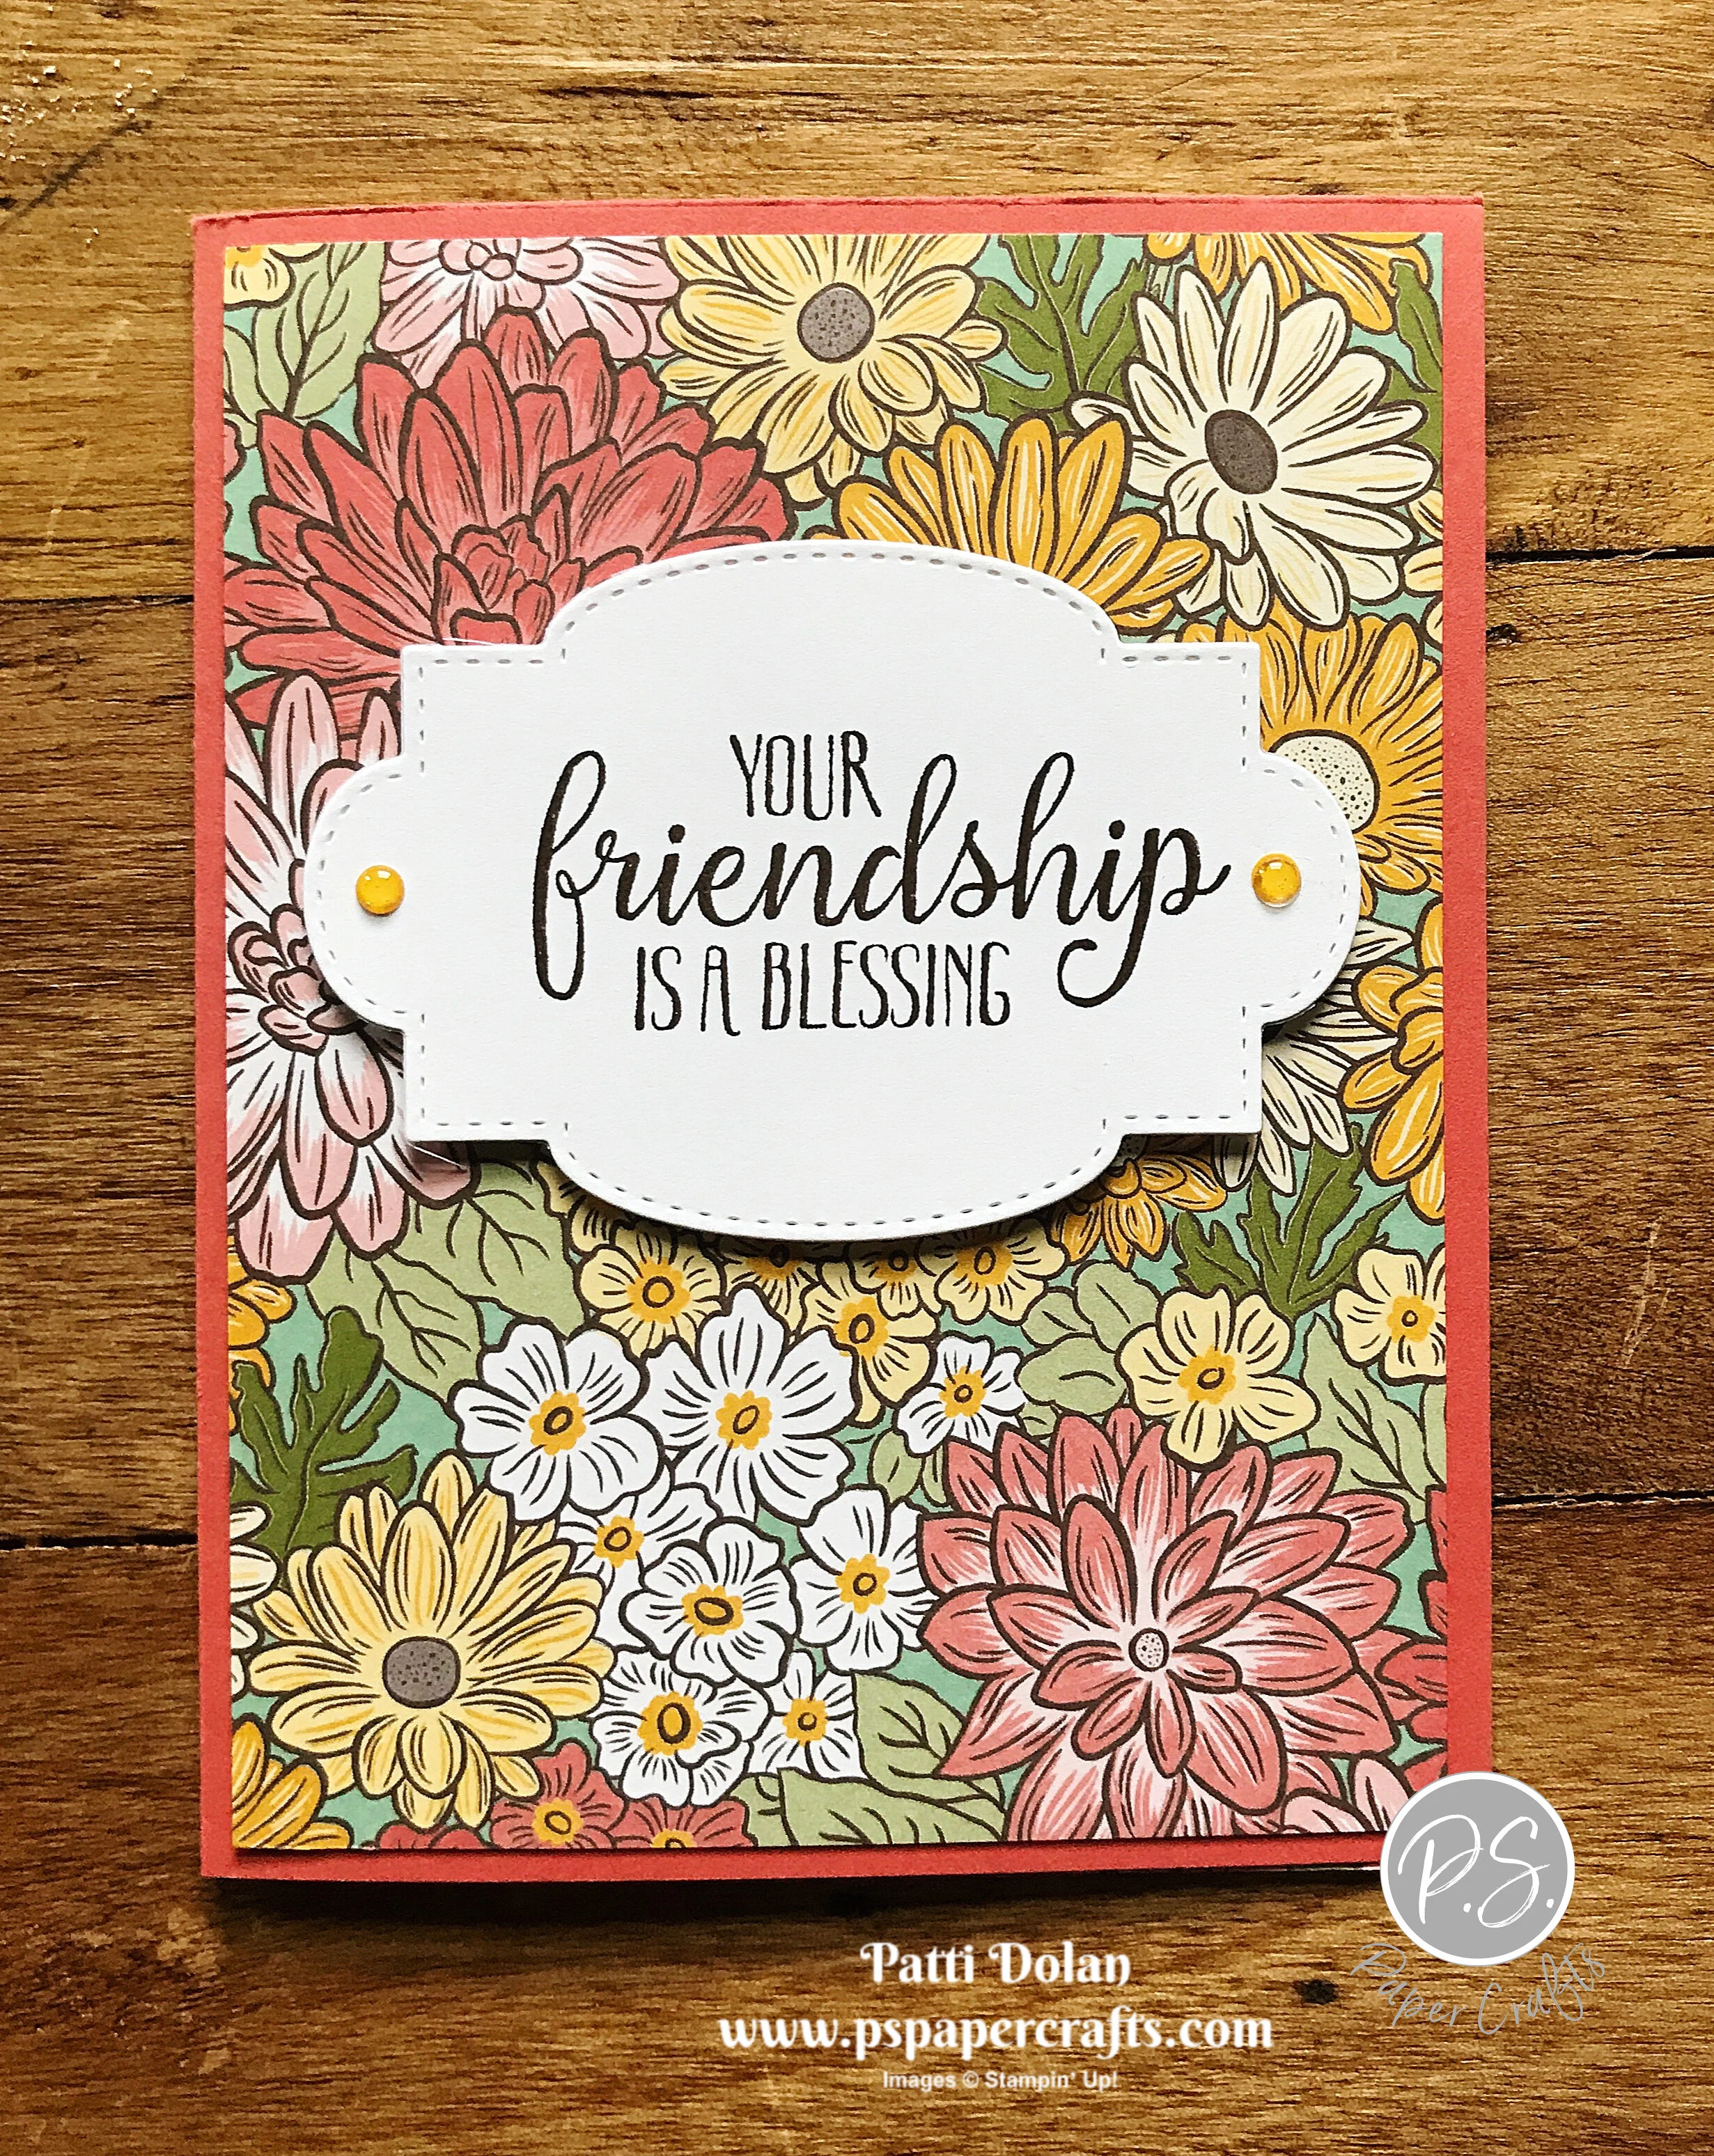
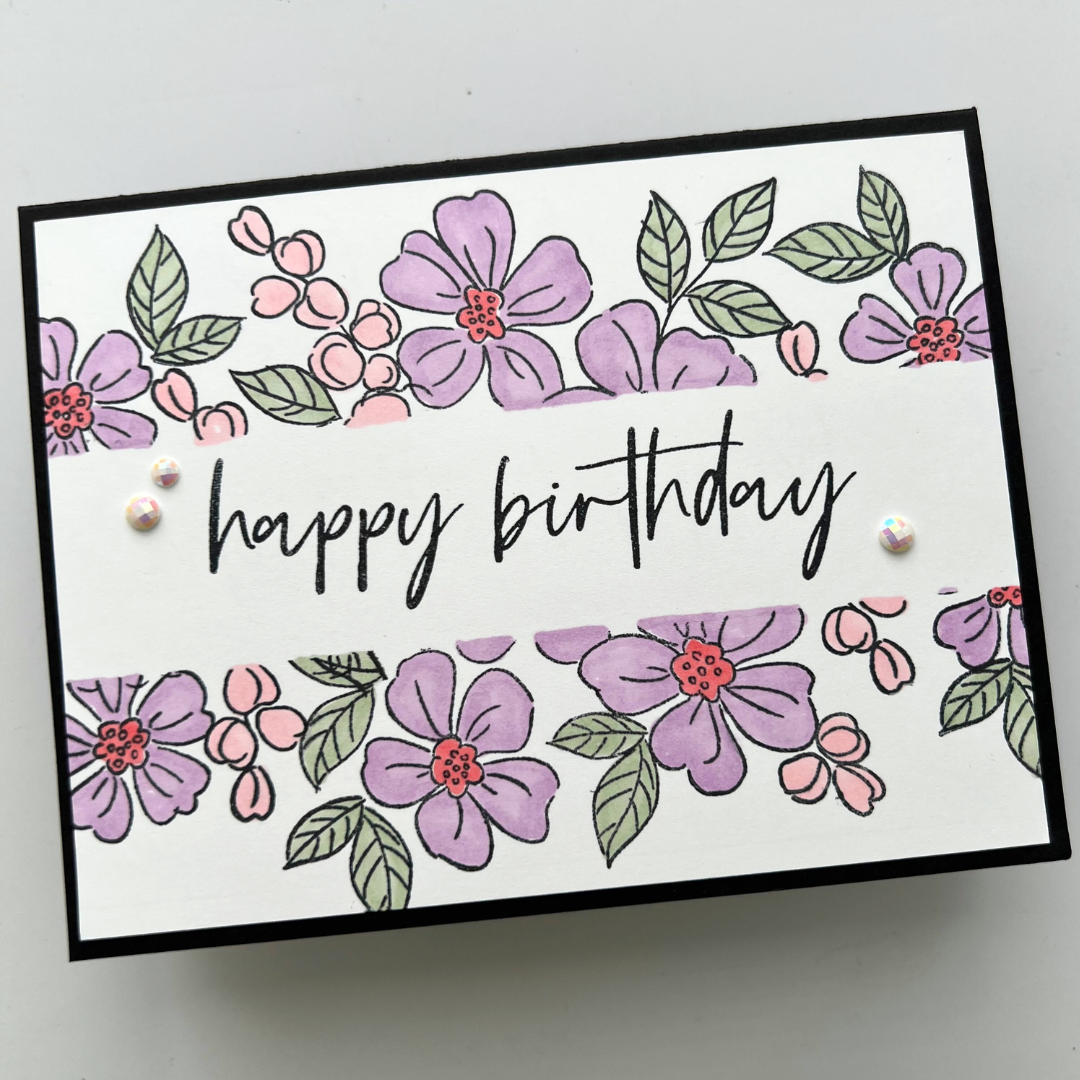
I love how bright and cheerful this card is. I used the Hand-Drawn Blooms Bundle and lots of Stampin’ Blends to make it.

 
Hand Drawn Blooms Birthday Card1.jpg
 

These are the Stampin’ Blends that I used but you can change it up and use whatever colors you like.

 
Hand Drawn Blooms Birthday markers.jpg
 

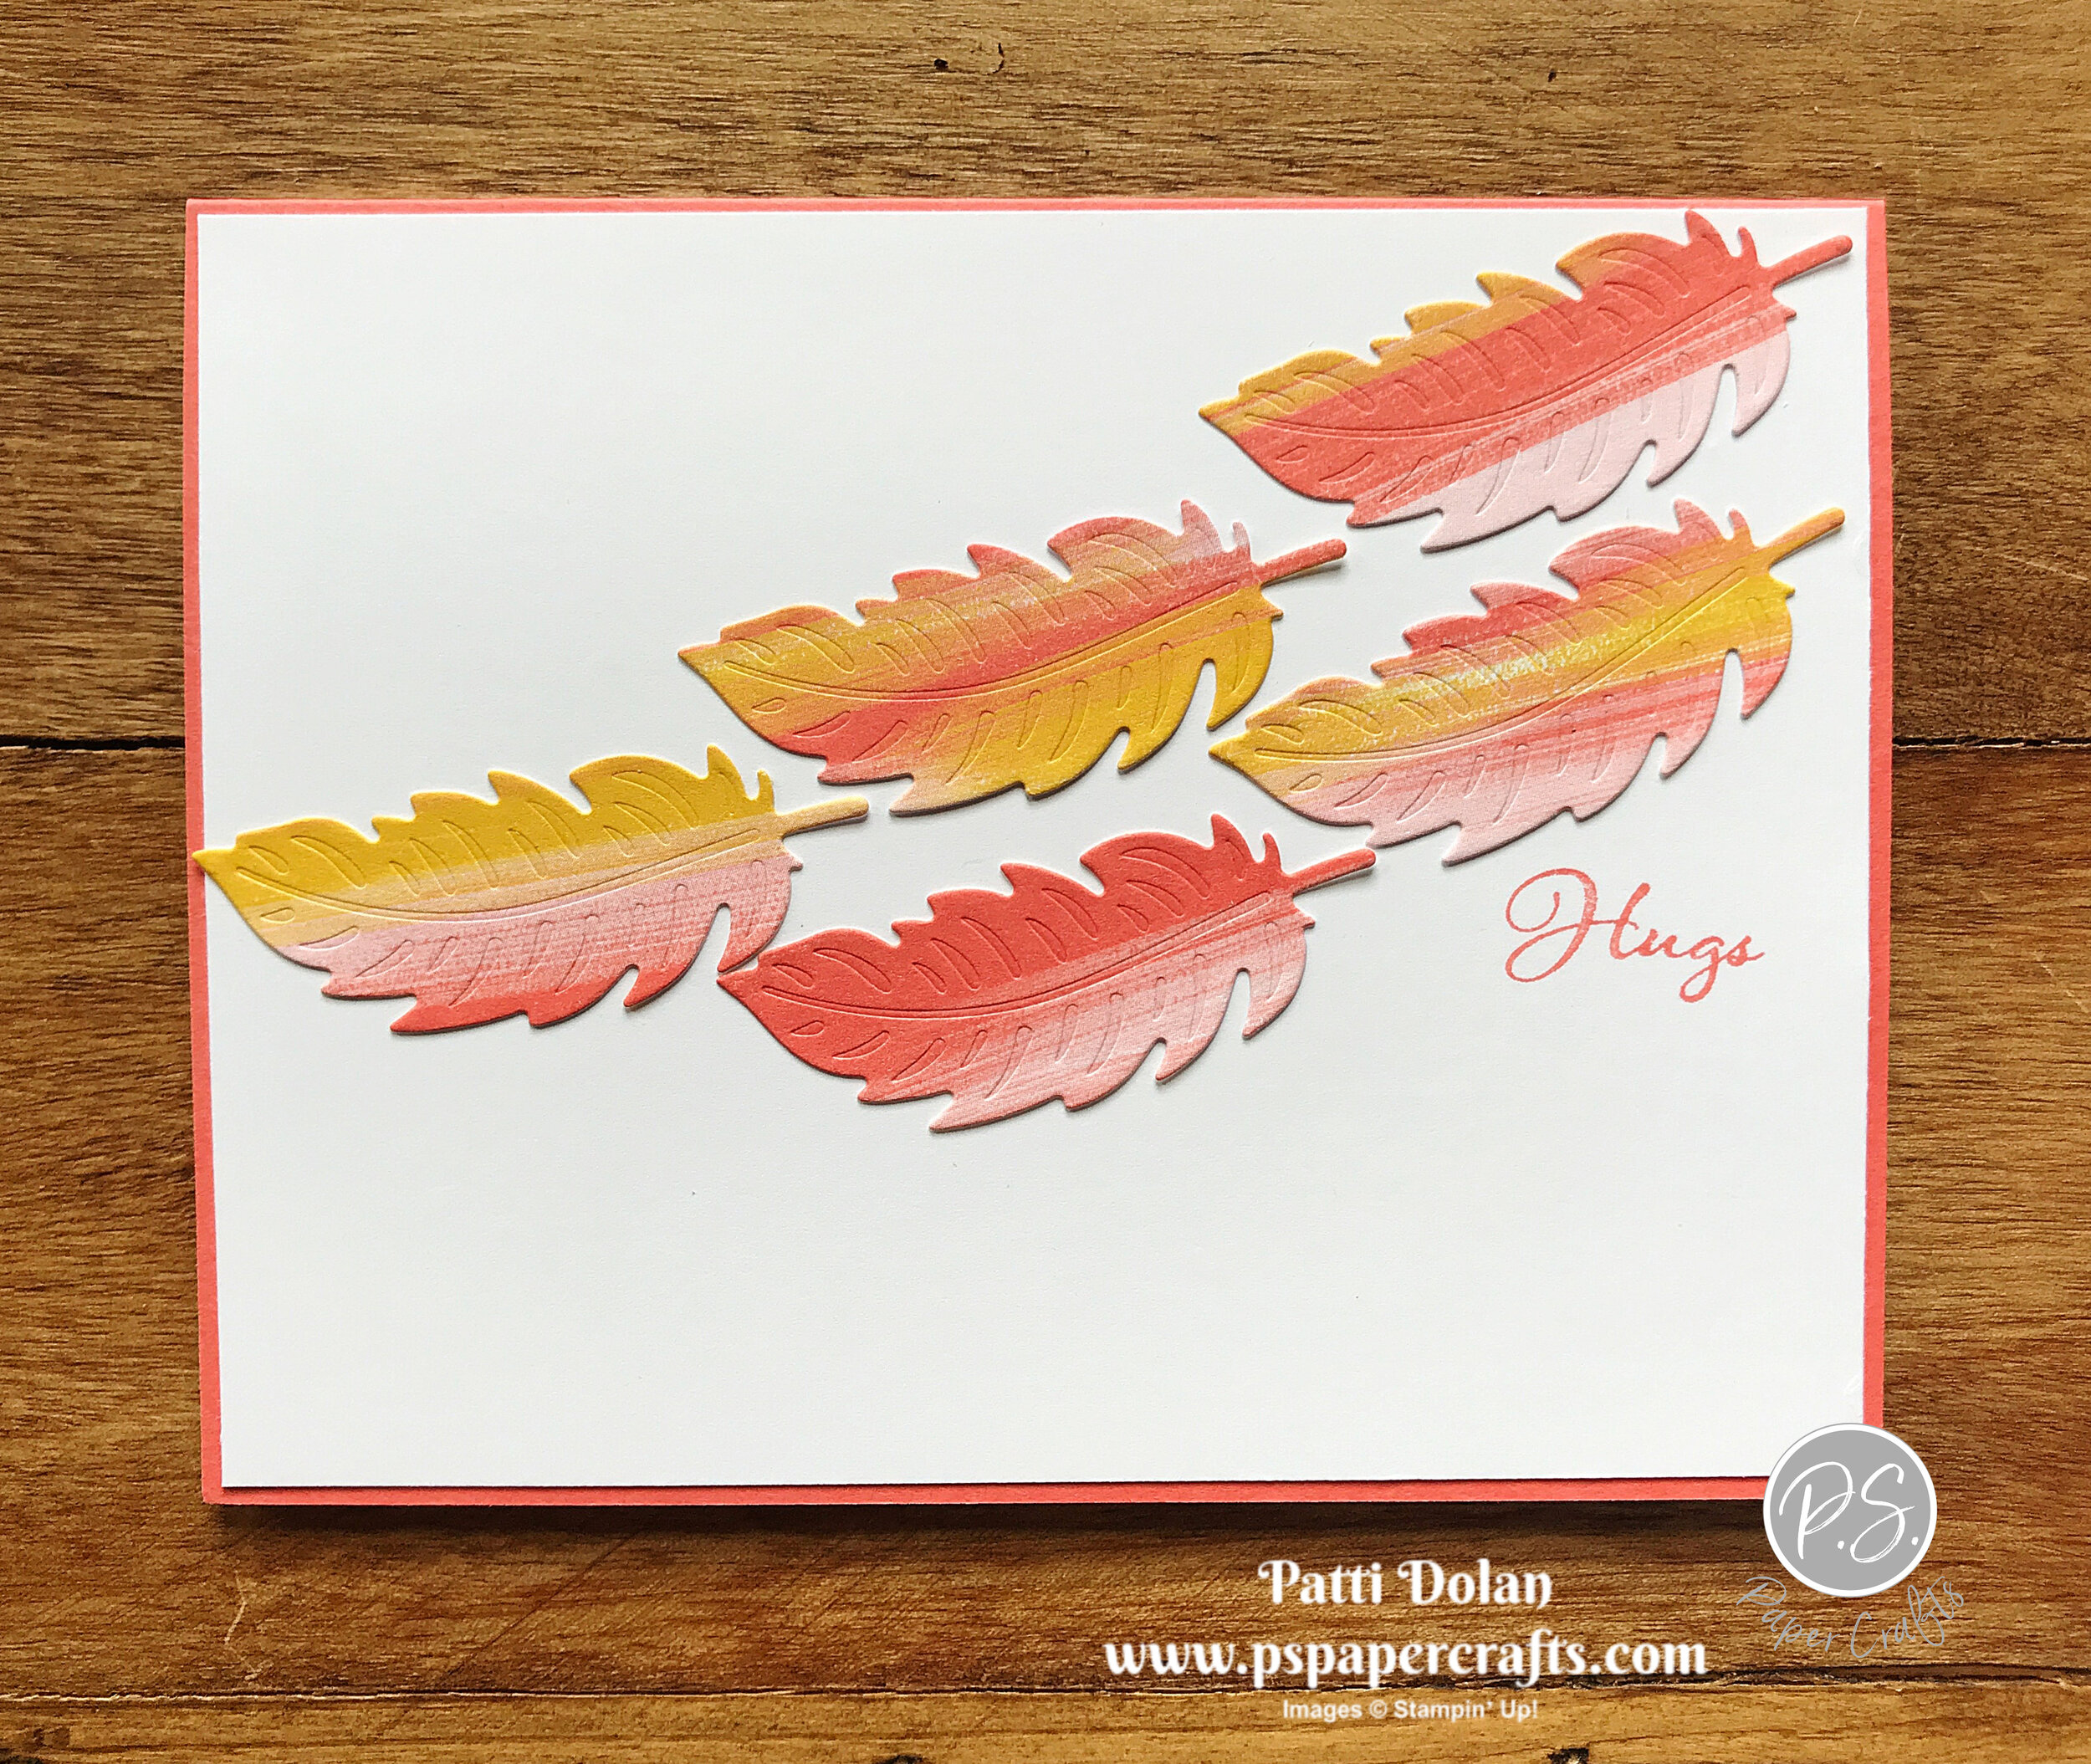
The stamped image and the dies for this bundle are so large that you really don’t need anything else to add to the card.

 
Hand Drawn Blooms Bundle.png
 

Tips & Instructions

  • Granny Apple Green Card Base - 5 1/2 x 8 1/2, score at 4 1/4

  • Daffodil Delight Layer - 5 1/2 x 3 3/4, adhere to card base

  • Whisper White - cut large floral image using the Banner Blooms Dies

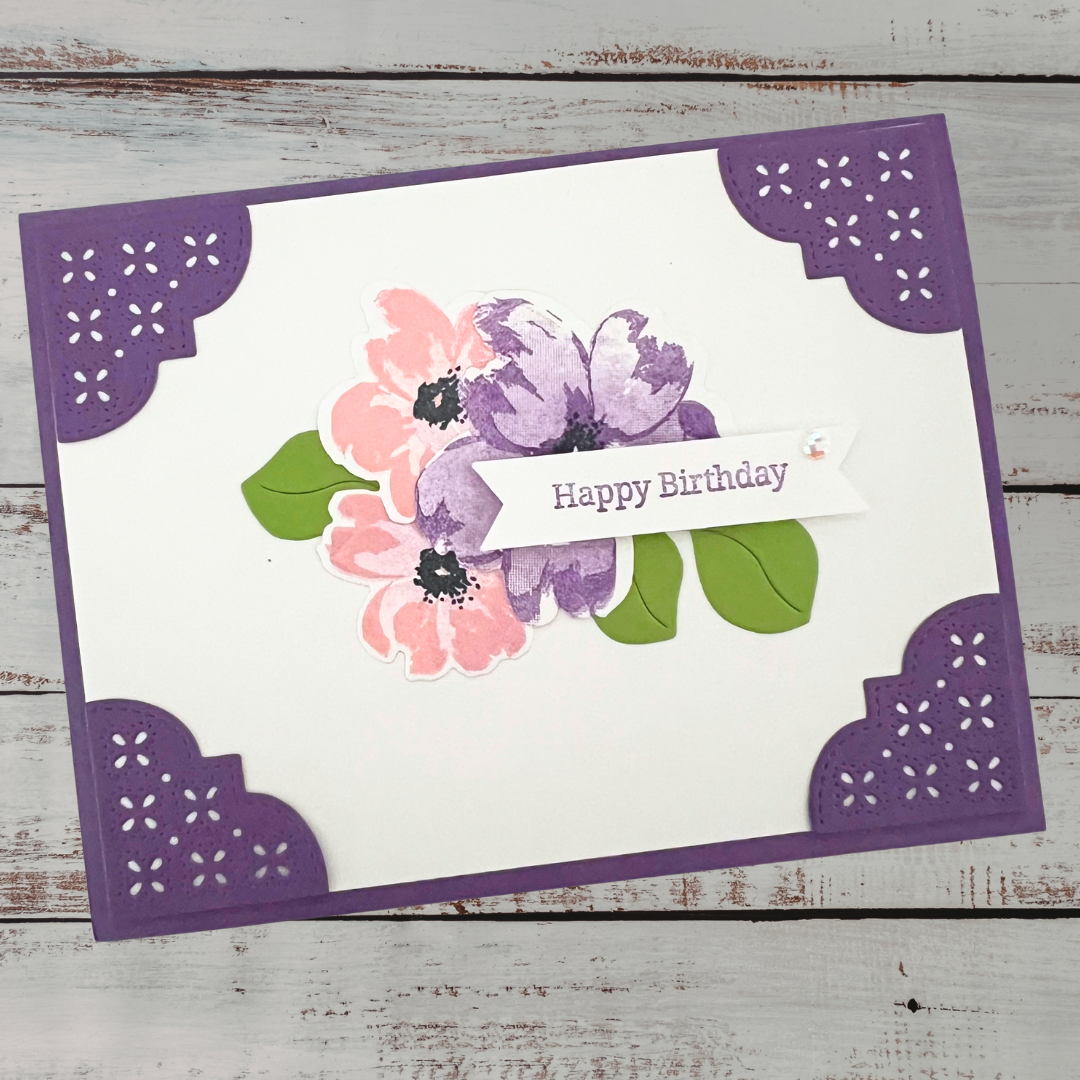
  • Color flowers and leaves using Stampin’ Blends - I used Dark Mossy Meadow, Dark Granny Apple Green, Dark Magenta Madness, Dark Poppy Parade, Dark Seaside Spray, Light Pumpkin Pie, Dark Daffodil Delight, Dark Crumb Cake, Light Rich Razzleberry and Light Flirty Flamingo

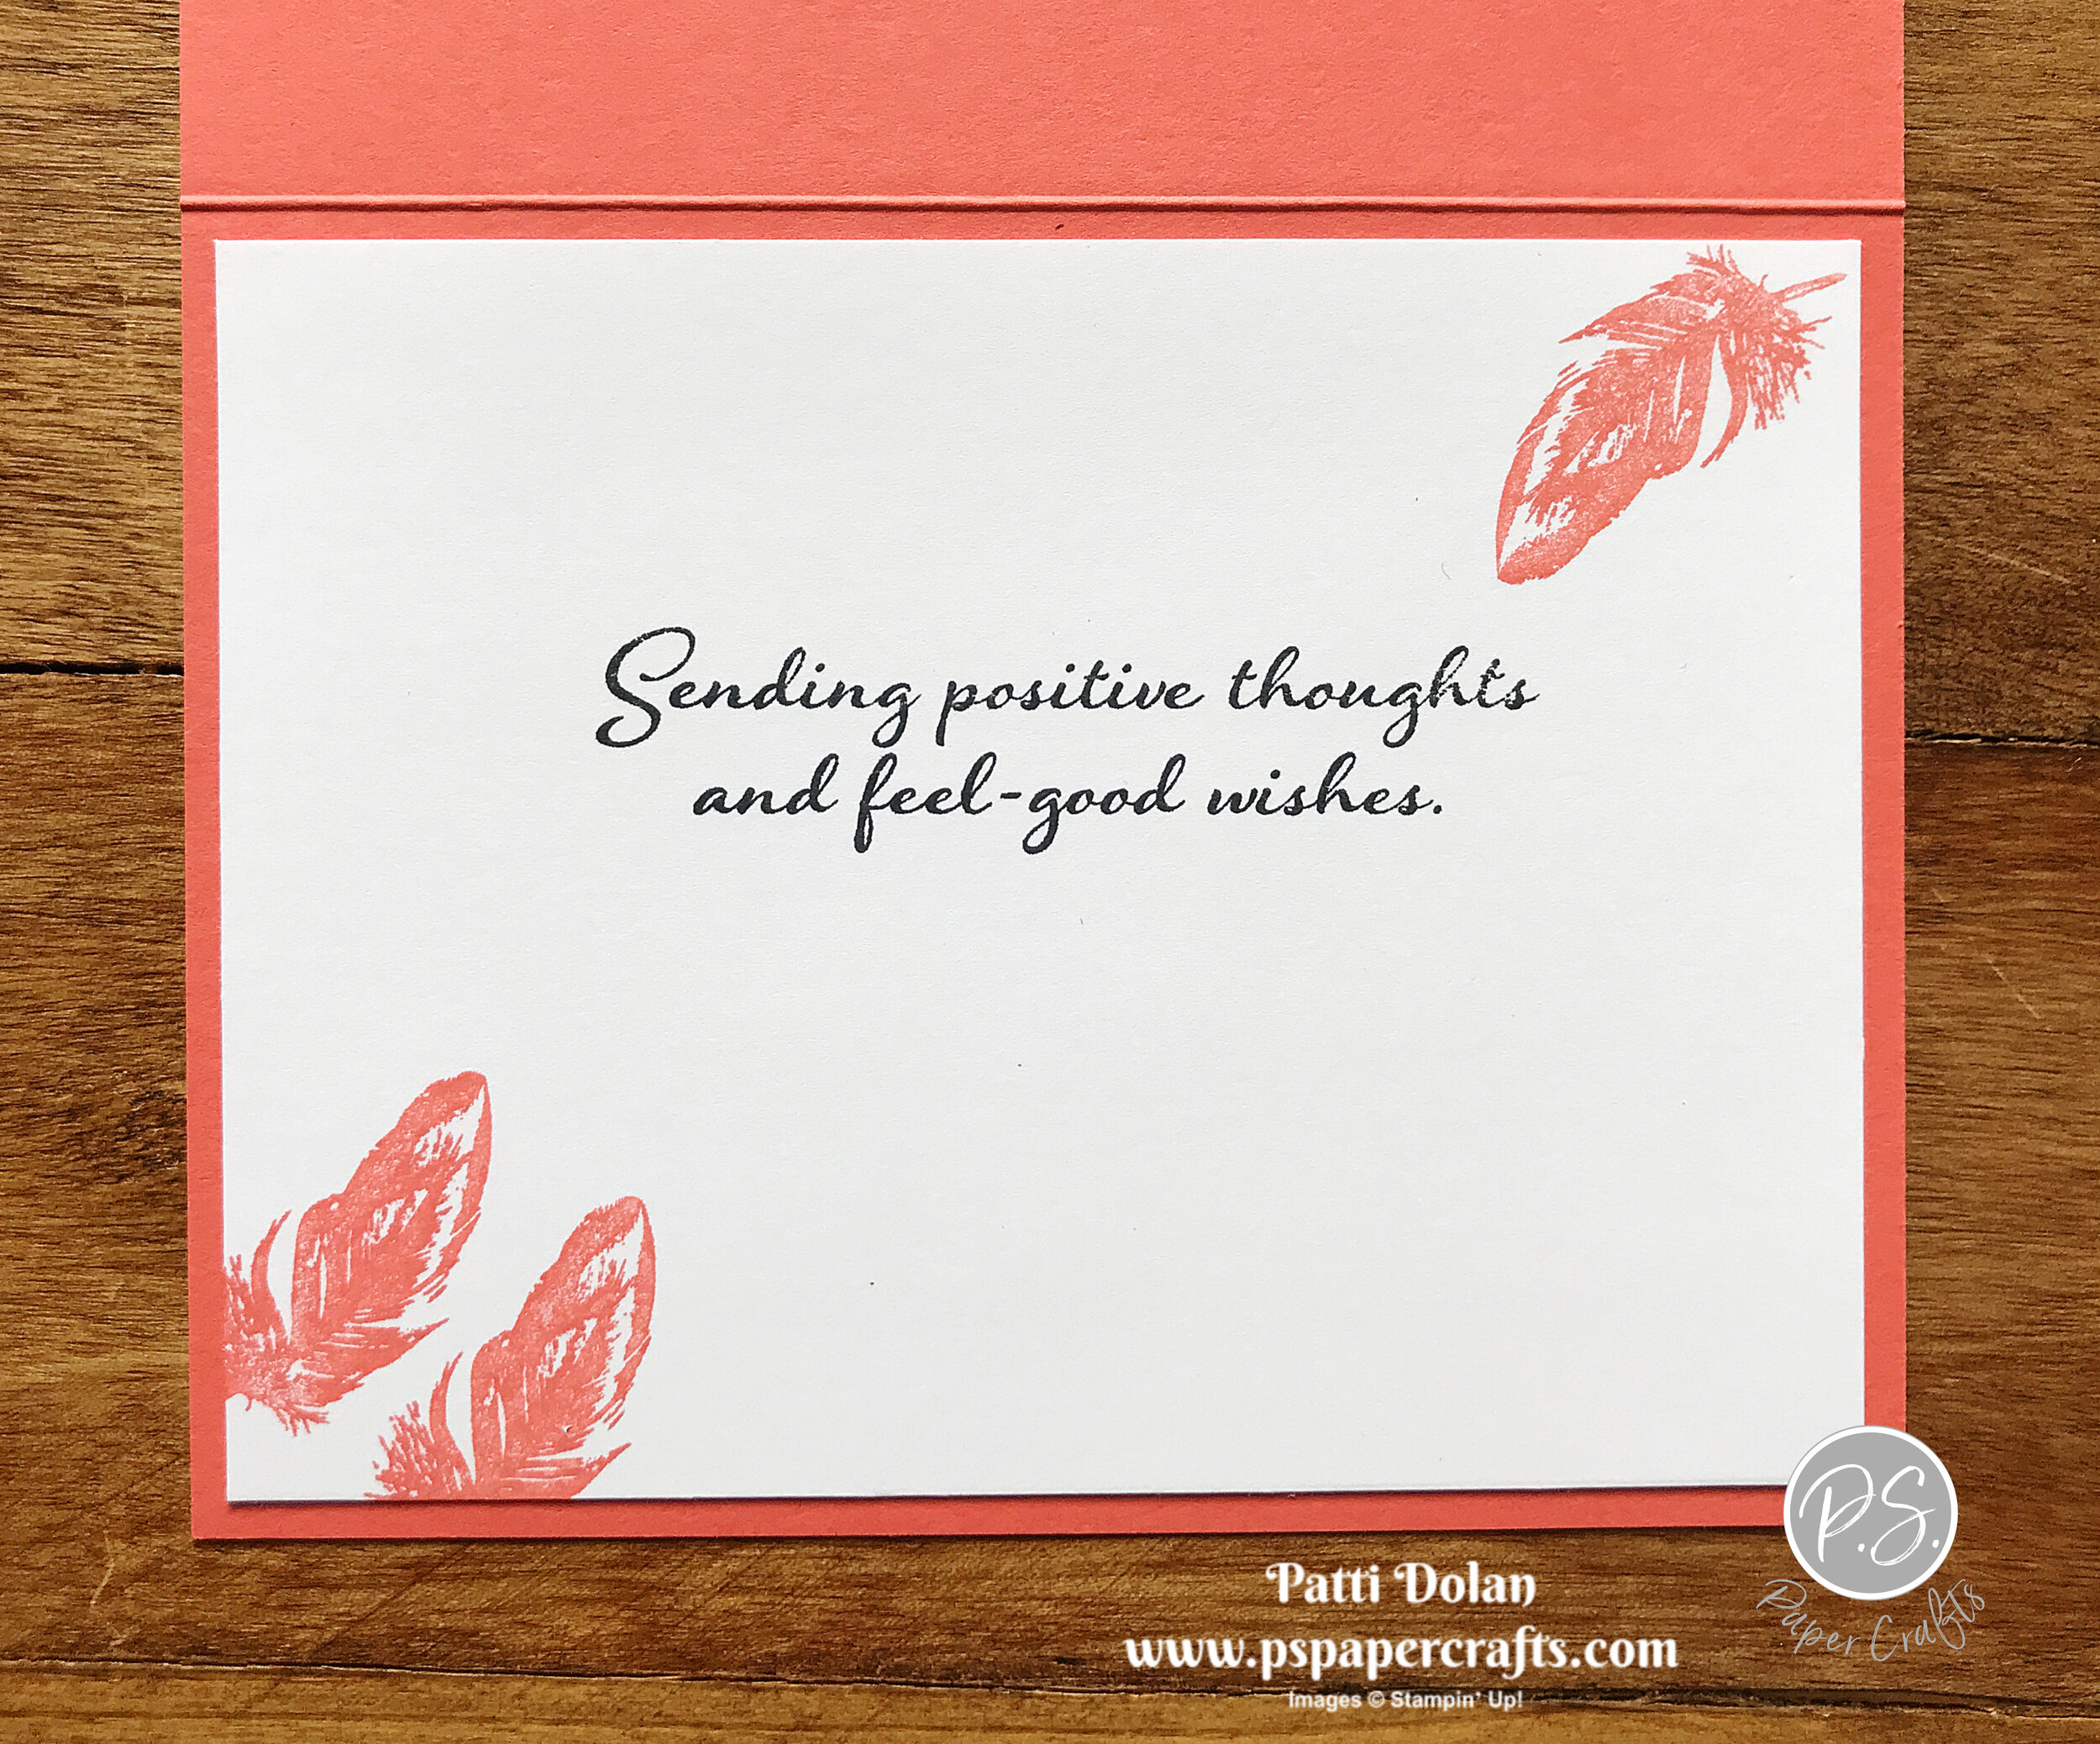
  • Stamp sentiment using Black Memento Ink and adhere to card

  • Add Elegant Faceted Gems

  • Tie bow with Daffodil Delight Ruched Ribbon and adhere using a Mini Glue Dot

 
Hand Drawn Blooms Birthday Card2.jpg
 

On the inside I stamped the sentiment with Black Ink and the leaves with Granny Apple Green Ink. Both are from the Positive Thoughts Stamp Set.

 
Hand Drawn Blooms Birthday Card inside.jpg
 

Supply List

Love Patti.png
Shop Here
 

Sketch Saturday - Positive Thoughts Card

I had to really think about this card sketch and I pictured leaves or branches but then as I was going through my stamp sets and dies, I saw this feather and decided to use it.

 
Sketch Saturday - Positive Thoughts Card.jpg
 

The sketch is from the CAS(E) This Sketch Challenge from Splitcoaststampser.

 
Screen Shot 2020-07-11 at 12.24.27 PM.png
 

The feathers were cut from the Playing With Patterns Designer Series Paper using the Thoughtful Nature’s Dies. I love the colors in these feathers.

 
Sketch Saturday - Positive Thoughts Card3.jpg
 

Tips & Instructions

  • Calypso Coral Card Base - 5 1/2 x 8 1/2, score at 4 1/4

  • Whisper White Layer - 5 3/8 x 4 1/8

  • Playing With Patterns Designer Series Paper - cut 5 feathers and adhere to Whisper White Layer

  • Color just the word Hugs on the sentiment stamp using a Calypso Coral Stampin’ Write Marker and stamp below the feathers

  • Adhere layer to card base

 
Sketch Saturday - Positive Thoughts Card2.jpg
 

The Positive Thoughts Stamp Set has such pretty images and sentiments. You can get the Nature’s Thoughts Dies which coordinate with the stamp set.

 
Positive Thoughts & Natures Thoughts.png
 

On the inside, I stamped the sentiment with Black Memento Ink and some the feathers with Calypso Coral Ink (either use the ink pad or color the stamp using a Stampin’ Write Marker).

 
Sketch Saturday - Positive Thoughts Card inside.jpg
 

Supply List

Love Patti.png
Shop Here
 

Gorgeous Flowering Blooms Card!

The flower image in the Flowering Blooms Stamp set is just beautiful. This is a Distinktive Stamp Set which means that it has a special texture that gives added depth and dimension in a single step, creating photo-realistic images. 

 
Gorgeous Flowering Blooms Card both.jpg
 

Watch my video to see all the steps to make these cards.


I chose the Gray Granite color for this card because of the pretty Shimmer Ribbon.

 
Gorgeous Flowering Blooms Card2.jpg
 

Tips & Instructions

  • Gray Granite Card Base - 5 1/2 x 8 1/2, score at 4 1/4

  • Whisper White Layer - cut with the largest Stitched Rectangle Die

  • Gray Granite Layer - cut with second largest Stitched Rectangle Die

  • Whisper White Layer - cut with third largest Stitched Rectangle Die, stamp sentiment with Gray Granite Ink

  • Color directly on the flower stamp using Stampin’ Write Markers (I used Rococo Rose for flower and Old Olive for leaves) and then breathe on stamp and stamp in Whisper White Cardstock and cut with coordinating die

  • Adhere 3 stitched rectangles together and wrap ribbon around adhering to the back

  • Adhere flower image to card using Dimensionals.

  • Tie bow with ribbon and adhere using Mini Glue Dot

  • Add a Butterfly Gem

 
Gorgeous Flowering Blooms Card.jpg
 

On the inside stamp sentiment with Gray Granite Ink and leaves with Old Olive, stamping straight on and then a second time without re-inking.

 
Gorgeous Flowering Blooms Card inside.jpg
 

Supply List

Love Patti.png
Shop Here
 

Forever Fern Friendship Card

The Forever Greenery Designer Series Paper is one of my favorites and this particular sheet is my favorite of the pack. I love the sentiment on this card as well, just perfect for a special friend.

I CASEd (Copy And Share Everything) this card from one I found on Pinterest from Stamp It Up With Jamie and changed is up a bit.

 
Forever Fern Friendship Card3.jpg
 

Aren’t these papers just beautiful? The picture doesn’t do them justice.

 
Forever Greenery DSP.png
 

I embossed the background layer using the new Tasteful Textile 3D Embossing Folder. I love this texture and I’m sure I’ll be using it often.

 
Forever Fern Friendship Card2.jpg
 

Tips & Instructions

  • Pear Pizzazz Card Base - 4 1/4 x 11, score at 5 1/2 (top folding)

  • Pear Pizzazz Layer - 5 1/2 x 4 1/4, emboss with Tasteful Textile 3D Embossing Folder and adhere to card base

  • Pretty Peacock Layer 5 1/2 x 2 3/8

  • Forever Greenery Designer Series Paper 5 1/2 x 2 1/4, adhere to Pretty Peacock Layer and then to card

  • Pretty Peacock Scrap - cut with larger label from the Stitched So Sweetly Dies

  • Whisper White Scrap - stamp with sentiment using Pretty Peacock Ink and cut with smaller label die from Stitched So Sweetly Dies

  • Adhere stamped label to background label and adhere to card using Dimensionals

  • Cut leaves from Pear Pizzazz and Pretty Peacock and adhere to bottom of label

  • Tie bow with 2 strand of Whisper White Linen Thread

  • Add 3 Rhinestones (I used the Noble Peacock Rhinestones which have retired but you can use clear rhinestones or pearls, whatever you have on hand)

 
Forever Fern Friendship Card.jpg
 

On the inside, stamp leaves at top and bottom using Pretty Peacock and Pear Pizzazz Inks.

 
Forever Fern Friendship Card inside.jpg
 

Supply List

Love Patti.png
Shop Here
 

Fun Fold Gift Card Holder

These are great cards to slip a gift card into for a special occasion. I used the Ornate Garden Specialty Designer Series Paper for the card layers which is so pretty.

 
Fun Fold Gift Card Holder Card Both.jpg
 

I’ll show you how to make this card in the video and don’t worry about all the measurements; I have them listed further down in this Blog.


Fun Fold Gift Card Holder Card1.jpg
 

Tips & Instructions

  • Terracotta Tile Card Base - score at 5 1/2 (on 11” side) turn and score at 4 1/4 (on 8 1/2 side)

  • Cut off one quarter of the card

  • On flap that folds down, cut 1/4” on each side

  • Ornate Garden Designer Series Paper - 5 1/4 x 4, adhere to the front of card

  • Stamp sentiment on Whisper White using Early Espresso Ink and cut with Stitched So Sweetly Die

  • Adhere sentiment using Dimensionals and add 2 Enamel Dots

 
Fun Fold Gift Card Holder Card2.jpg
 

Inside Flap

  • Ornate Garden Designer Series Paper - 5 1/2 x 3 3/4, adhere to flap

  • Stamp sentiment on Whisper White using Early Espresso Ink and cut with Stitched So Sweetly Die

  • Adhere sentiment on flap

 
Fun Fold Gift Card Holder Card inside.jpg
 

On Inside Gift Card Holder

  • Ornate Garden Designer Series Paper - cut with Stitched So Sweetly Die (largest scalloped rectangle) and cut off part of the top

  • Using Circle Punch (I used 2 1/4”) cut partial circle at top of the rectangle and attach to inside with strong adhesive (I used Stampin’ Seal+)

 
Fun Fold Gift Card Holder Card inside2.jpg
 

Supply List

Love Patti.png
Shop Here
 

Pattern Play Happy B-Day Card

This is a very cheerful card to send to either a guy or a gal. It’s pretty simple but I love the colors; they make me smile!

 
Pattern Play Birthday Card4.jpg
 

These Playful Alphabet Dies are the perfect size to spell out lots of sentiments. You can create a personal card with someone’s name using them.

 
Pattern Play Bundle.png
 

The Playing With Patterns 6x6 Designer Series Paper has just what the names describes…Playful Patterns! The colors and designs are so fun.

 
Playing With Patterns DSP.png
 

Tips & Instructions

  • Night Of Navy Card Base - 5 1/2 x 8 1/2, score at 4 1/4

  • Coastal Cabana Layer - 5 3/8 x 4 1/8

  • Playing With Patterns Designer Series Paper - 5 1/4 x 4

  • Adhere layers to card base

  • Whisper White Cardstock - cut with Stitched So Sweetly Die

  • Night Of Navy - cut HAPPY B-DAY with Playful Alphabet Dies (I used the dot from the “i” letter)

  • Adhere letters to white scalloped layer and then adhere layer to card using Dimensionals

  • Add 3 Playing With Patterns Resin Dots

 
Pattern Play Birthday Card.jpg
 

On the inside stamp sentiment with Night Of Navy Ink and confetti with Coastal Cabana Ink. Adhere 4 x 3/4 strip of the Designer Series Paper.

 
Pattern Play Birthday Card inside.jpg
 

Supply List

Love Patti.png
Shop Here
 

Sketch Saturday - Whale Of A Time

Designer Series Paper is one of my favorite products from Stampin’ Up! I used the the Whale Of A Time papers to create this card for this week’s sketch and I just love it.

 
Case This Sketch - Whale Done Card1.jpg
 

The sketch is another CAS(E) This Sketch challenge from Splitcoaststampers. I love their sketch challenges. I wanted the sea turtles to swim up so I had to make the diagonal go the other way.

 
Screen Shot 2020-07-03 at 9.30.33 PM.png
 

Tips & Instructions

  • Pacific Point Card Base - 4 1/4 x 11, score at 5 1/2 (top folding)

  • Whale Of A Time Layer - 4 1/4 x 5 1/2

  • Whisper White Strip - 4 1/4 x 5 1/2, cut each side on a diagonal to a 2 1/4 width

  • Whale Of A Time Layer (Turtles) - 4 1/4 x 5 1/2 - when you cut this layer try to cut it so you have as many turtles in the layer as possible and then cut each side on a diagonal to a 1 7/8 width

  • Adhere all layers to card base

  • Stamp sentiment (from Itty Bitty Birthdays) on 3/4 x 2 1/4 strip of Whisper White Cardstock with Pacific Point Ink and adhere using Dimensionals

  • Cut one of the turtles from the Designer Series Paper and adhere using Dimensionals

 
Case This Sketch - Whale Done Card3.jpg
 

On the inside, stamp sentiment and stamp turtles along the bottom with Granny Apple Green and Pacific Point Ink.

 
Case This Sketch - Whale Done.jpg
 

Supply List

Love Patti.png
Shop Here
 

Hippo Happiness Birthday Card

This Hippo Happiness Bundle is really cute. I think this card is so fun for a kid’s birthday. I used one of my favorite color combos: Gorgeous Grape and Granny Apple Green!

 
Hippo Happiness Birthday Card3.jpg
 

Watch my video below to see all the steps to make this card. You’ll love these stamps and how they work together. Adding the little faces just pulls these cute animals together.


The images and sentiments are so fun but what I really love are all the nesting dies in the Hippo & Friends Dies.

 
Hippo Happiness Birthday Bundle2.png
 

Tips & Instructions

  • Gorgeous Grape Card Base 5 1/2 x 8 1/2, score at 4 1/4

  • Granny Apple Green Layer - 5 1/4 x 4, emboss with Dainty Diamonds 3D Embossing Folder

  • Gorgeous Grape Strip - 5 1/2 x 3/4, emboss with Dainty Diamonds 3D Embossing Folder

  • Adhere layer to card base and strip across middle, trim at end if needed

  • Whisper White - cut with largest die from Hippos & Friends Dies

  • Stamp Hippo and sentiments with Gorgeous Grape Ink and sheep with Granny Apple Green Ink as shown in the video

  • Stamp 3 butterflies with Gorgeous Grape Ink and cut with coordinating die

  • Adhere focal and butterflies with Dimensionals

 
Hippo Happiness Birthday Card.jpg
 

Supply List

Love Patti.png
Shop Here
 

Flowering Blooms Thank You Card

I’m so happy with how this card turned out. I used the Flowering Blooms Stamp Set along with the Jar Punch to make this pretty jar of flowers. I embossed the cardstock for the jar with the Tasteful Textiles 3D Embossing Folder.

 
Flowering Blooms Thank You Card3.jpg
 

The Flowering Blooms Stamp Set has gorgeous images. The stamps are Distinktive which gives you a photo-realistic image. They have a special texture that gives you added depth and dimension.

 
Flowering Blooms Thank You Card.jpg
 

Steps & Instructions

  • Highland Heather Card Base - 5 1/2 x 8 1/2, score at 4 1/4

  • Granny Apple Green Layer - 4 7/8 x 3 1/2

  • Whisper White - cut with 2nd largest Stitched Rectangle Die.

  • Color flower stamp using Stampin’ Write Markers (Do Not Use alcohol Stampin’ Blends). I used Highland Heather for the flower and Mossy Meadow for the stems but you can use any green you have. Breath on the stamp to moisten and then stamp on the stitched rectangle.

  • Stamp leaves with Granny Apple Green Ink.

  • Punch jar from Highland Heather Cardstock, emboss with Tasteful Textile 3D Embossing Folder

  • Wrap some Whisper White Baker’s Twine around top of jar, adhering to the back. Tie a bow with 3 strands and adhere using Mini Glue Dot.

  • Adhere Jar to card using Dimensionals.

  • Stamp sentiment on scrap with Whisper White using Granny Apple Green Ink and cut with circle die from Tasteful Label Dies (you can use a circle punch but make sure it’s small enough to fit on the jar.)

  • Adhere layers to card base.

  • Add 3 of the Elegant Faceted Gems.

 
Flowering Blooms Thank You Card2.jpg
 

On the inside stamp sentiment using Granny Apple Green Ink. Color the flower stamp and stamp just like you did on the card front.

 
Flowering Blooms Thank You Card inside.jpg
 

Supply List

Love Patti.png
Shop Here
 

Jar of Flowers Shaker Card

Shaker Cards are so much fun! Just think about the person receiving a card like this and shaking those pretty gems around.

 
Jar of Flowers Shaker Birthday Card5.jpg
 

In the video I’ll show these great Mason Jar Shaker Domes with the adhesive all around to keep everything inside the jar. You get 10 in a box! I’ll also show you some tips on how to make a shaker card.


The stamps are so cool, some are reversible so you can stamp with the detail on the jar and flip over the stamp to get a background. Then you can use the punch to easily punch out the mason jar. I’ll show you how to make the sentiment label using this punch.

 
Jar Of Flowers Bundle.png
 

Tips & Instructions

  • Mossy Meadow Card Base - 5 1/2 x 8 1/2, score at 4 1/4

  • Whisper White Layer - 5 3/8 x 4 1/8

  • Mossy Meadow Layer - 5 1/4 x 4, emboss with Tasteful Textile 3D Embossing Folder.

  • Punch bottom corner of embossed layer with the Jar Punch.

  • On scrap of Whisper White Cardstock stamp jar with Smoky Slate Ink. Stamp smooth side of the water stamp with Seaside Spray Ink once on scrap and then on the jar (stamp off). Stamp stems with Mossy Meadow Ink.

  • Punch jar with Jar Punch.

  • Lay embossed layer on white layer and position jar in jar cutout. Adhere the jar in the “jar hole” and then lift off the embossed layer (see video).

  • Remove release paper from front of jar and adhere to the embossed layer

  • Add some of the Flowers For Every Season Gems to jar.

  • Remove the release paper from back side of the mason jar, add some adhesive to back of embossed layer and adhere to white layer.

  • Stamp flowers using Black Memento Ink and color using Stampin’ Blends (Daffodil Delight, Mossy Meadow, Poppy Parade, Seaside Spray and Pumpkin Pie).

  • Fussy cut and adhere to card using Dimensionals.

  • Punch jar from Whisper White Cardstock and using post-it note feed the jar back in punch and punch off the top (see video). Stamp sentiment with Black Memento Ink. Adhere to card with Dimensionals.

  • Tie bow with 3 strands of Whisper White Bakers Twine and adhere to jar with Mini Glue Dots.

 
Jar of Flowers Shaker Birthday Card6.jpg
 

Supply List

Love Patti.png
Shop Here
 

Pretty Peony Sympathy Card

I used the Peony Garden Designer Series Paper along with the Prized Peony Bundle to make this pretty Sympathy Card.

 
Pretty Peony Sympathy Card3.jpg
 

The Designer Series Paper is really pretty in grays, pinks and white. You can color it or use it as a background. On this card the background layer is one side and the small piece for the banner is the other side of one of the sheets.

 
Peony Garden DSP.png
 

These are the stamps and coordinating dies that are in the bundle. You can actually build a 3D flower with some of the dies.

 
Prized Peony Bundle.png
 

Tips & Instructions

  • Basic Gray Card Base - 5 1/2 x 8 1/2, score at 4 1/4

  • Flirty Flamingo Layer - 5 3/8 x 4 1/8

  • Peony Garden Designer Series Paper - 5 1/4 x 4

  • Stamp peony on Whisper White Cardstock with Black Memento Ink and color using Flirty Flamingo and Mossy Meadow Stampin’ Blends. I used both the dark and light to add some shading. Cut with coordinating die.

  • Peony Garden Designer Series Paper - 1 1/4 x about 2, then punch banner on one end with Banner Triple Punch.

  • Whisper White Cardstock - 1 3/8 x 1 1/8 stamp sentiment and adhere to banner.

  • Adhere peony and sentiment using Dimensionals

  • Add some Elegant Faceted Gems

 
Pretty Peony Sympathy Card2.jpg
 

On the inside stamp flower and sentiment with Black Memento Ink.

 
Pretty Peony Sympathy Card inside.jpg
 

Supply List

Love Patti.png
Shop Here
 

2020-2022 In Color Club

Want to get all the new Stampin' Up! 2020-2022 In Colors without breaking the bank? Join my In Color Club and buy them over a period of 5 months.

 
2020-2022 In Color Club.png
 

These new In Colors are so rich and pretty:

  • Bumble Bee

  • Misty Moonlight

  • Just Jade

  • Cinnamon Cider

  • Magenta Madness

Here's a set of cards I made using these colors.  I used the In Color Designer Series Papers to give you an idea of what they look like. 

 
2020-2022 In Color Cards All.jpg
 

You pay $40.00 per month for local pickup or $48 per month if shipped (U.S. only). Each month you will receive the following for one color:

  • Full Package of Cardstock

  • Classic Ink Pad

  • Ink Refill

  • Full Roll 1/4" Ribbon

  • In Color 6" x 6" Designer Series Paper (8 sheets per color)

  • Stampin' Write Marker

  • In Color Enamel Dots (20 pieces each color)

**Free Wink Of Stella at the end of the 5 months**


Love Patti.png
Shop Here
 

Sketch Saturday - Forever Fern

I’m back again with the Rainbow Glimmer Paper. I’m loving it and used it on the bird for this card for Saturday’s Sketch. You get some nice variation of color on the bird with this paper.

 
Sketch Saturday - Birds & Branches.jpg
 

Today’s sketch is from the CAS(E) This Sketch Challenge from Splitcoaststampers.

 
Screen Shot 2020-06-27 at 11.28.41 AM.png
 

Tips & Techniques

  • Pretty Peacock Card Base - 5 1/2 x 8 1/2, score at 4 1/4

  • Whisper White Layer - 5 3/8 x 4 1/8

  • Pretty Peacock Layer - 4 7/8 x 1 7/8

  • Forever Greenery Designer Series Paper - 4 3/4 x 1 3/4

  • Whisper White - cut 2nd largest circle from Stitched Shapes Dies

  • Rainbow Glimmer Paper - cut bird from Birds & More Dies

  • Cut branch from Pretty Peacock Cardstock using the Forever Flourishing DIes

  • Lay pieces out to determine placement for the sentiment and stamp with Pretty Peacock Ink

  • Adhere layers, circle, branch using Dimensionals on the circle and the bird

 
Sketch Saturday - Birds & Branches3.jpg
 

On the inside I stamped part of the branch images with Pretty Peacock Ink. I love that these stamps give you lots of depth and shading.

 
Sketch Saturday - Birds & Branches Inside.jpg
 

Supply List

I used a lot of different products on this card but you can change it up by using what you have on hand.

Love Patti.png
Shop Here
 

Happy Whales In Love Card

My LOVE for you is bigger than the OCEAN! Isn’t that a great sentiment to send to your special someone in your life? I made this cute card using the Whale Of A Time Suite. These are two happy whales!

 
Whales In Love Card3.jpg
 

In the video below, I’ll show you some of the products in this suite and how I punched the whales from the Rainbow Glimmer Paper which is so pretty.


Tips & Instructions

  • Pretty Peacock Card Base - 5 1/2 x 8 1/2, score at 4 1/4

  • Whale Of A Time Designer Series Paper - 5 3/8 x 4 1/8

  • Punch 2 whales from the Rainbow Glimmer Paper using the blue area (Punch one with the glimmer side up and one with glimmer side down so you get the two whales facing each other.)

  • Using Dark Misty Moonlight Stampin’ Blends Marker, draw smiles on each whale and color 2 Rhinestones for the eyes

  • Adhere eyes and adhere whales and spouts using Dimensionals

  • Cut heart from red part of the glimmer paper (I used the heart from the Birds & More Dies but you can use whatever heard die or punch you have on hand.) and adhere using Dimensionals

  • Stamp sentiment with Pretty Peacock Ink on 1/2” strip of Whisper White and punch one end with the Banner Triple Punch

  • Adhere using Dimensionals

 
Whales In Love Card2.jpg
 

On the inside stamp sentiment with Pretty Peacock Ink and stamp the seaweed 3 times on the bottom without re-inking between stamping to get different shades.

 
Whales In Love Card inside.jpg
 

Supply List

Love Patti.png
Shop Here
 

Happy Birthday Fishes Card

Isn’t this a fun card? I think the sentiment is great and goes so well with the background paper.

 
Happy Birthday Fishes Card2.jpg
 

The Whale Of A Time 6x6 Designer Series Paper is just beautiful! There are great under water scenes, sea turtles, whales, sea horses, little fish, seaweed and I could go on and on. The colors are fabulous!

 
Happy Birthday Fishes papers.jpg
 

Tips & Instructions

  • Calypso Coral Card Base - 5 1/2 x 8 1/2, score at 4 1/4

  • Whale Of A Time Designer Series Paper - 5 3/8 x 4 1/8, adhere to card base

  • Whisper White scrap, stamp sentiment with Calypso Coral and punch with Label Me Fancy Punch

  • Calypso Coral scrap, punch with Label Me Lovely Punch and adhere labels together, then adhere to card using Dimensionals

  • Add sequins

 
Happy Birthday Fishes Card1.jpg
 

On the inside stamp sentiment (from Many Mates Stamp Set) with Calypso Coral Ink and stamp fish image with Pacific Point Ink.

 
Happy Birthday Fishes Card inside.jpg
 

Supply List

Love Patti.png
Shop Here
 

Arrange A Wreath Birthday Card

Wreaths are one of my favorite things to put on a card and the Wreath Builder Dies in the Arrange A Wreath Bundle are so nice to work with.

 
Arrange A Wreath Birthday Card2.jpg
 

I’ll walk you through all the steps to make this card on the video below.


This bundle can be used for all different holidays: Valentine’s Day, Thanksgiving Day, Easter, Christmas or just about anything.

 
Arrance A Wreath Bundle.png
 

Tips & Instructions

  • Mossy Meadow Card Base - 5 1/2 x 8 1/2, score at 4 1/4

  • Pear Pizzazz Layer - 5 1/4 x 4

  • Whisper White Layer - 5 1/8 x 3 7/8, emboss with Greenery Embossing Folder (watch video to see how to emboss the full layer)

  • Cut wreath and flower pieces (Mossy Meadow, Pear Pizzaz, Magenta Madness and Daffodil Delight)

  • Stamp sentiment on Whisper White scrap with Mossy Meadow Ink and cut with 4th largest Layering Circle Die

  • Adhere card layers

  • Adhere wreath pieces and adhere sentiment behind the wreath.

  • Add flowers and flower centers, add Magenta Madness Enamel Gems

  • Adhere wreath to card

  • Tie bow and adhere with Mini Glue Dot

 
Arrange A Wreath Birthday Card1.jpg
 

Stamp sentiment with Mossy Meadow Ink. Stamp flowers with Magenta Madness Ink and leaves with Mossy Meadow Ink.

 
Arrange A Wreath Birthday Card inside.jpg
 

Supply List

Love Patti.png
Shop Here
 

Monochromatic Masculine Card

Monochromatic cards are fun to make and I love how this turned out using the new Cinnamon Cider In Color.

 
Walk In The Woods - Masculine Card2.jpg
 

I used the Walk In The Woods Stamp Set which has some great images for masculine or outdoor themed cards.

 
Walk In The Woods - Masculine Card Supplies.jpg
 

Tips & Instructions

  • Cinnamon Cider Card Base - 5 1/2 x 8 1/2, score at 4 1/4

  • Whisper White Cardstock - cut with largest Rectangle Stitched Die

  • Flowers For Every Season Designer Series Paper - cut with 2nd largest Rectangle Stitched Die

  • Whisper White Cardstock - cut with 4th largest Rectangle Stitched Die, stamp mushroom image and sentiment with Cinnamon Cider Ink

  • Wrap piece of ribbon around the Designer Series Paper Layer and adhere to Whisper White layer and then to card

  • Adhere stamped layer over ribbon using Dimensionals

  • Add 3 Cinnamon Cider Enamel Dots to top corner

 
Walk In The Woods - Masculine Card4.jpg
 

On the inside, stamp sentiment (from Itty Bitty Birthdays) with Cinnamon Cider and leaf images with Just Jade Ink.

 
Walk In The Woods - Masculine Card inside.jpg
 

Supply List

Love Patti.png
Shop Here
 

Sketch Saturday - Forever Greenery

Today’s card for the CAS(E) This Sketch challenge from Splitcoaststampers was made using the Forever Greenery Designer Series Paper. I love all the greens in this paper.

 
Sketch Saturday - Forever Fern.jpg
 

Here’s the sketch that I followed.

 
Screen Shot 2020-06-20 at 10.57.32 AM.png
 

Tips & Instructions

  • Pretty Peacock Card Base - 5 1/2 x 8 1/2, score at 4 1/4

  • Forever Greenery Designer Series Paper - 5 1/4 x 4

  • Whisper White scrap, cut with Tasteful Labels Die

  • Stamp sentiment with Black Memento Ink and stamp leaves with Pear Pizzaz Ink

  • Wrap Pretty Peacock scalloped Linen Ribbon around Designer Series Paper layer and adhere to back

  • Adhere sentiment label using Dimensionals

  • Add Butterfly Gem

 
Sketch Saturday - Forever Fern2.jpg
 

On the inside stamp sentiment (from Here’s A Card) with Black Memento Ink and the leaves on top and bottom corners with Pear Pizzazz Ink.

 
Sketch Saturday - Forever Fern inside.jpg
 
Love Patti.png
Shop Here
 

Gorgeous Posies Project Kit

The Gorgeous Posies Project Kit is absolutely beautiful. The kit includes vibrant card fronts, card bases, envelopes, ribbon, die cuts, sentiment labels to make 16 cards along with a pretty box to hold them. The colors are striking!

 
Georgous Posies Card Kit .png
 

I’ll walk you through making one of each of the 4 designs in the video.


You’ll need some additional supplies to make the cards as shown but you can change up the sentiments if you want to use what you have on hand.

  • Gorgeous Posies Cling Stamp Set

  • Stamp Pads - Highland Heather, Gorgeous Grape, Blackberry Bliss and Blushing Bride

  • Adhesives - Dimensionals, Mini Glue Dots, Stampin’ Seal

  • Clear Blocks

 
Georgous Posies Card Kit card1.jpg
 

The cards have gold accents which make them so rich looking.

 
Georgous Posies Card Kit card2.jpg
 

The ribbon is so pretty; sheer in the middle, gold running through with satin white on the edges. There’s also a purple twine included.

 
Georgous Posies Card Kit card3.jpg
 

These cards are so easy to put together and are really so beautiful. You can purchase multiple kits and make more than one using the same stamp set or have a few people each buy a kit and share the stamp set.

 
Georgous Posies Card Kit card4.jpg
 

Supply List

Love Patti.png
Shop Here
 

Dainty Queen Anne's Lace

I used the Queen Anne’s Lace Stamp Set to make this card. I love how delicate it looks; just simple and pretty!

 
Dainty Queen Anne's Lace Card2.jpg
 

The flower image is a two-step stamp where you stamp the full image and then stamp over with the flower image. The fonts for the sentiments are so pretty.

 
Screen Shot 2020-06-17 at 11.02.20 PM.png
 

Tips & Instructions

  • Seaside Spray Card Base - 5 1/2 x 8 1/2, score at 4 1/4, emboss card front using the Dainty Diamonds 3D Embossing Folder

  • Whisper White Layer - 4 1/2 x 3 1/2

  • Seaside Spray Layer - 4 3/8 x 3 3/8

  • Whisper White Layer - 4 1/4 x 3 1/4

  • Color flower part of the stamp with Seaside Spray Stampin’ Write Marker and stems with Pear Pizzazz Stampin’ Write Marker (DO NOT USE STAMPIN’ BLENDS) and breath on stamp to moisten, then stamp on smallest layer

  • Ink up the flower top stamp with Seaside Spray Ink and stamp off (stamp on scrap) then stamp over flowers

  • Stamp sentiment with Pear Pizzazz Ink

  • Adhere layers together and add to card base using Dimensionals

  • Add some Rhinestones

 
Dainty Queen Anne's Lace Card1.jpg
 

On the inside color stamp, excluding the top flower and stem like it was done on the card front and stamp in lower corner.

 
Dainty Queen Anne's Lace inside.jpg
 

Supply List

Love Patti.png
 
Shop Here